During the repair process, you often have to stroke the walls to hide communications. In the article, we will consider: what is a strobe, which tool to carry out work and how to post the walls for wiring and pipes.
Content:
- Types Shtrob
- Than stroke the walls
- How to stroke the wall with a strooborosis
- How to stroke the wall with a grinder correctly
- How to properly stroke the walls with a perforator
- How to properly stroke the wall for wiring
- How to stroke the walls under pipes correctly
Types Shtrob
The strobe is a recess in the wall that allows you to hide wires or pipes. After the repair, the communications elements will be in the wall and will not interfere. Shtrobes for wires, water pipes and heating are made vertical or horizontal. For sewer pipes, you can make strokes at an angle to provide the necessary slope.
Stroke the walls begin at the stage of the rough finish after plastering walls. So the strobes are easier to beat off, because half of the string is not in a solid wall, but in plaster. In addition, it is easier to expose the level of sockets and hydrogen for the wall.
For bearing walls, less damage is obtained. Marking a stroke on plaster is much more convenient than on an unprepared wall.
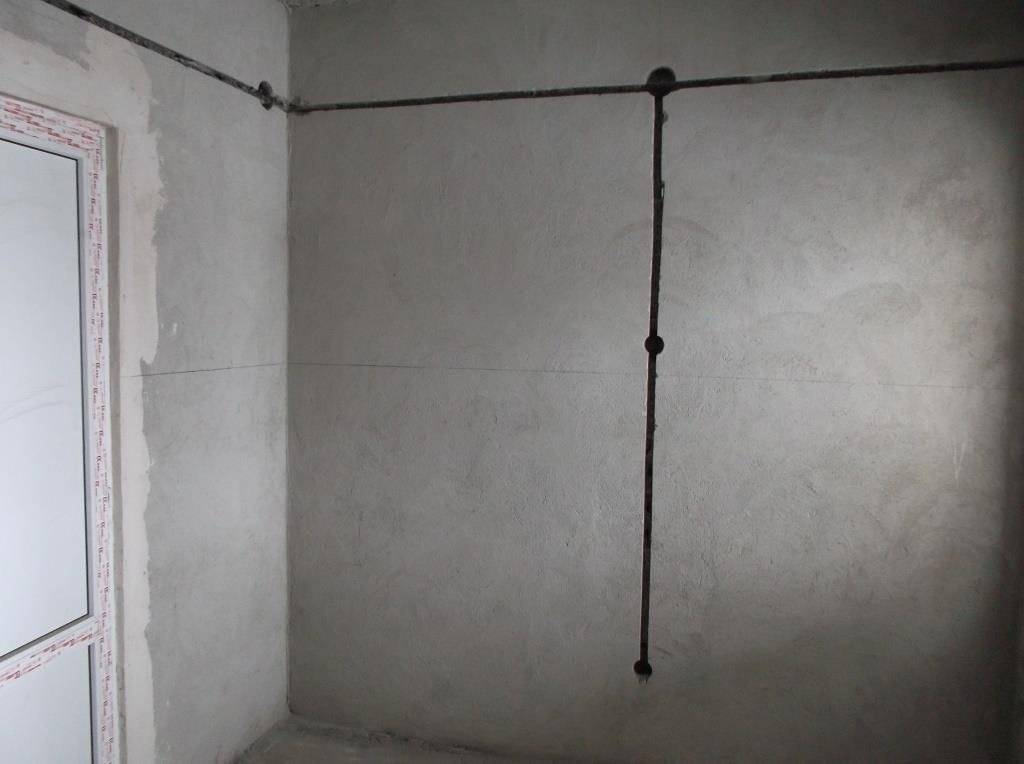
Photo: strokes for wiring
By the way: You can stroke the walls 2-3 days after plastering surfaces, when humidity from the walls goes by 50%.
Than stroke the walls
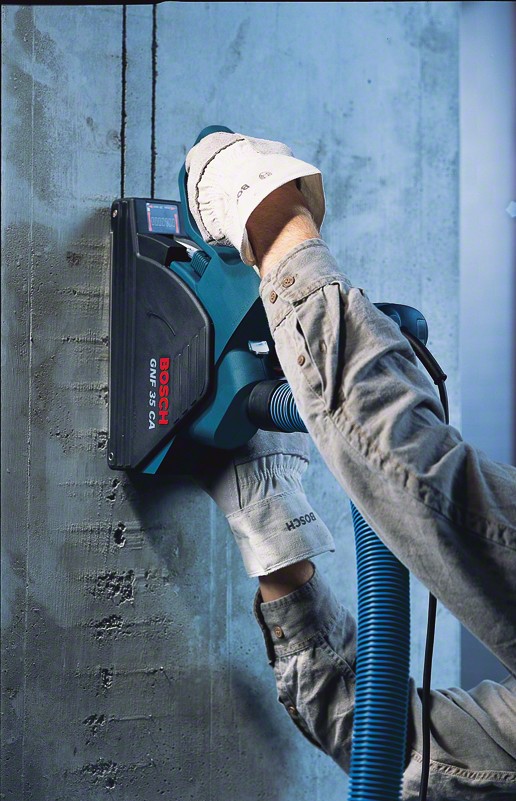
The walls are stroke with a grinder, a strooborer and a perforator. Stroborese is the most convenient option, but it is more expensive than other tools.
Photo: tools with which you can stroke the walls

How to stroke the wall with a strooborosis
The design of the stroboreus allows you to tightly put the tool to the wall, which is why the strokes are even and the same depth.
Photo: Two disks provide the same edges of the strobe
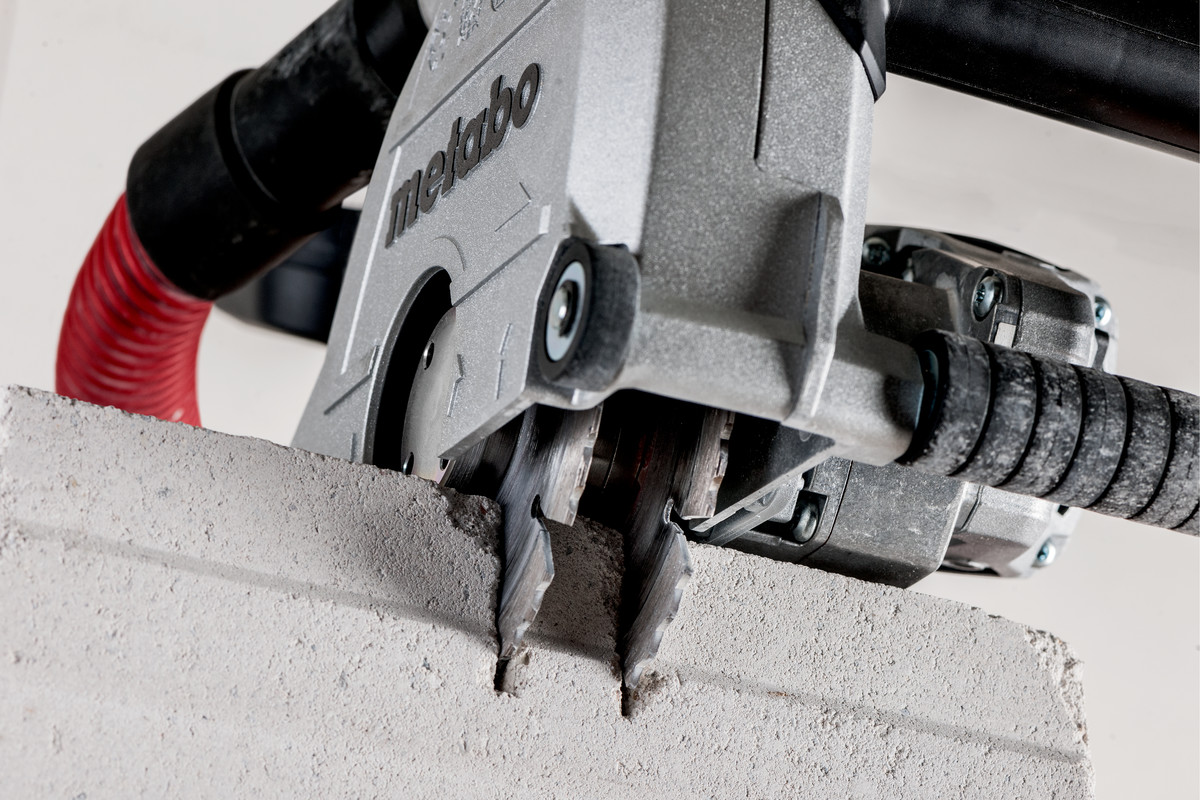
Also, the strobores allows you to divert dust with a special hose during operation, which is why the room is comfortable and clean. The stroborez has 2 diamond disks, which make 2 parallel stripes. The distance between the disks can be adjusted depending on the task.
Photo: The process of strokes of the walls
Then the plaster between these stripes is knocked out by a perforator.
Photo: Excesses from the strobe are removed by a perforator
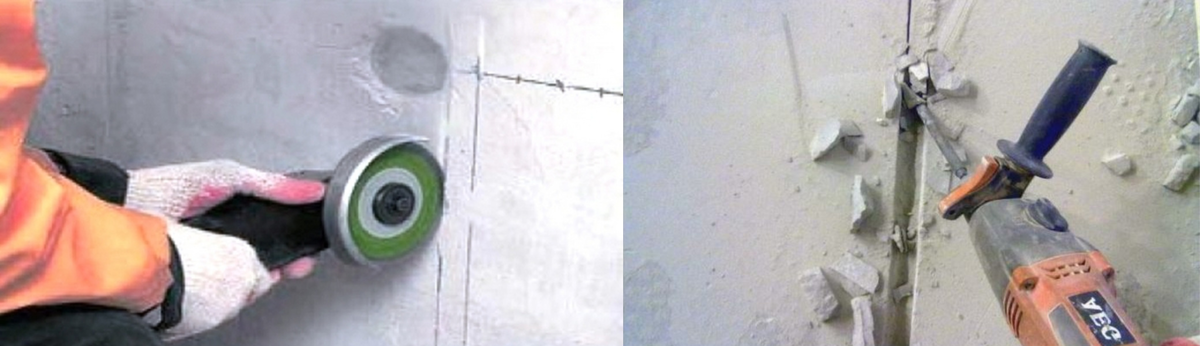
How to stroke the wall with a grinder correctly
If there is no barbore, then 2 parallel stripes are made with a diamond disk with a grinder and the plaster is knocked out between them. The distance between the stripes should be at least 2 cm. A lot of dust is formed in the process of working with the grinder. The strobes themselves can turn out different in depth, since it is difficult to keep the grinder tightly against the wall. After that, the stroke is also beaten with a perforator.
Photo: The grinder needs to be kept at one depth during the stroke of the walls
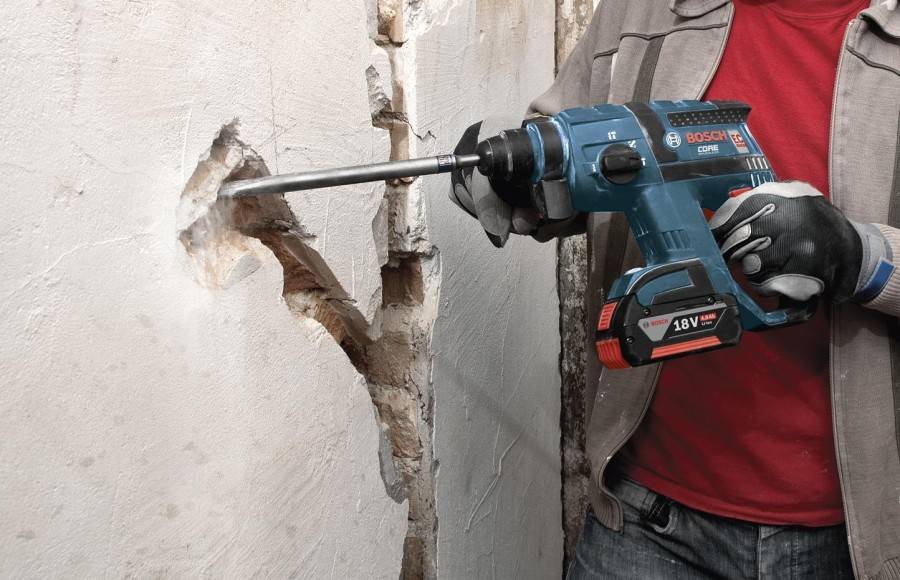
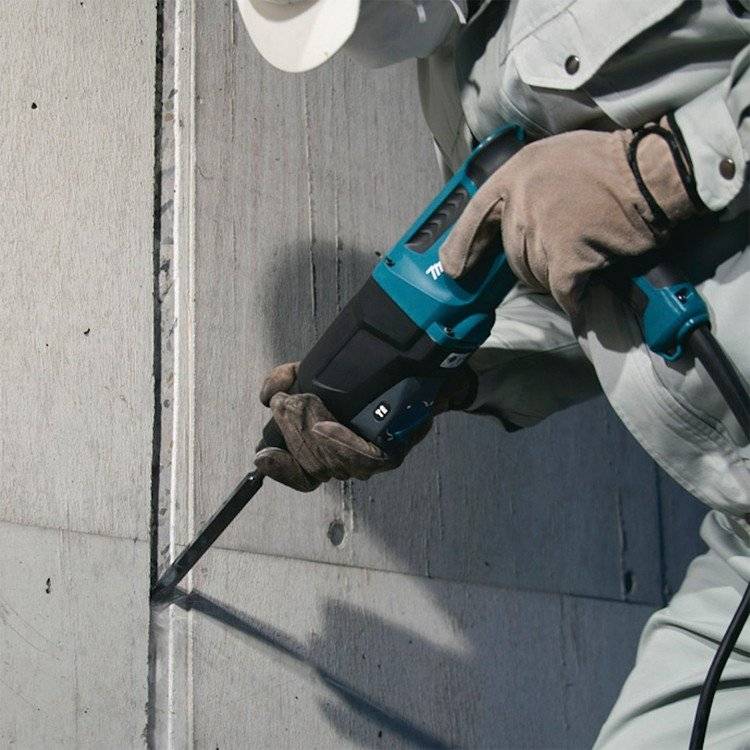
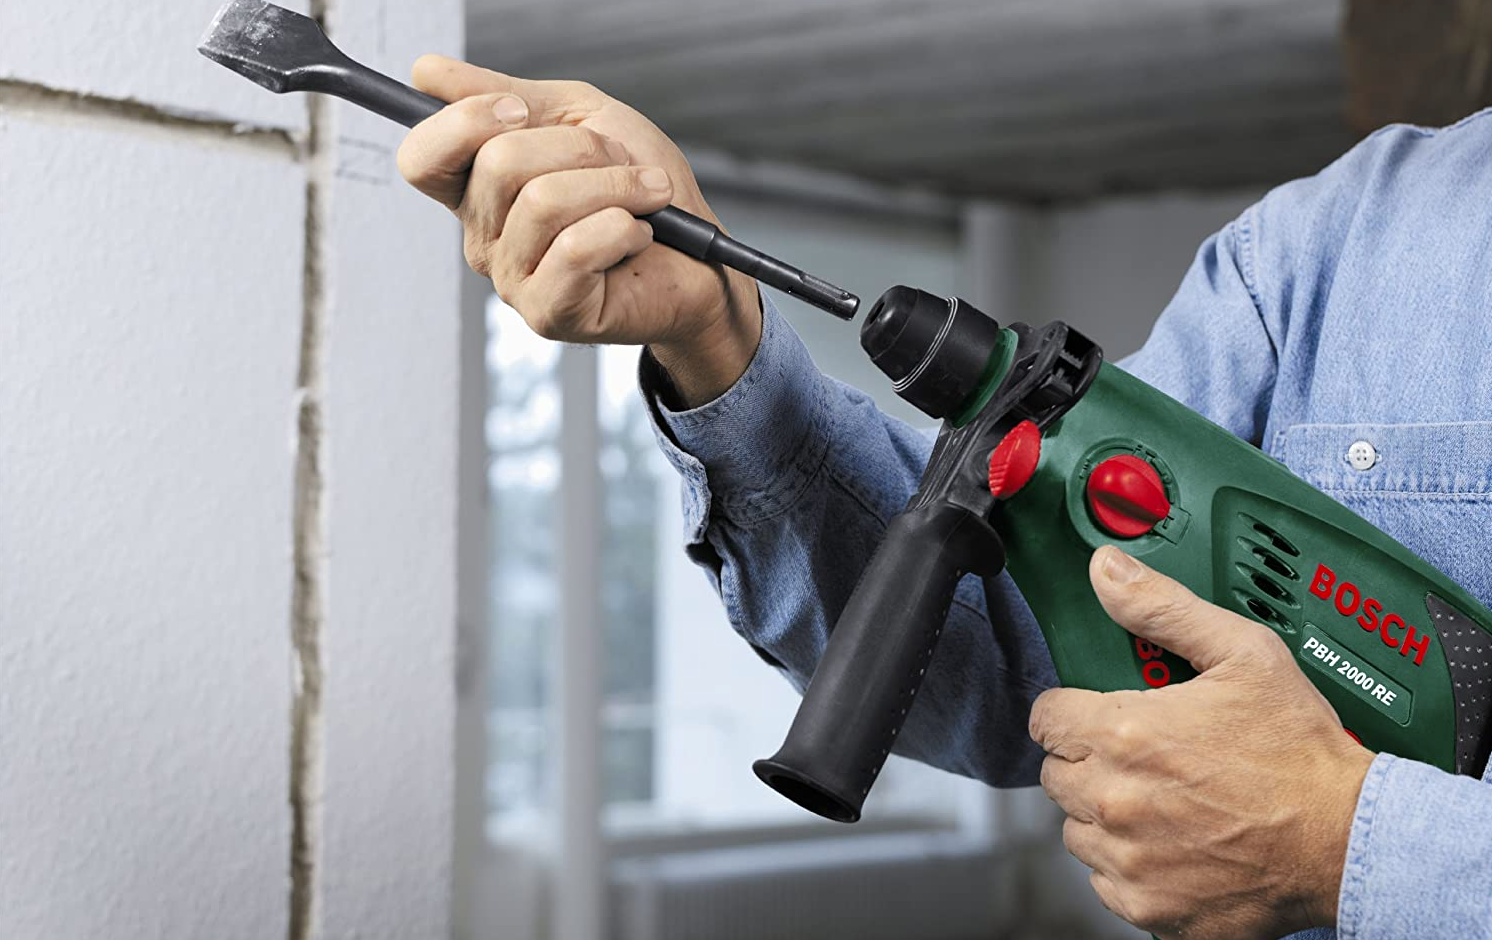
How to properly stroke the walls with a perforator
You can also make strokes in the wall with a simple perforator. First, the line on the wall is marked. Then, along the line, they begin to drill holes at a distance of 2 cm from each other. The concrete drill with a size of 12 mm should be used. In order for all holes to be the same depth, it is better to wrap the island at a height of 2-2.5 cm from the edge of the drill on the drill.
Photo: Drill make holes along the strobe
After you made holes, on the perforator you need to change the drill to the shoulder blade. This spatula is made on the holes. The uneven edges are removed with a hammer and chisel.
Photo: The blade helps to remove all excess
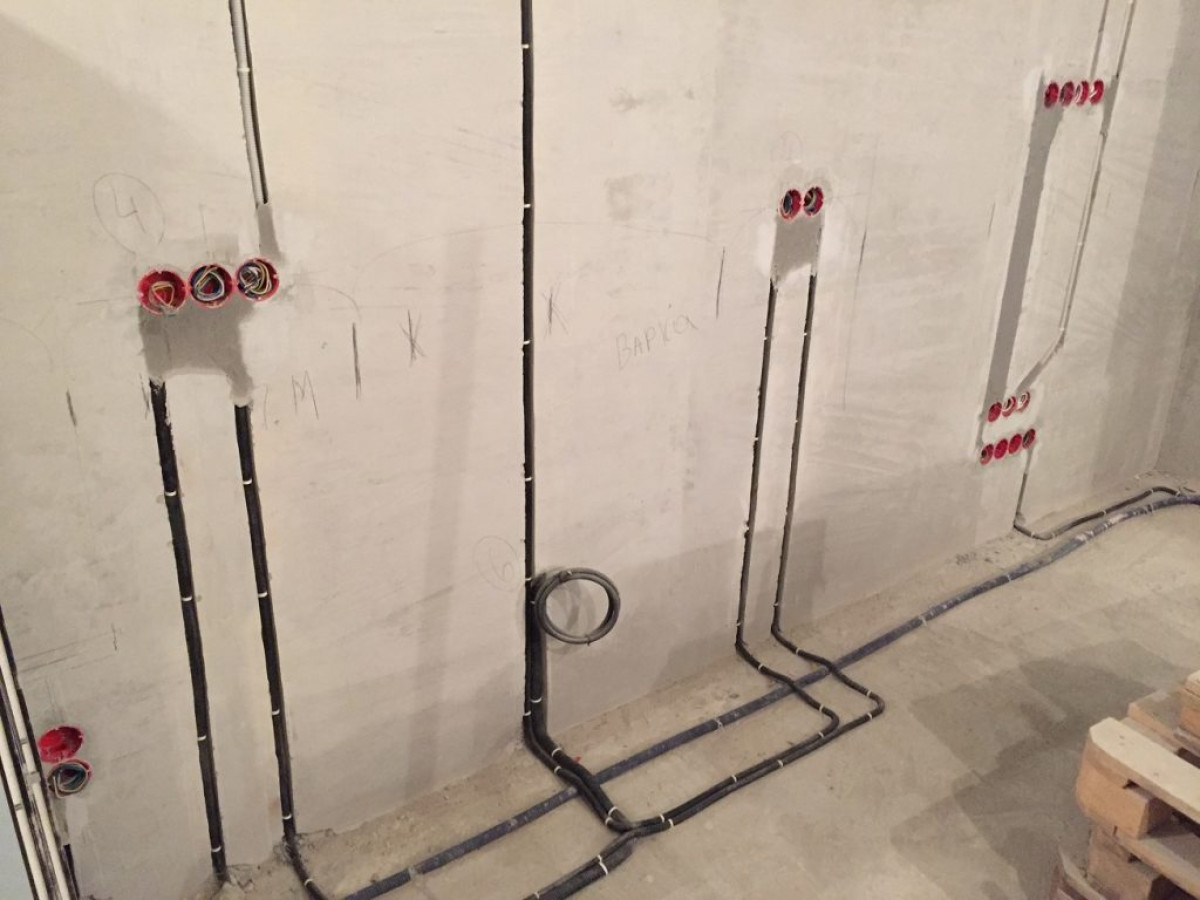
How to properly stroke the wall for wiring
Strokes of the walls should be carried out according to the laser level. The laser level should be set to the left of the stroke’s place so that the hose from the vacuum cleaner does not hook the laser beam in the case of using a barborer.
Photo: laser level allows you to make even strokes
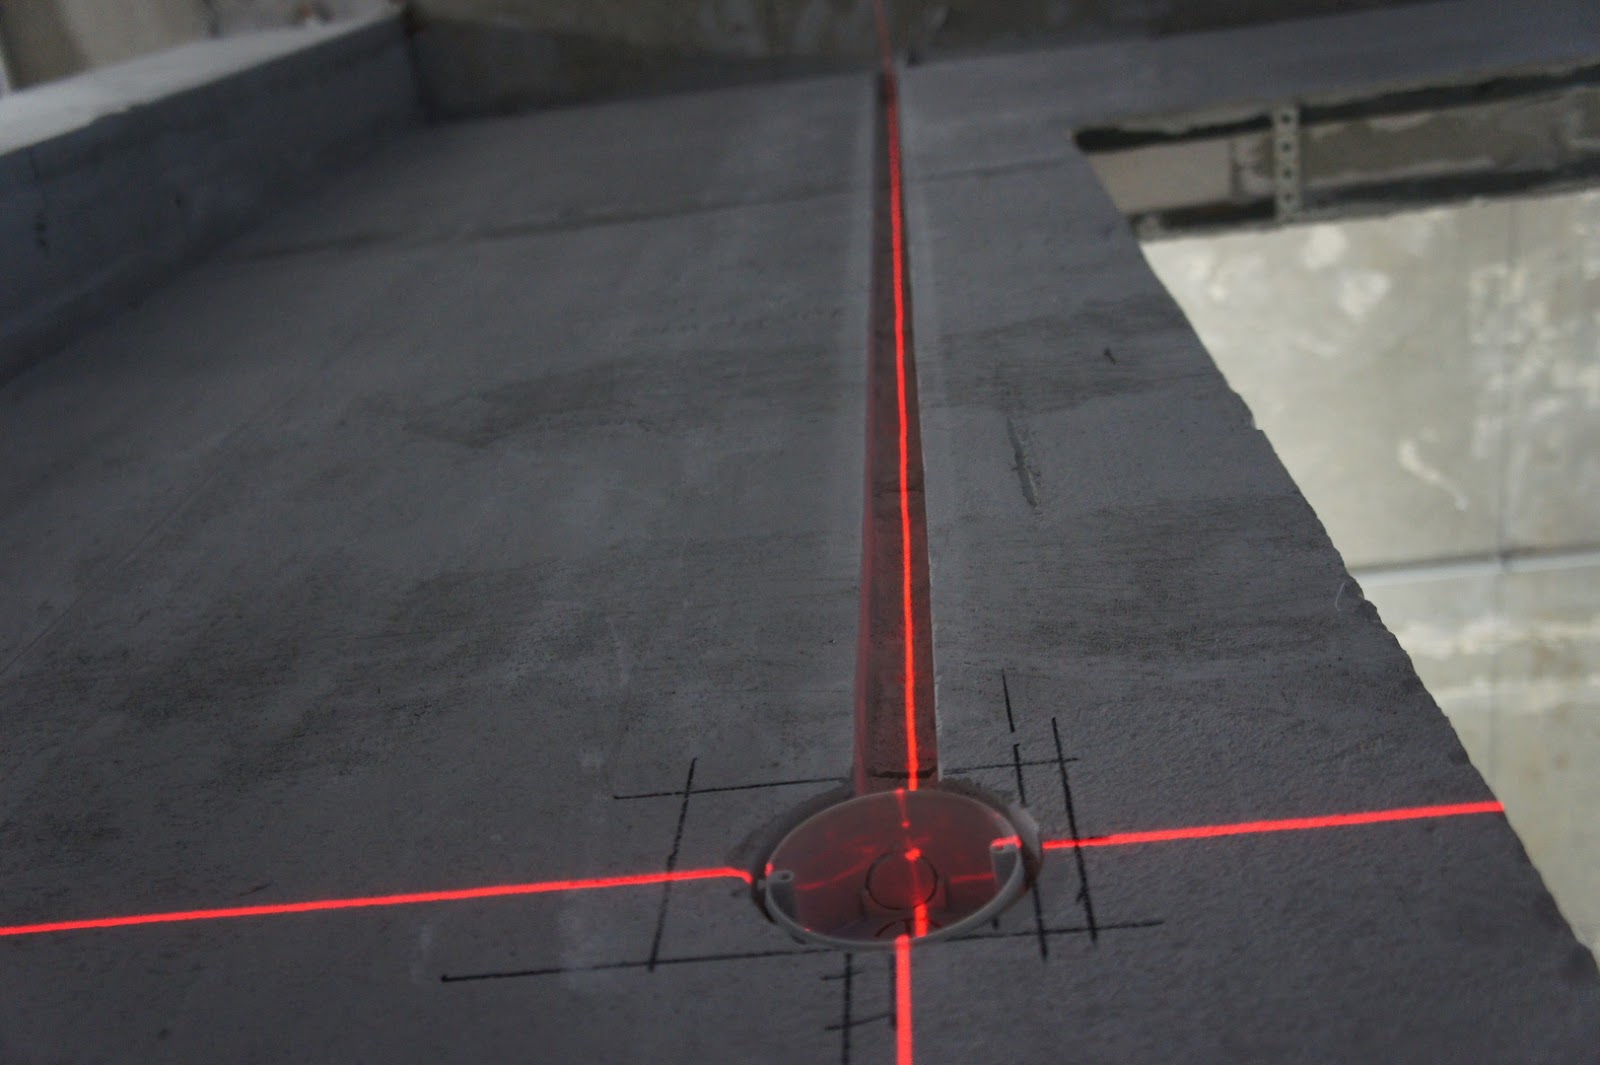
After that, the strobores is placed on the line, and under his own weight it makes stroobes. During stroke, it is important not to overheat the diamond disk, otherwise it may bend. So that the dust does not go outside, a construction vacuum cleaner can be connected to a strobes or connect a thick hose, the end of which is inserted into a plastic bag and wrap the edge with electrical tape. So the dust from the bag will not go out. All surpluses in the strobe are knocked out by a perforator or a chisel and a hammer.
Photo: Stroke of walls using a stroborez

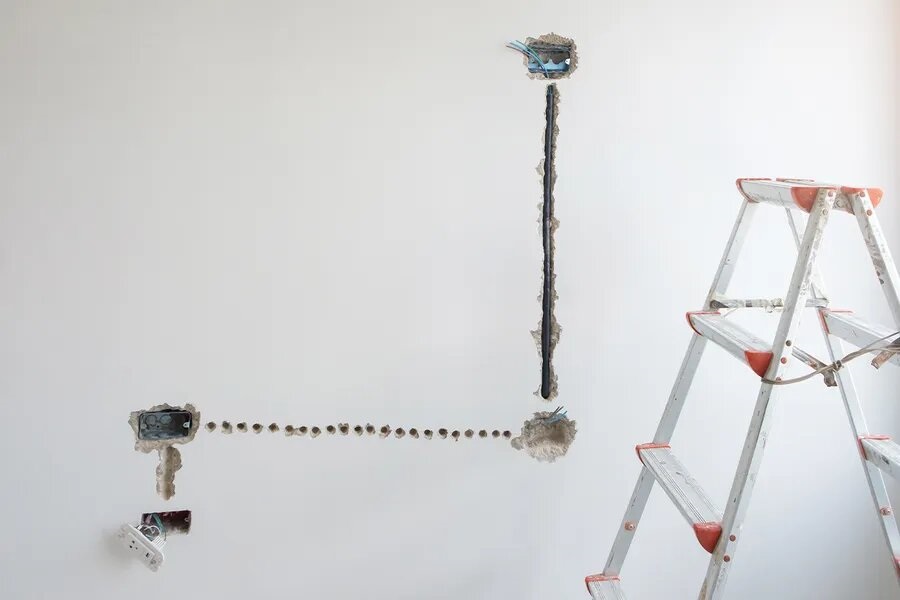
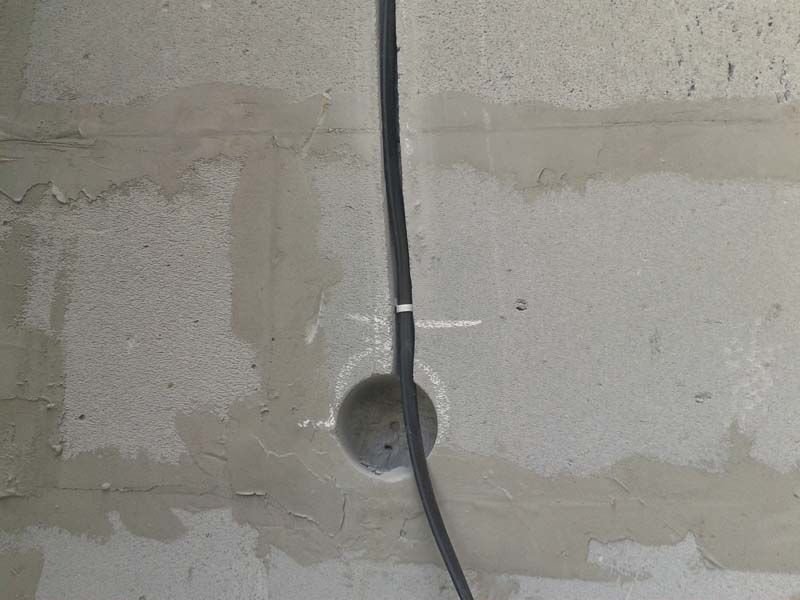
If low -current systems are planned in the apartment, then they usually make a separate cable for laying the cable. Strings for sockets should pass a little to the right of the socket.
Photo: Strobs for a socket
Strobs for wall lamps – at the place of fastening of the lamp to the wire – are made at 45 degrees. So you can avoid cable breaking.
Photo: Strips for the lamp
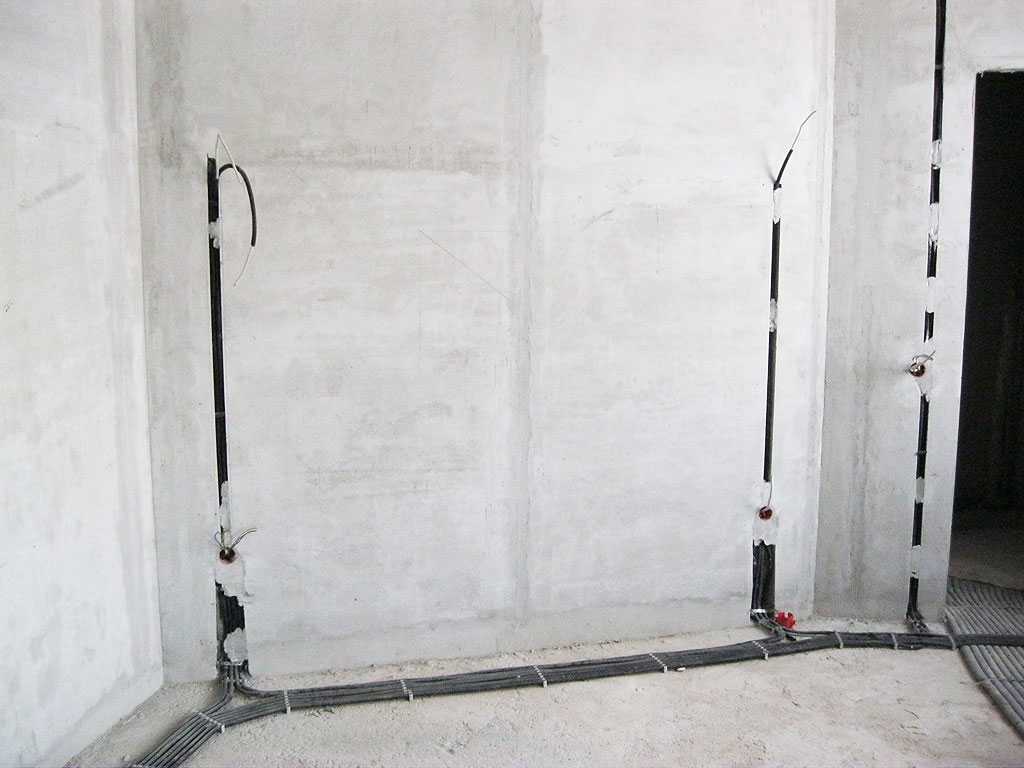
Strings for wiring should go vertically or horizontally. Horizontal strokes are made if the electrician passes along the wall. This method is rarely used in modern apartments. More often make perpendicular strokes for sockets, because the electrician is carried out on the ceiling or floor.
Photo: Stanes of the walls

Strobs should be made at a distance of 10-15 cm from the ceiling, floor, doorways and corners. This distance ensures safety and protects the wires from subsequent repair work. For example, when a stretch ceiling is made or a wall cornice is installed, the builders can accidentally damage the cable if the strobe is made too close to the ceiling. Also, the strobes must be made at a distance of at least 50 cm from water and gas pipes.
Photo: horizontal strokes should be at a distance of at least 10 cm from the ceiling
The depth of the seddle can be from 2 to 2.6 cm. Width is 2-2.5 cm. Such parameters allow you to lay wires of the desired size.
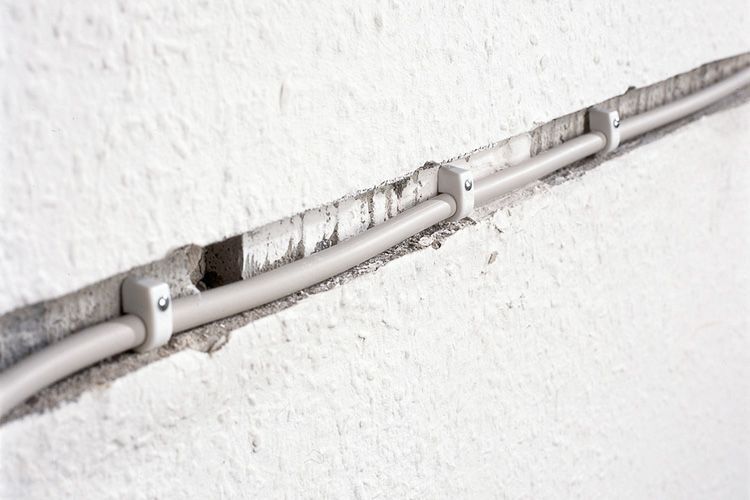
Photo: wire in the strobe
Important: When carrying out repair work, the question often arises of whether the supporting walls can be stroked. If the wall is covered with plaster, then it can be stroked to the depth of plaster, which is usually about 2 cm. This is quite enough to create a stroke. If a layer of plaster is less than 1 cm or is completely absent, then it is prohibited to stroke the supporting walls or ceilings.
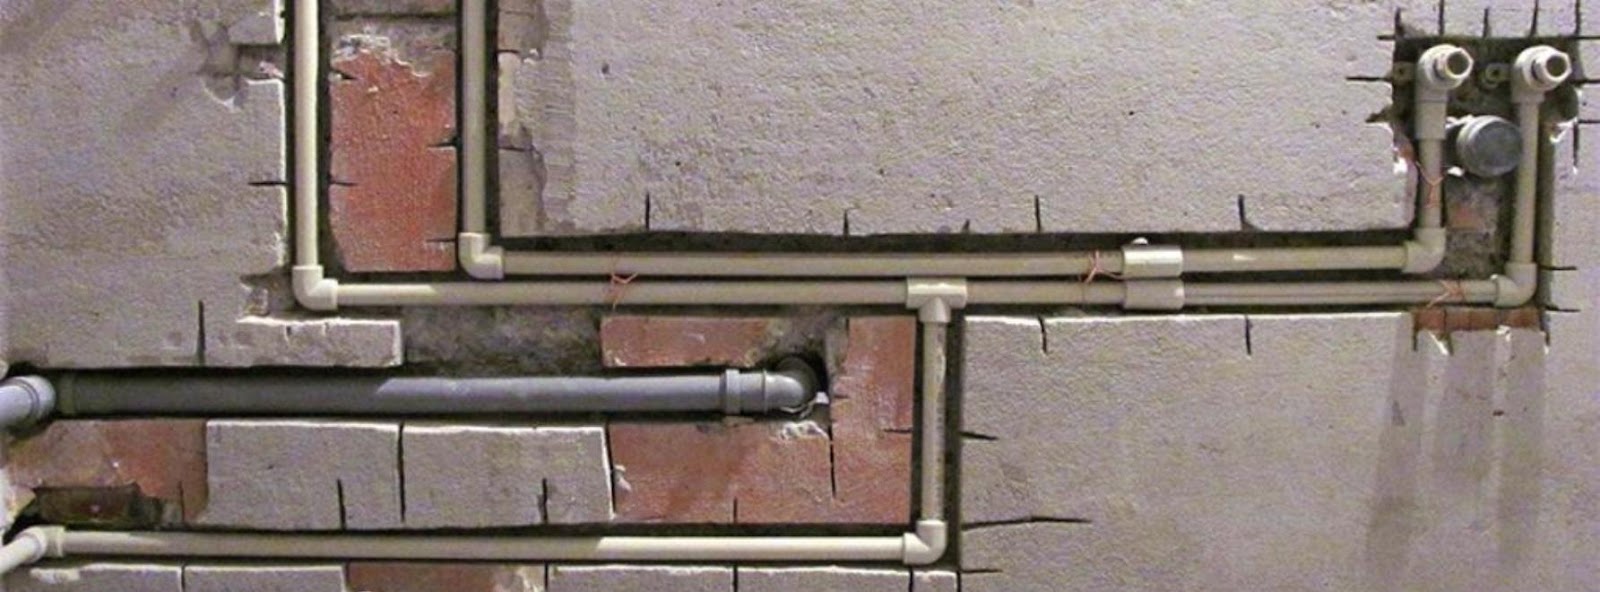
How to stroke the walls under pipes correctly
Strings for pipes are usually deeper and wider than a stroke for an electrician. They are also made with a chtrooborosis, a grinder or a perforator.
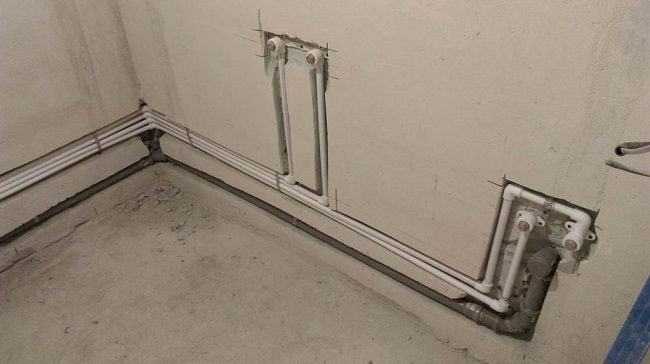
Photo: Shtrobes for water pipes
It is easiest to make strokes in a wall of a gas block or at the junction between bricks in a brick partition. The most difficult thing is to make a stroke in the reinforced concrete wall, because there you can stumble upon the reinforcement during stroke. It will have to be cut into a grinder. It is better to stroke the walls after plastering. In the load -bearing walls, it is impossible to make a strob under the pipes, since their depth is larger than the thickness of the plaster.
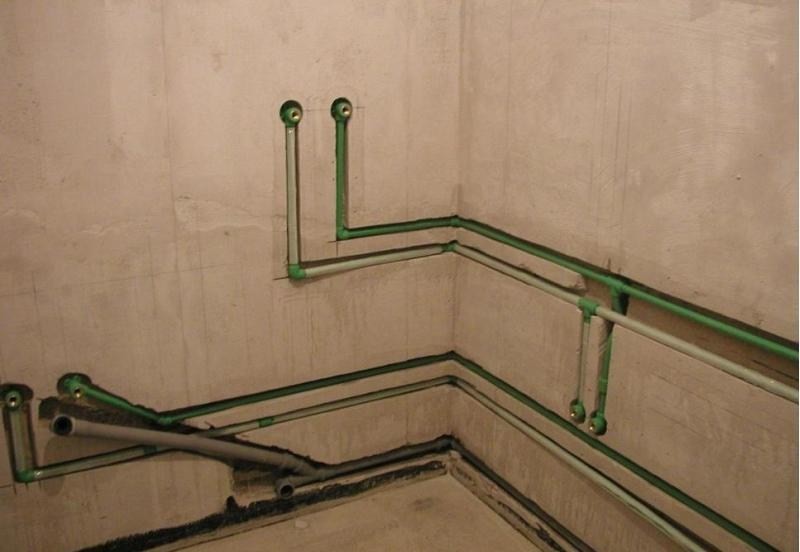
Photo: Shtrobes of water and sewer pipes
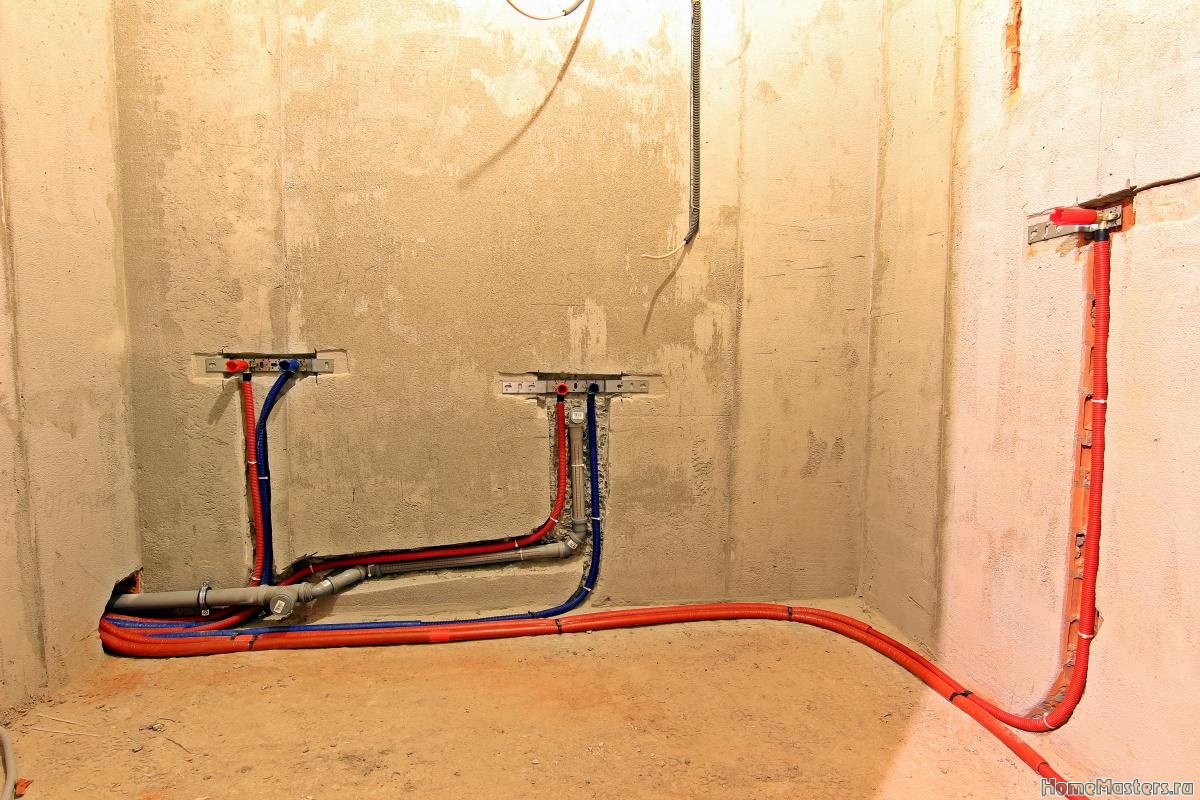
Important: Pipes in the stroke must be fixed using plastic or iron clamps so that they do not touch the walls of the groove. To do this, the strobe needs to be done a little wider than the pipes themselves. This method can minimize noise during the pipeline.
Photo: Stroobes in the bathroom
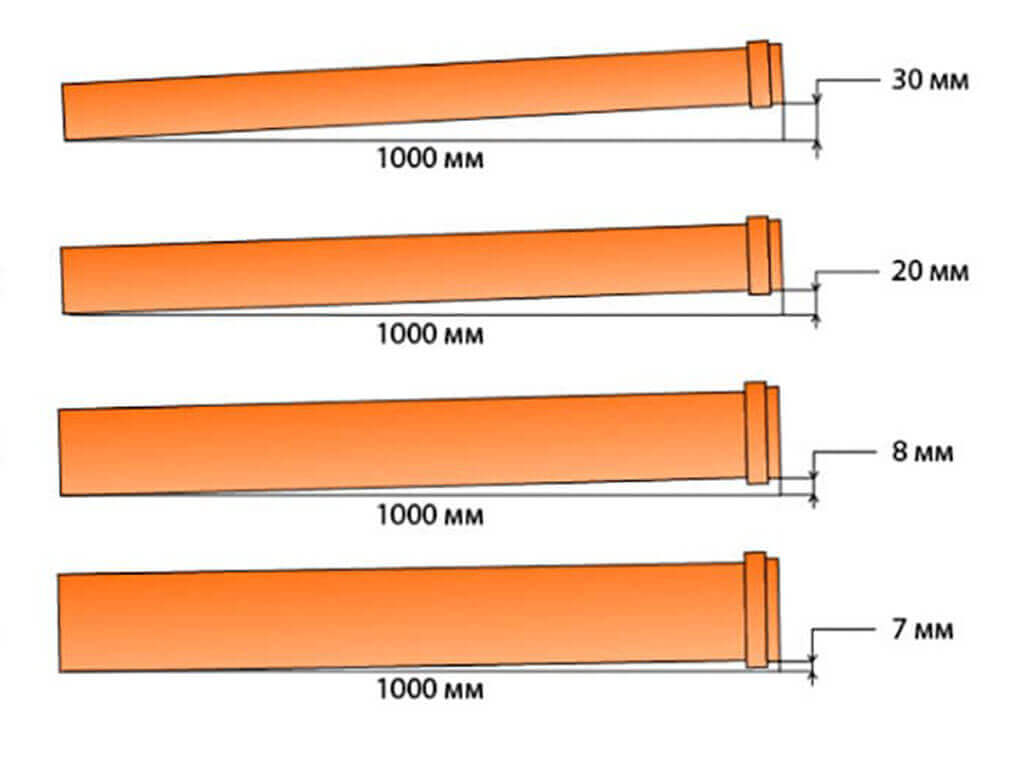
The stroke for the sewer pipe is made with a small slope of 15–25 mm for each linear meter. This is done so that the water does not linger and immediately goes into the sewer.
Photo: the necessary slope for sewer pipes of different diameters
Conclusion
- Strings are made for electrical wiring, water supply and pipes of sewage system.
- The walls of the walls are most conveniently made with a stroke.
- Shtrobes should be 2-2.5 cm in depth and 2-3 cm in width.
- The strobes in the wall should be at a distance of 10 cm from the ceiling, floor and angles.
- Shtrobes are horizontal and vertical.
- For sewer pipes, the strokes are made at an angle.