You can escape from noise from above using frame noise insulation of the ceiling. In this article, we will gradually consider the technology for the installation of soundproofing, the necessary tool for this and study the basic materials for soundproofing.
Content:
- What is the frame insulation of the ceiling made of
- What equipment is needed to make frame sound insulation of the ceiling
- Frame -insulation installation plan of the ceiling
- Installation of a soundproof blanket
- Installation of the damping tape
- Installation of electricians
- Installation of vibration suspens for a metal frame
- Installation of profiles for the frame
- Installation of sound insulation
- Glue the frame with a dumpfer ribbon
- Installation of GVL sheets in 3 layers
- Appliating sealant to joints
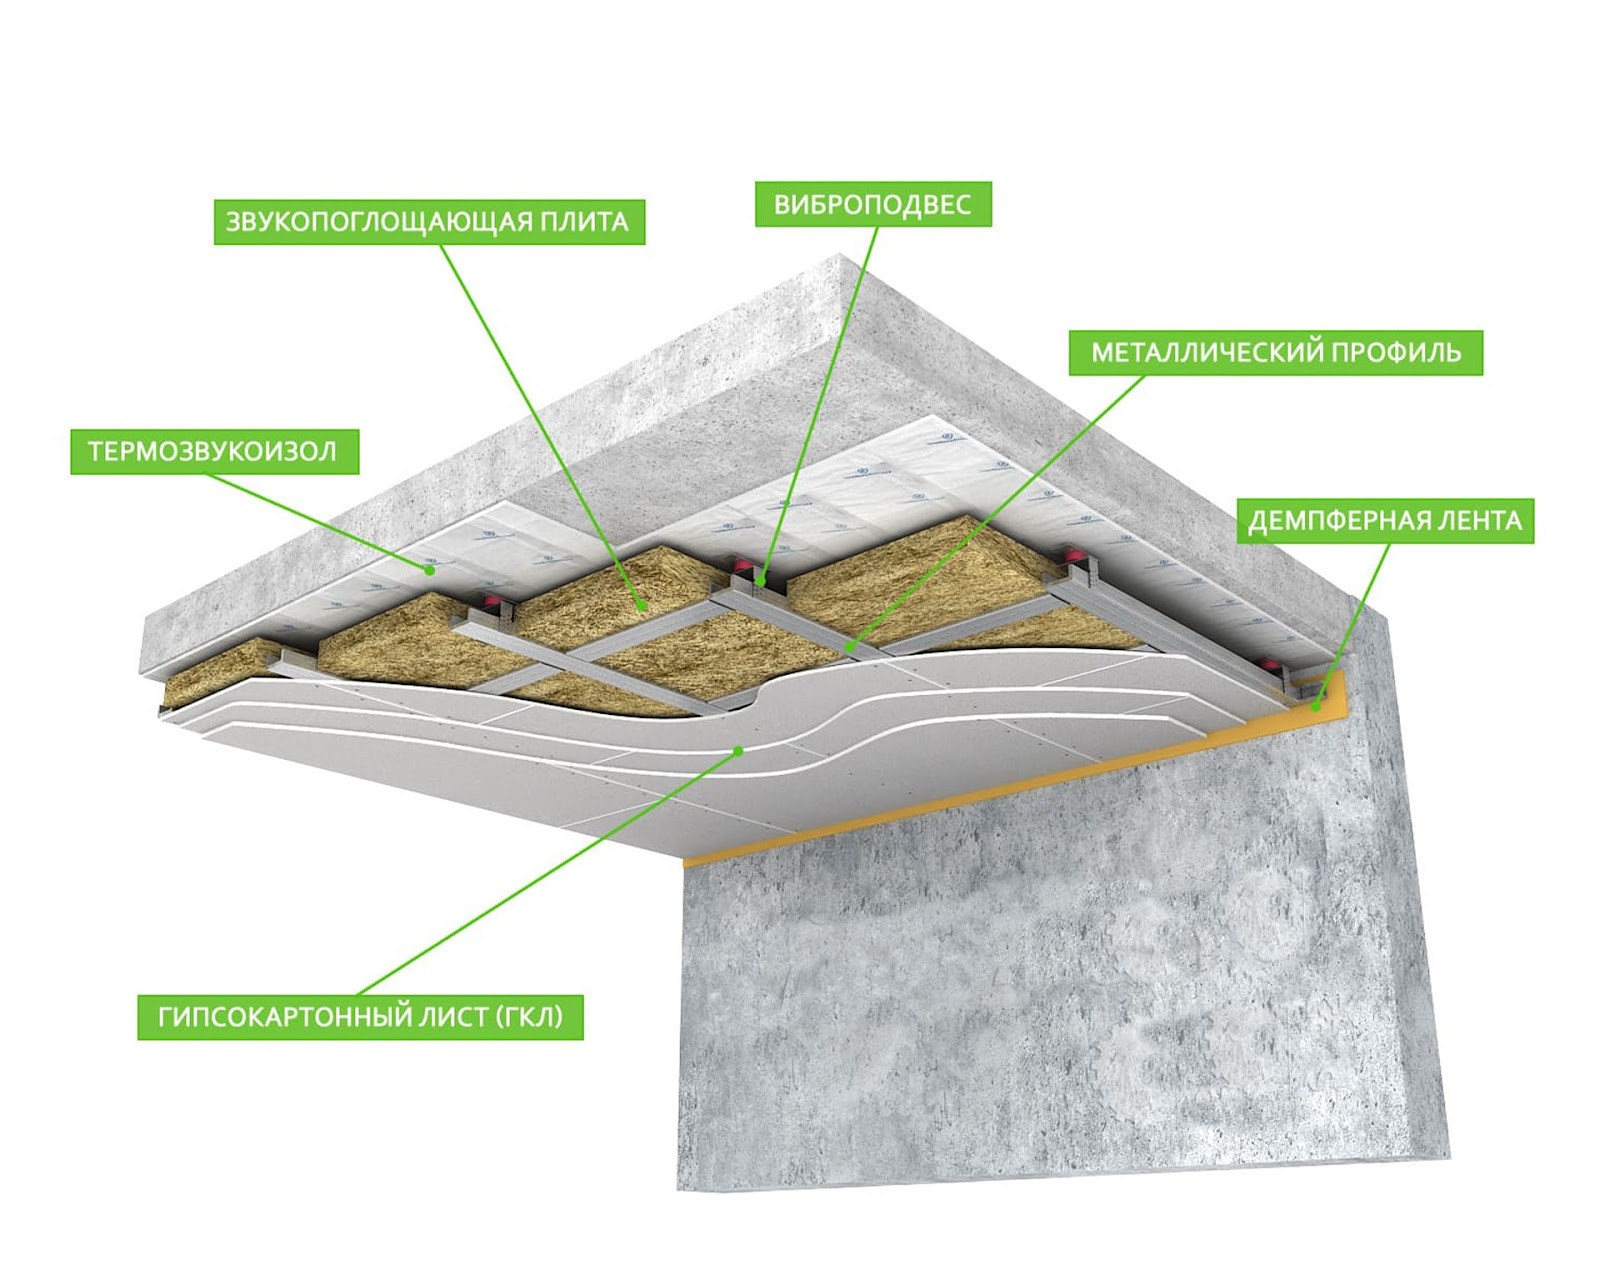
What is the frame insulation of the ceiling made of
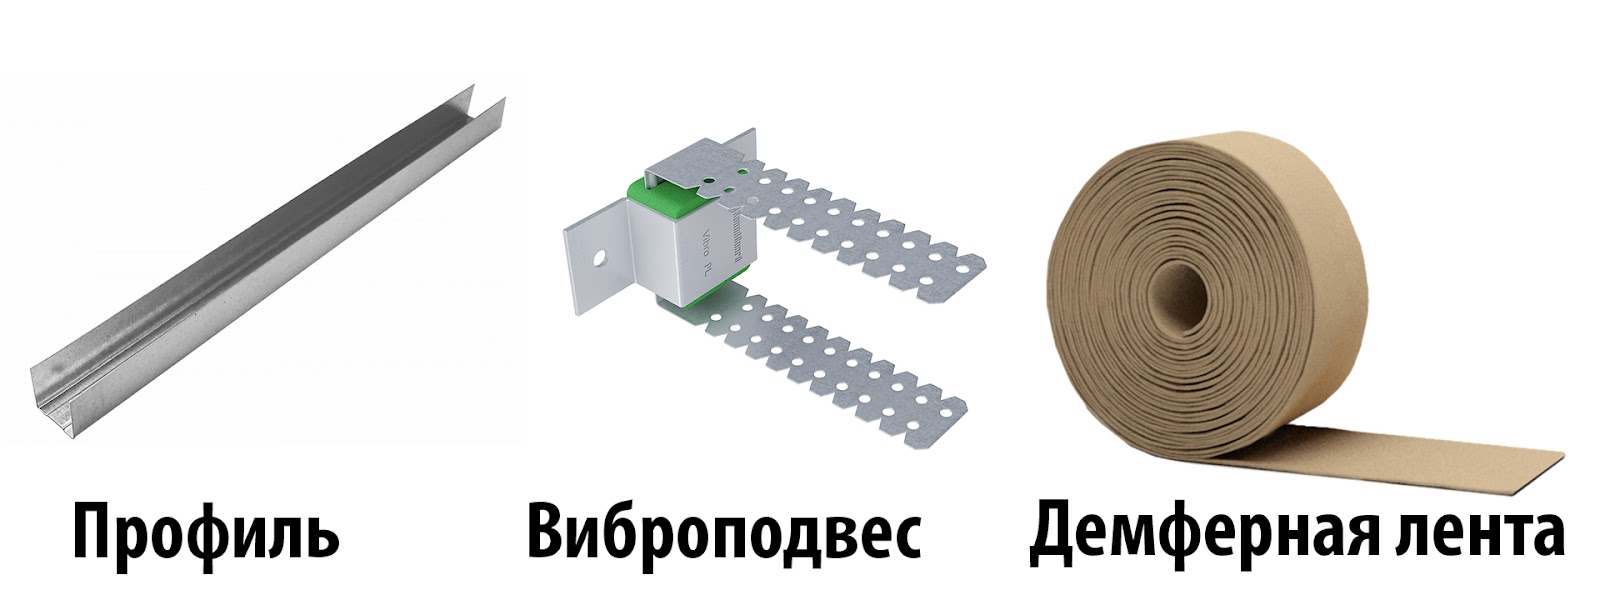
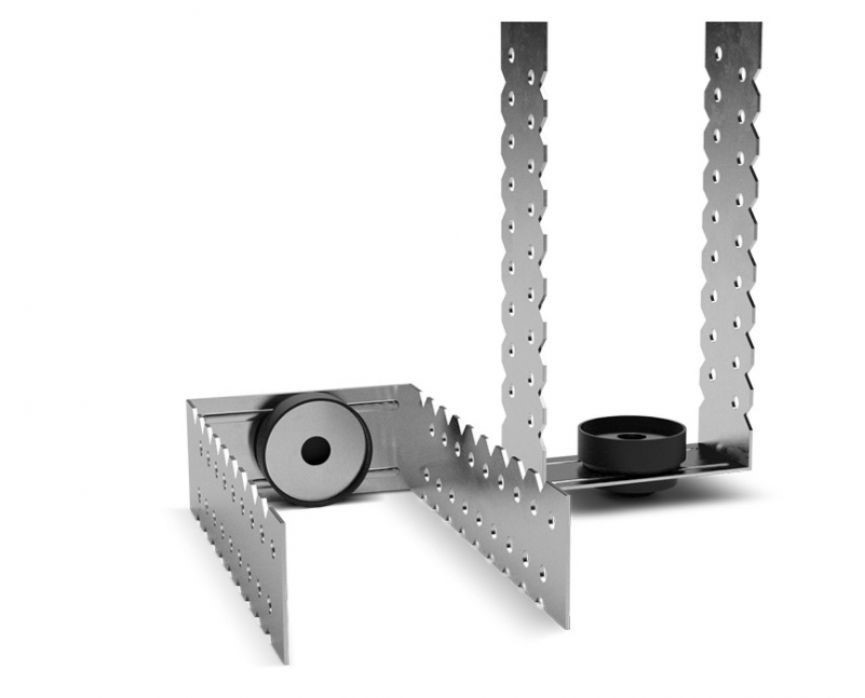
To make a frame for soundproofing the ceiling, you will need the following materials: the KNAUF PN-28/27 metal profile, the Dop-VOPZVUK V100 dumping ribbon and the KNAUF vibration suspension.
Photo: the main components of the sound insulation frame
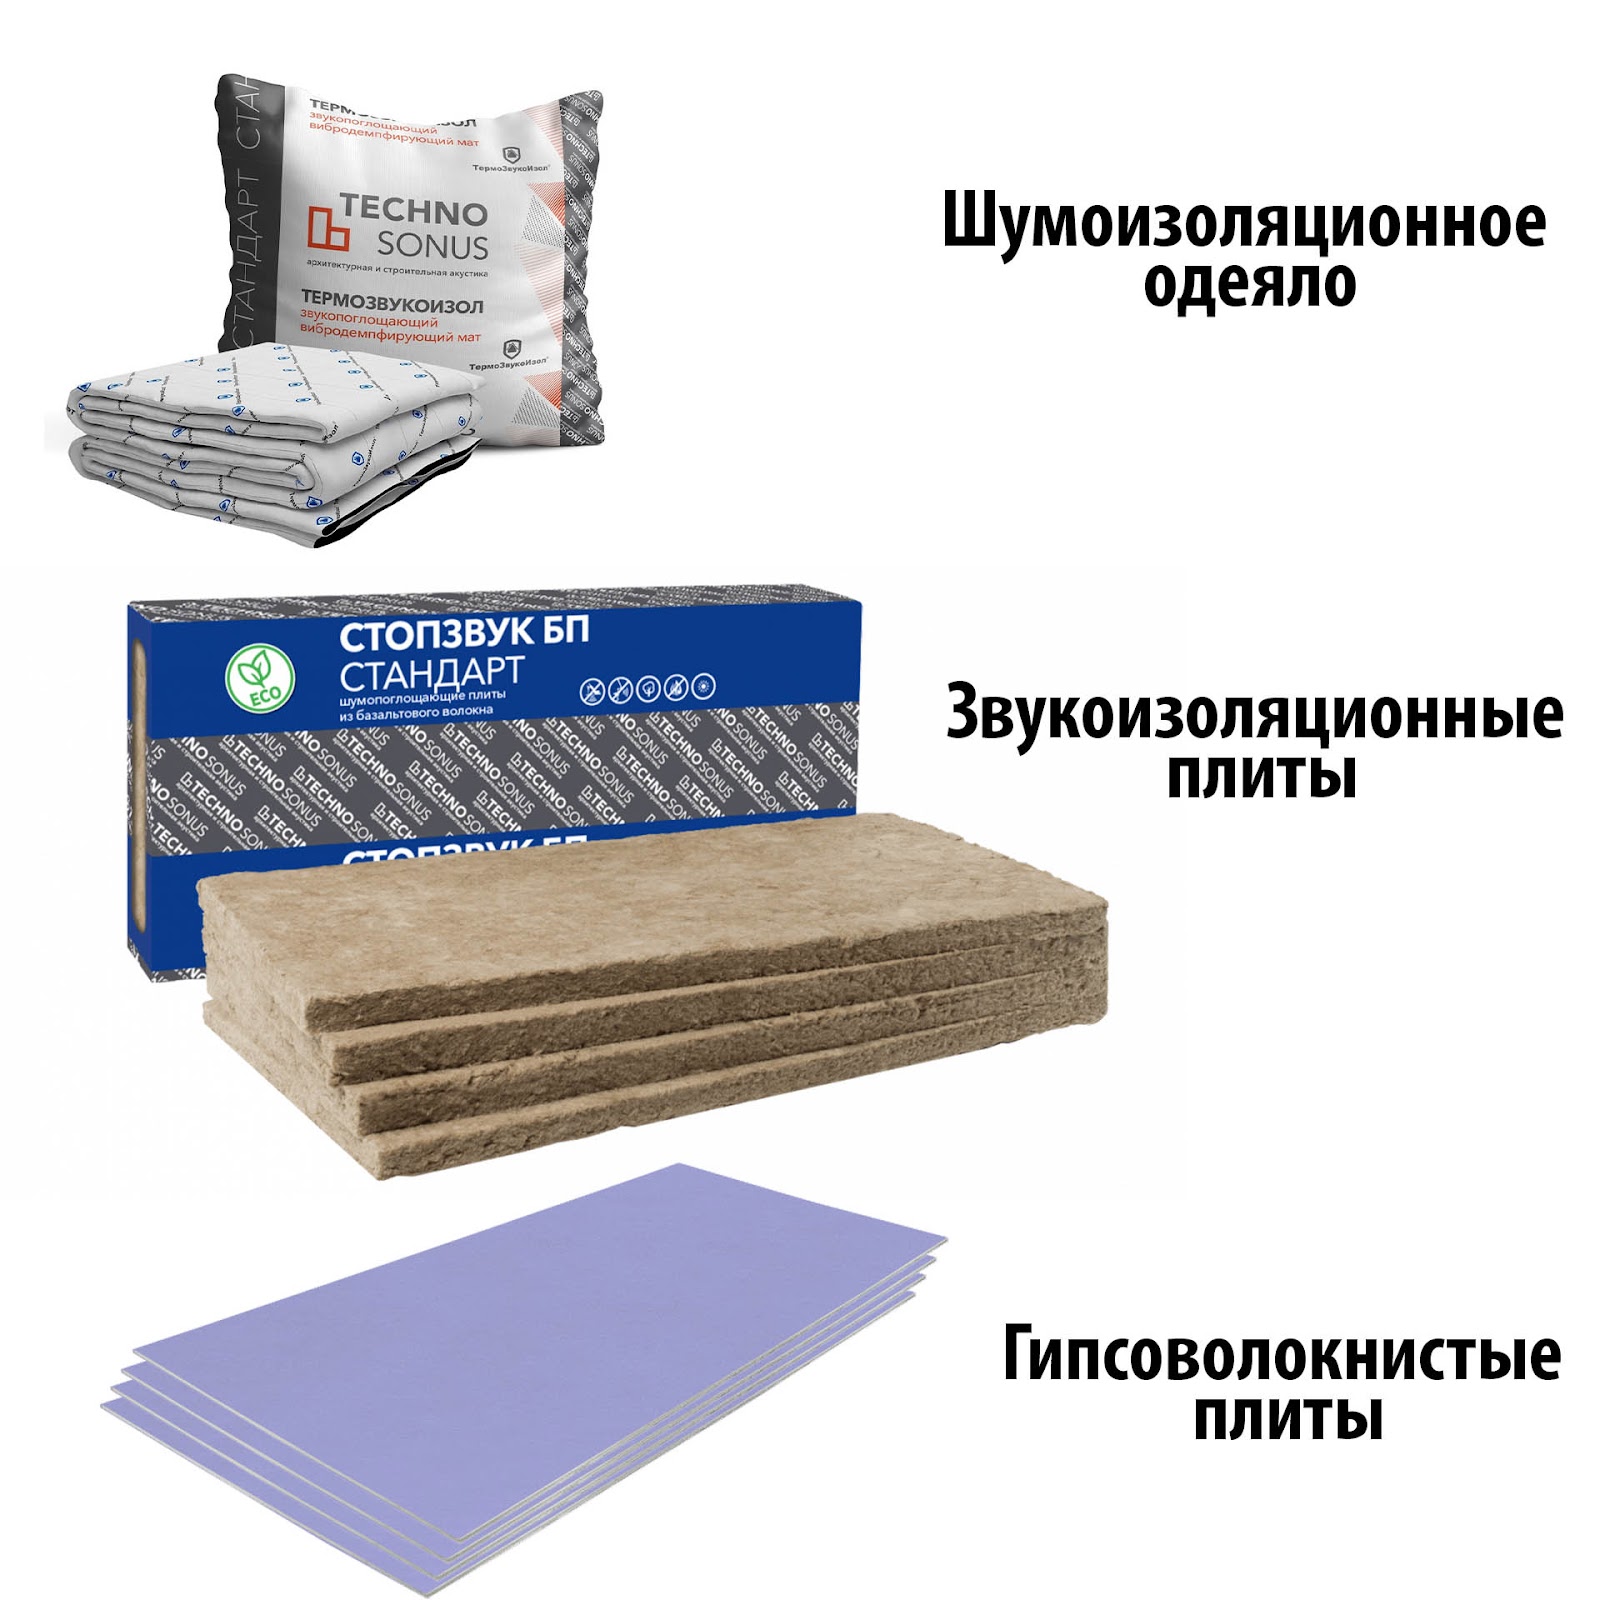
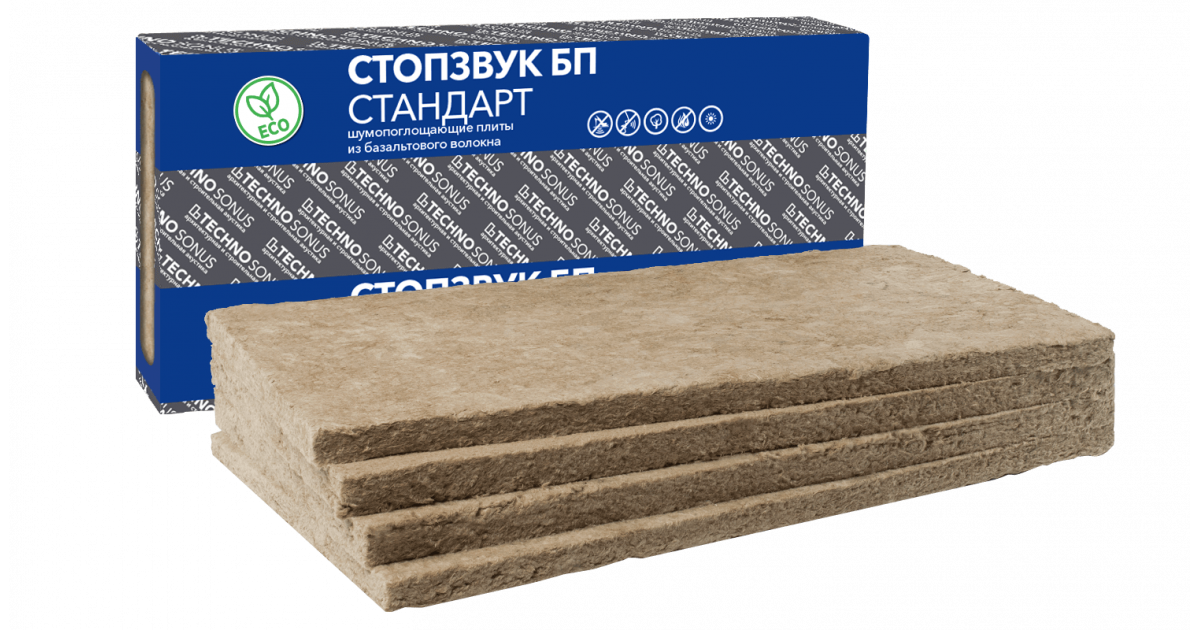
As materials for sound insulation, the noise -insulating blanket “Thermo -Wacuisol”, the soundproofing plates “Stopzvuk” and gypsum -fiber plates with a thickness of 10 mm are used.
Photo: Materials for sound insulation of the ceiling
What equipment is needed to make frame sound insulation of the ceiling
To work with frame noise insulation, the following tools will be needed: a punch, a clerical knife, a vibro -acoustic sealant, a screwdriver, a building level and a laser level.
Photo: Tool for the installation of frame sound insulation of the ceiling

Frame -insulation installation plan of the ceiling
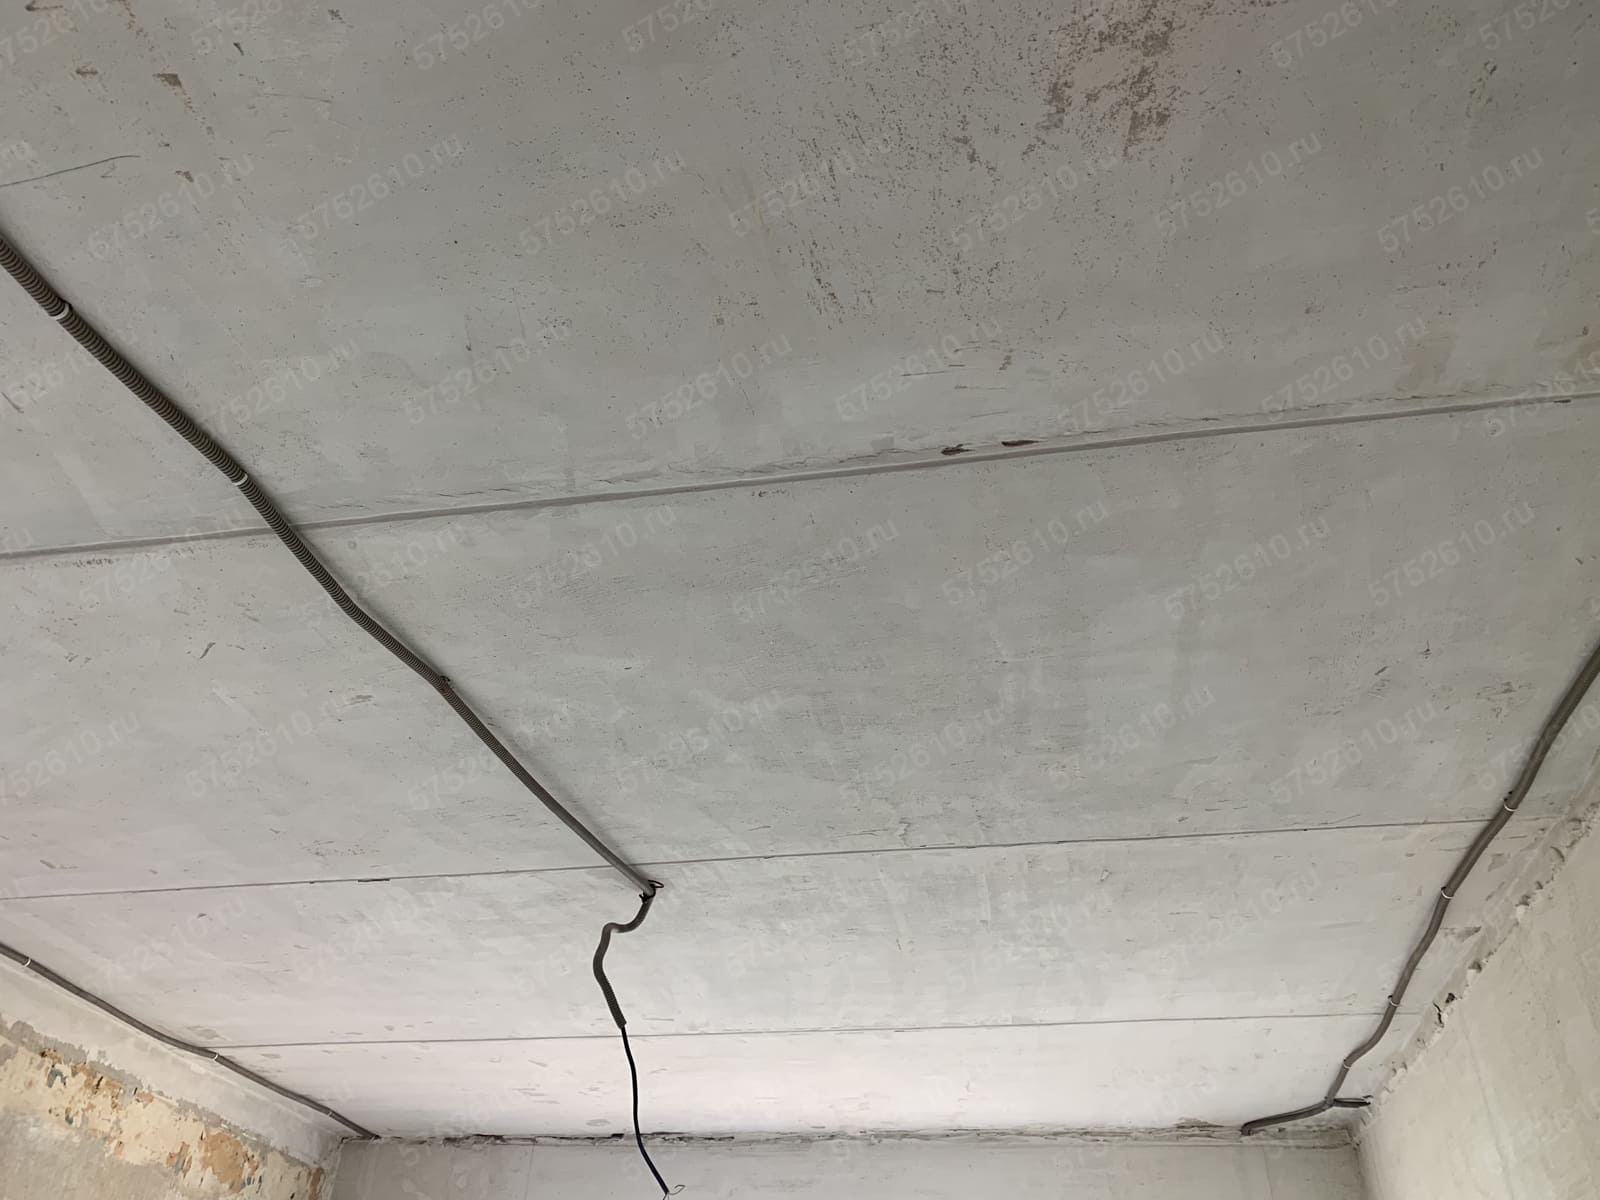
Before installing the soundproofing frame itself on the ceiling, you need to clean the surface of dust, adhering cement and protrusions. This is done so that the sound insulation is convenient to glue.
Photo: the ceiling should be cleaned as much as possible
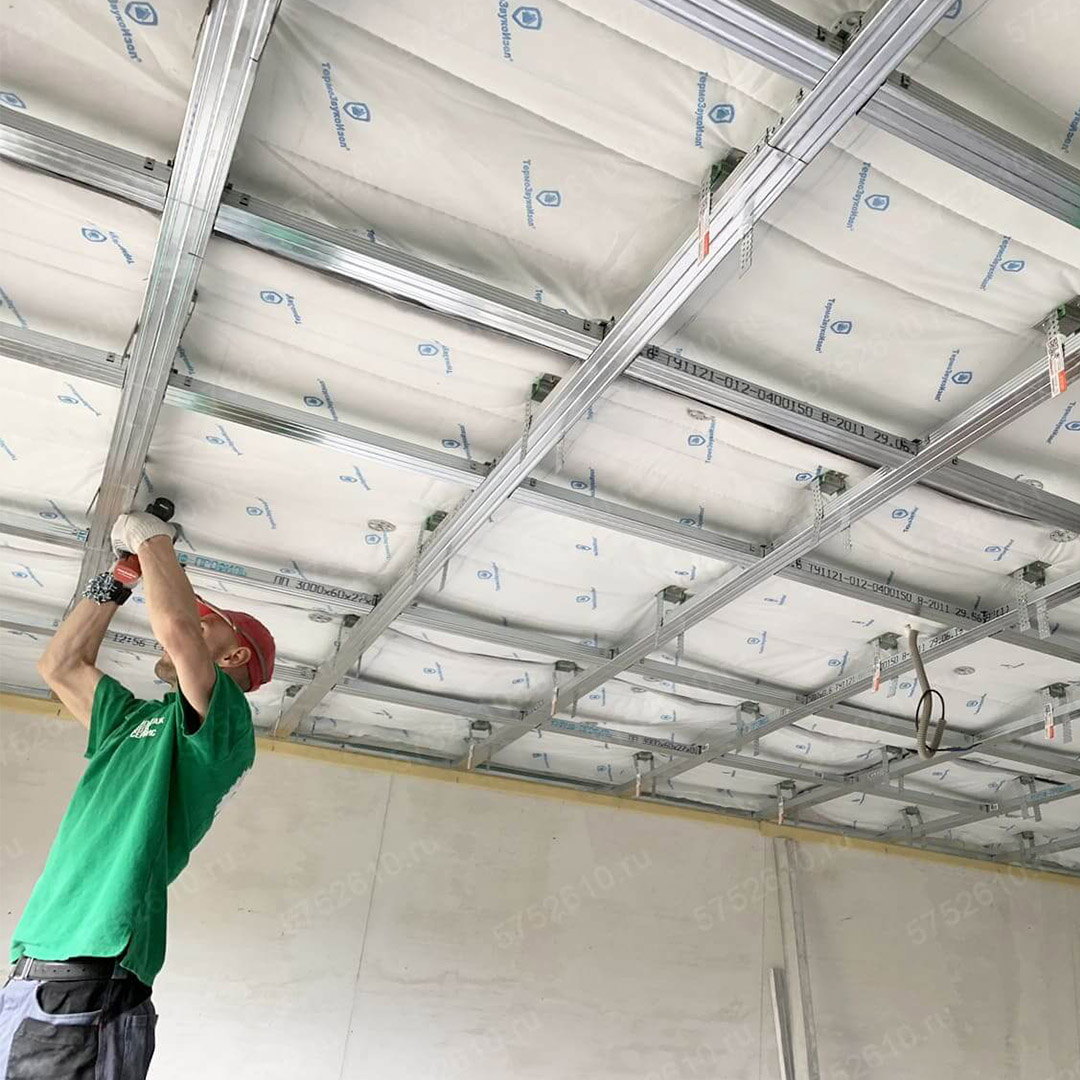
Stage 1. Installation of a soundproof blanket
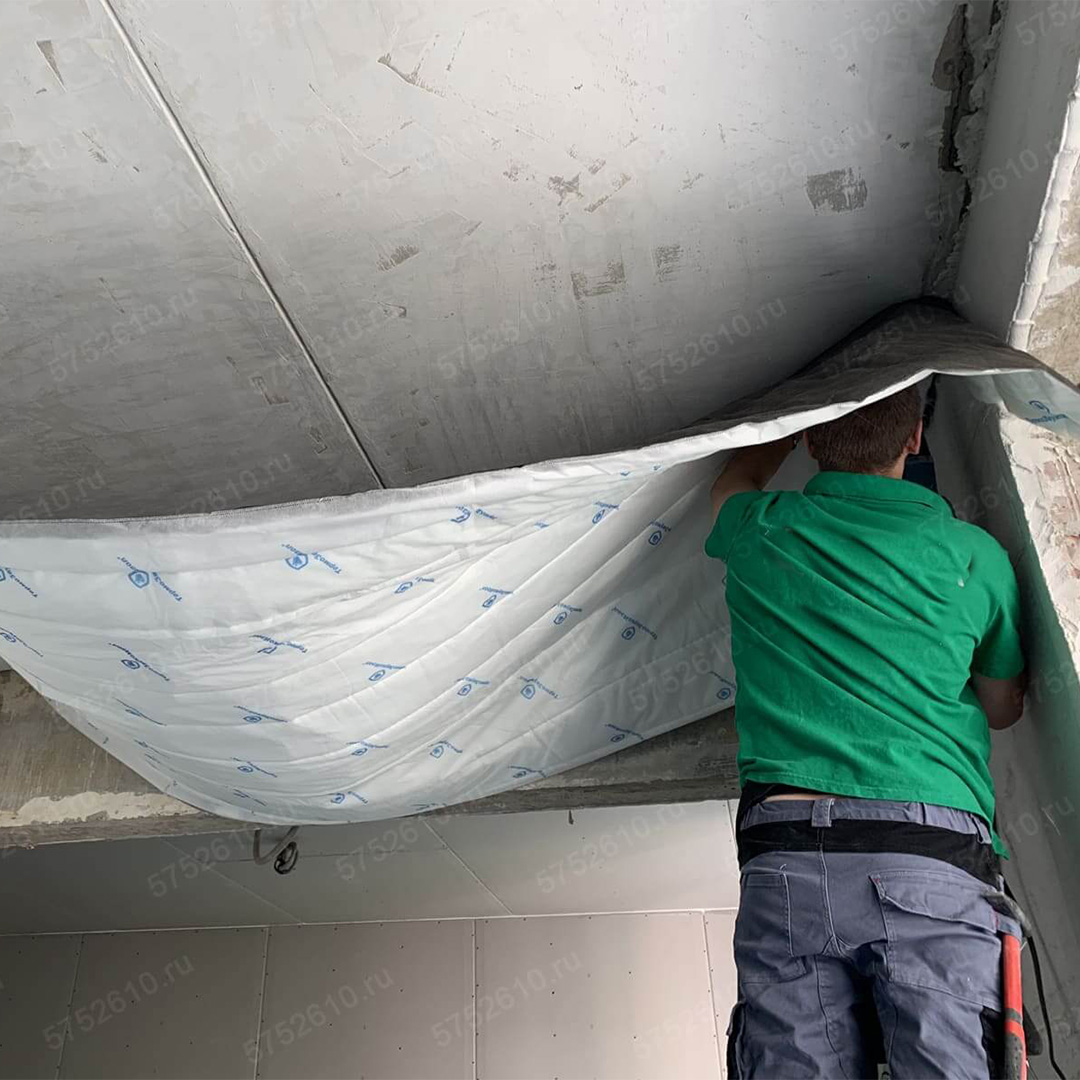
First, the noise insulation blanket “Thermosuroisol” is glued to the ceiling. This material will be the first obstacle to shock and sound noise.
Photo: sound insulation is glued to the ceiling
The “thermosvukozol” must be laid so that in the places of joints, the blanket is overlapped by 5-10 cm.
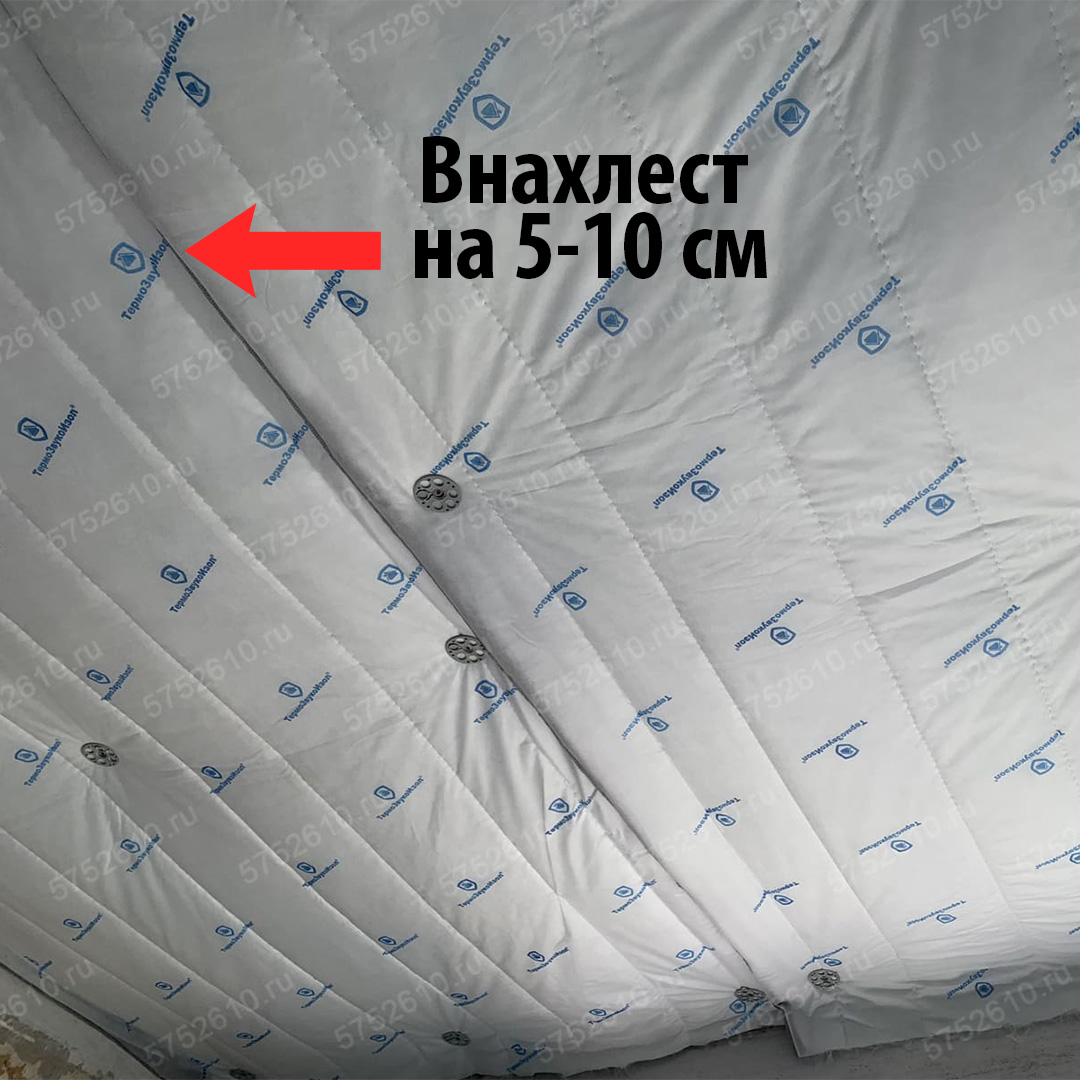
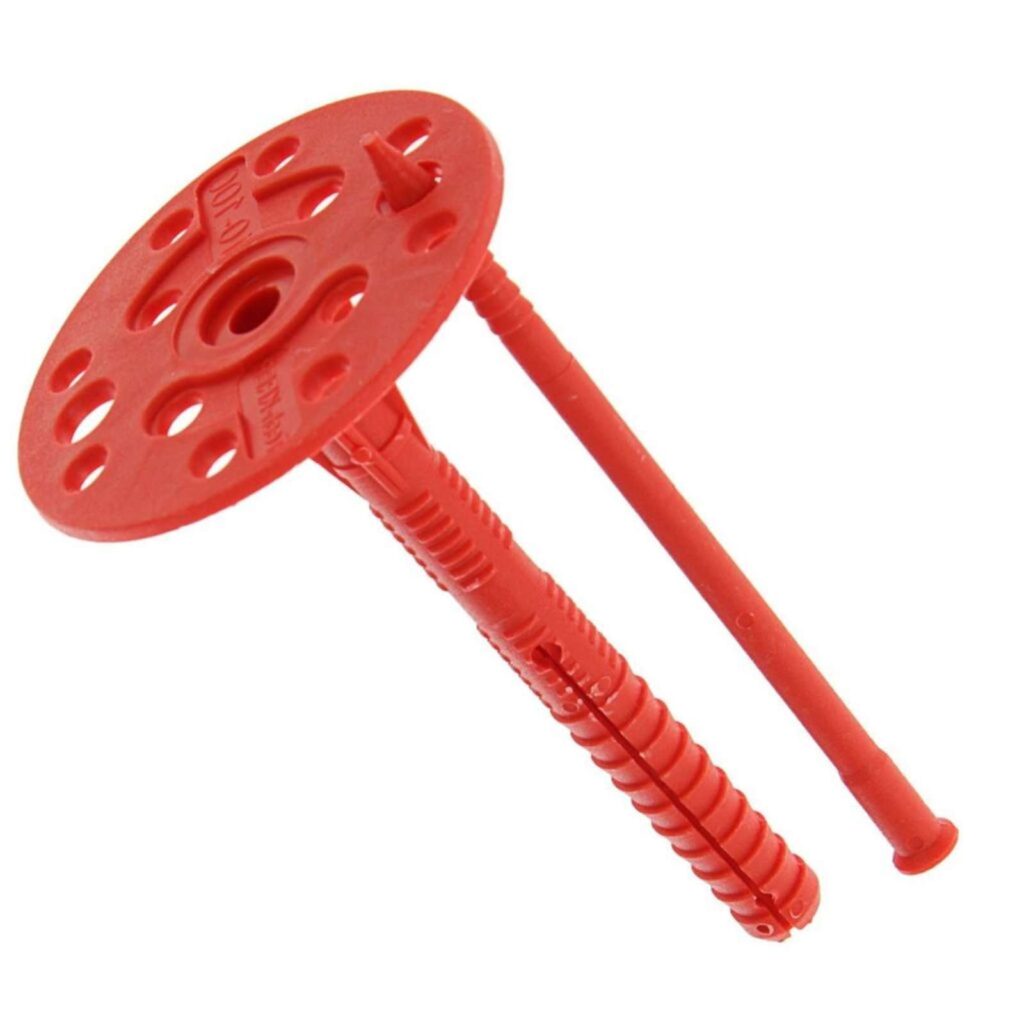
If the blanket is difficult to glue, then it can be fixed on the ceiling using special plastic fungi. Using a perforator, holes are made in the ceiling and fungi are inserted into them.
Photo: plastic dowel-gvo or fungus
Stage 2. Installation of the dampfer tape
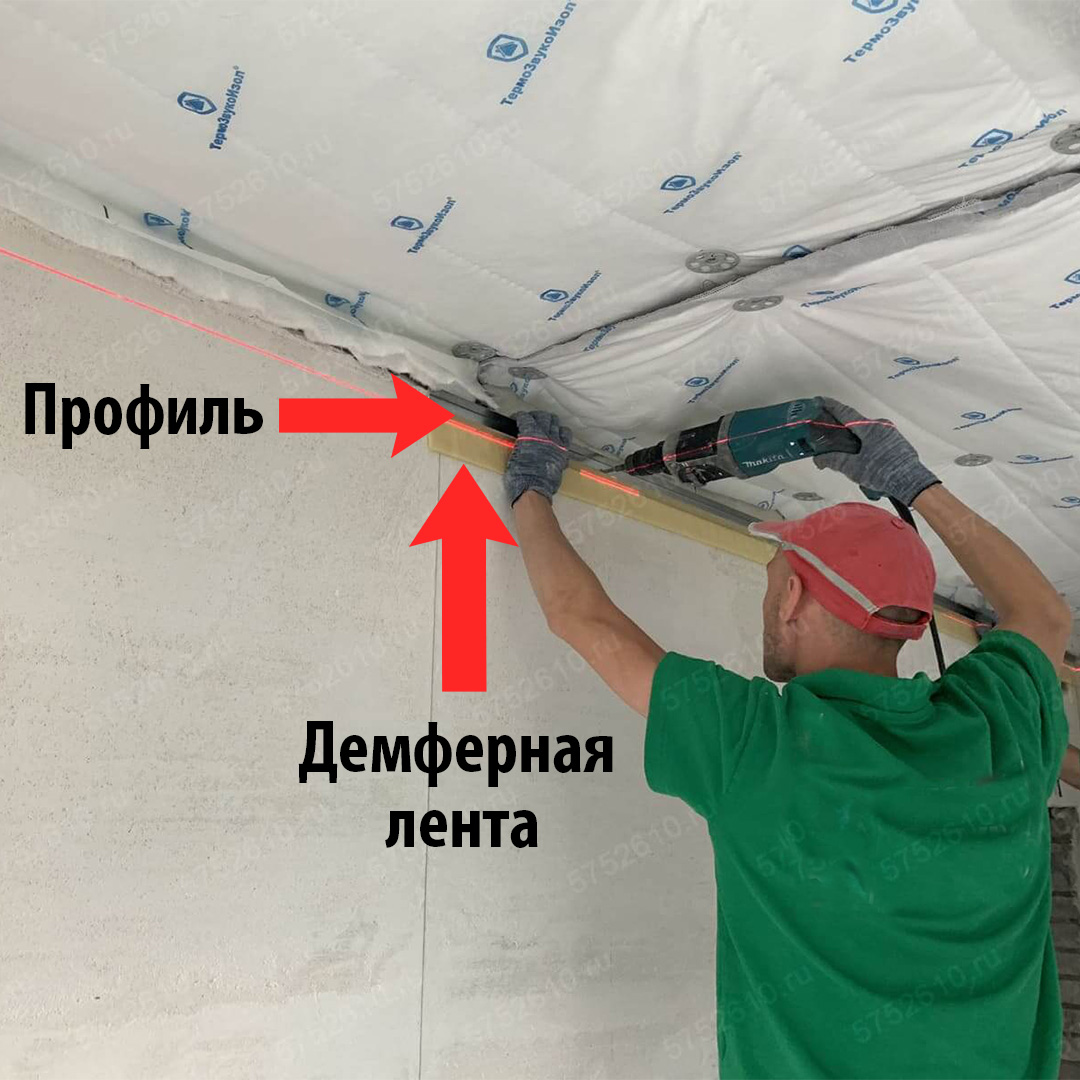
On the edges of the ceiling on the wall, it is necessary to glue the damping tape “Stopzvuk” V100. To do this, a vibro -acoustic sealant is applied to the tape and glued to the wall.
Photo: sealant should be applied in waves to the tape

This is done so that the vibration from the ceiling does not go to the walls. After the tape is glued to it, the extreme steel profile is screwed to it.
Photo: Installation of the damping tape and profile should be made taking into account the values of the laser leveling
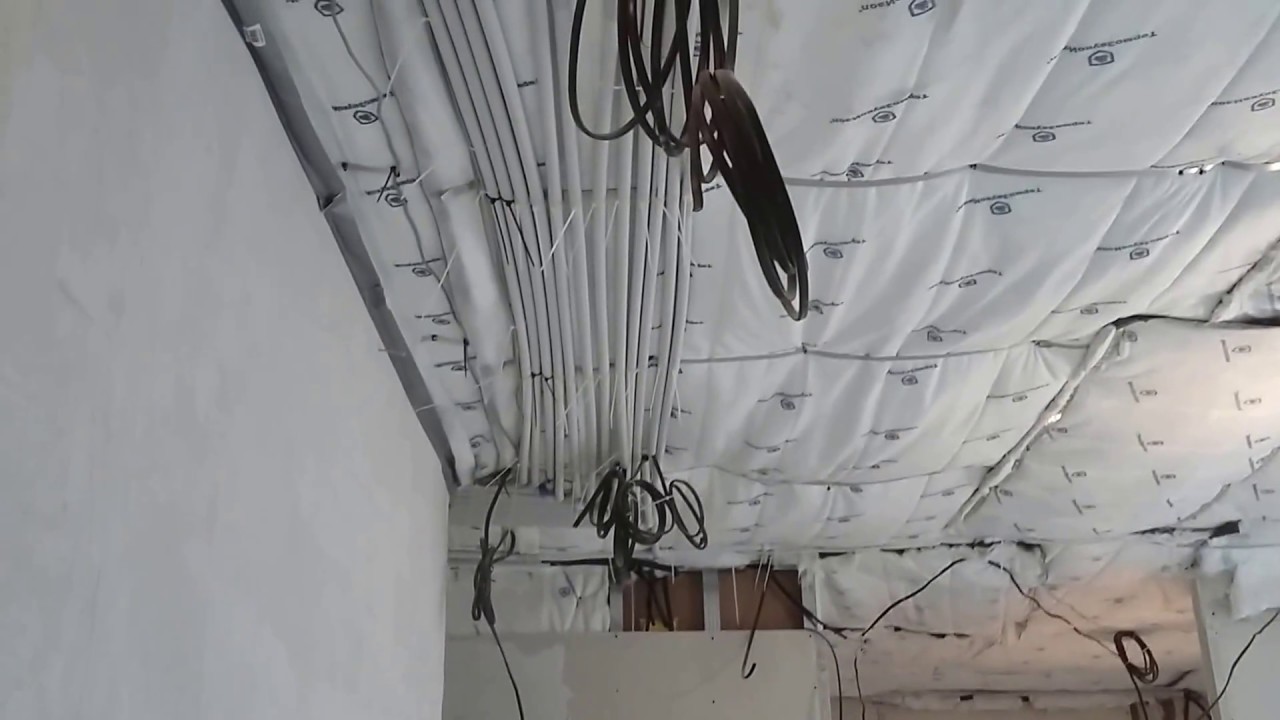
Stage 3. Installation of electricians
An electrician on the ceiling should be carried out after a soundproof blanket has been glued. This will save the canvas intact and provide access to electrical communications.
Photo: an electrician on the ceiling is made on top of a soundproof blanket
Stage 4. INTERNAGE OF VIBRUS SIVERS FOR THE METALRAL FARCH
Next, you need to install vibration suspensions. They are fixed on the ceiling in the same line with a step of 30–40 cm. On average per 1 m2, 3-4 such suspensions are required.
Photo: Vibro -suspension is screwed into one row
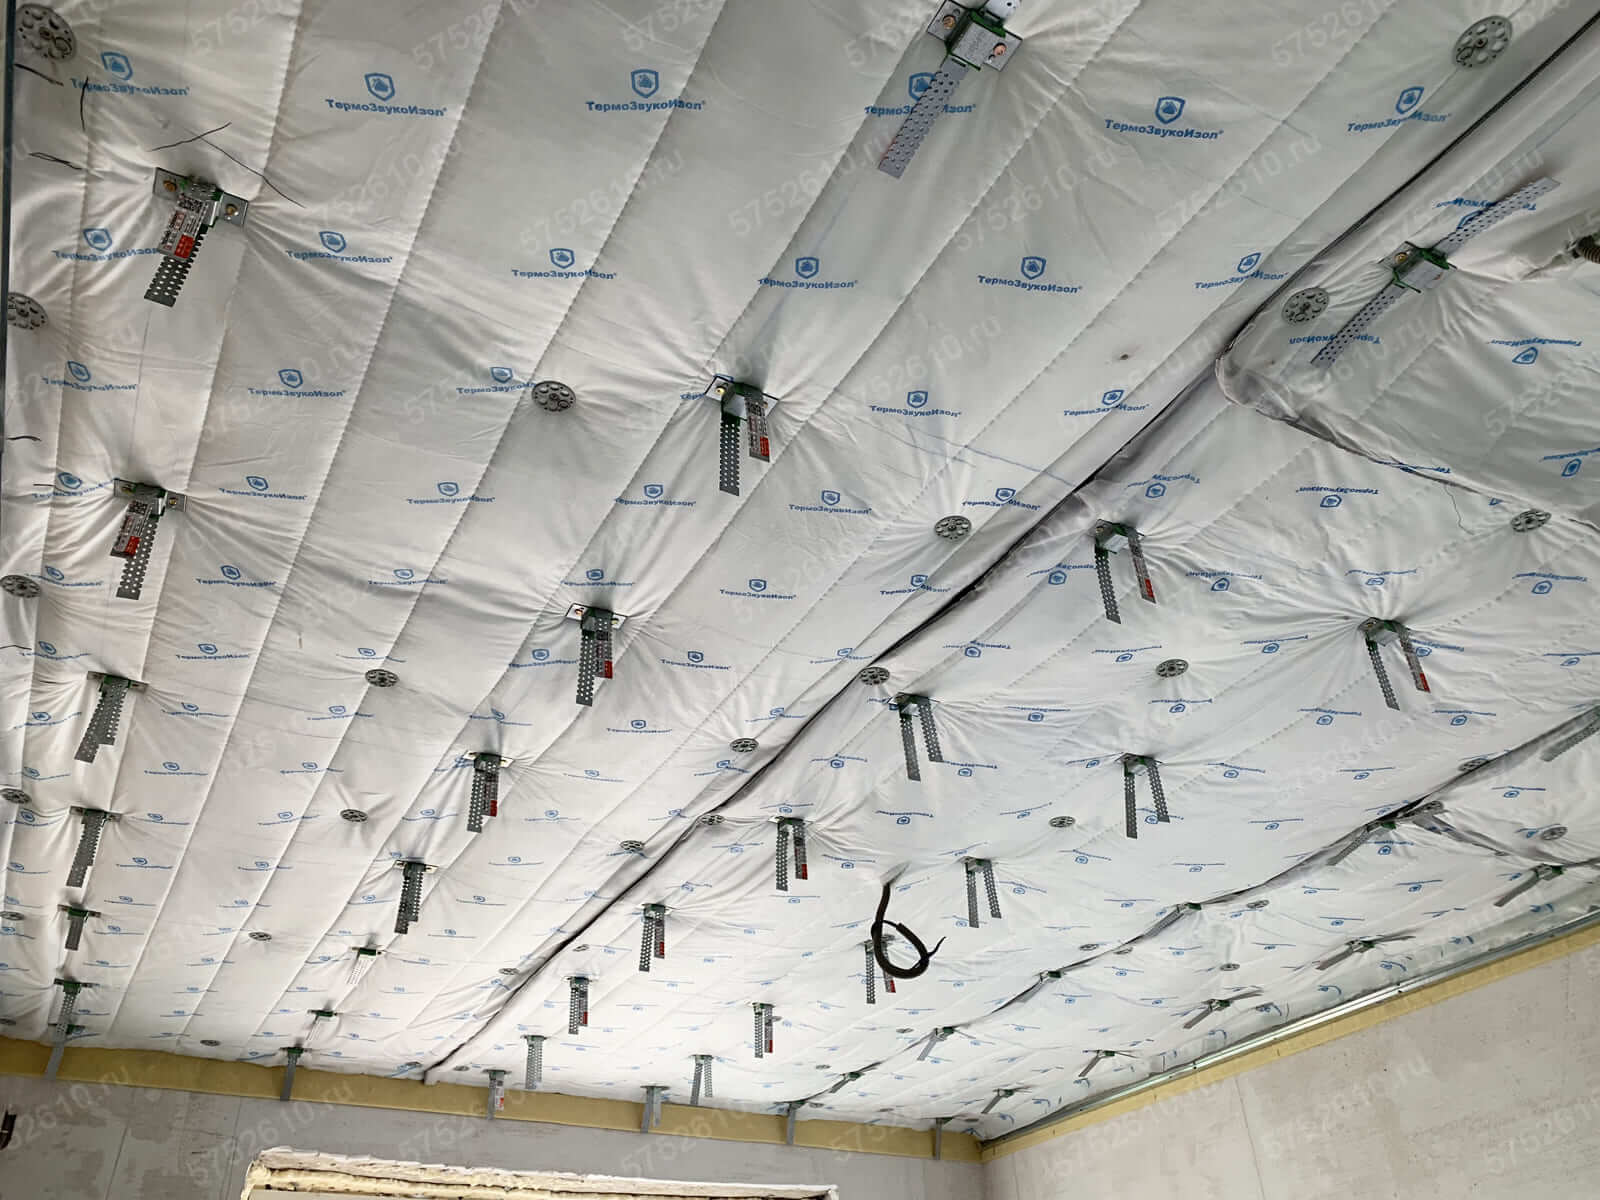
The vibration suspensions have a special damper layer, which does not allow vibrations to the frame.
Photo: vibration suspension extinguishes vibration
Stage 5. Stuffing for profiles for the frame
Inside the metal profile KNAUF PN-28/27, lay the chopped stoves “Stopzvuk” and fasten the profile to the suspensions using screws. The profiles of the frame should be 40 cm from each other.
Photo: the distance between the profiles should be 40 cm
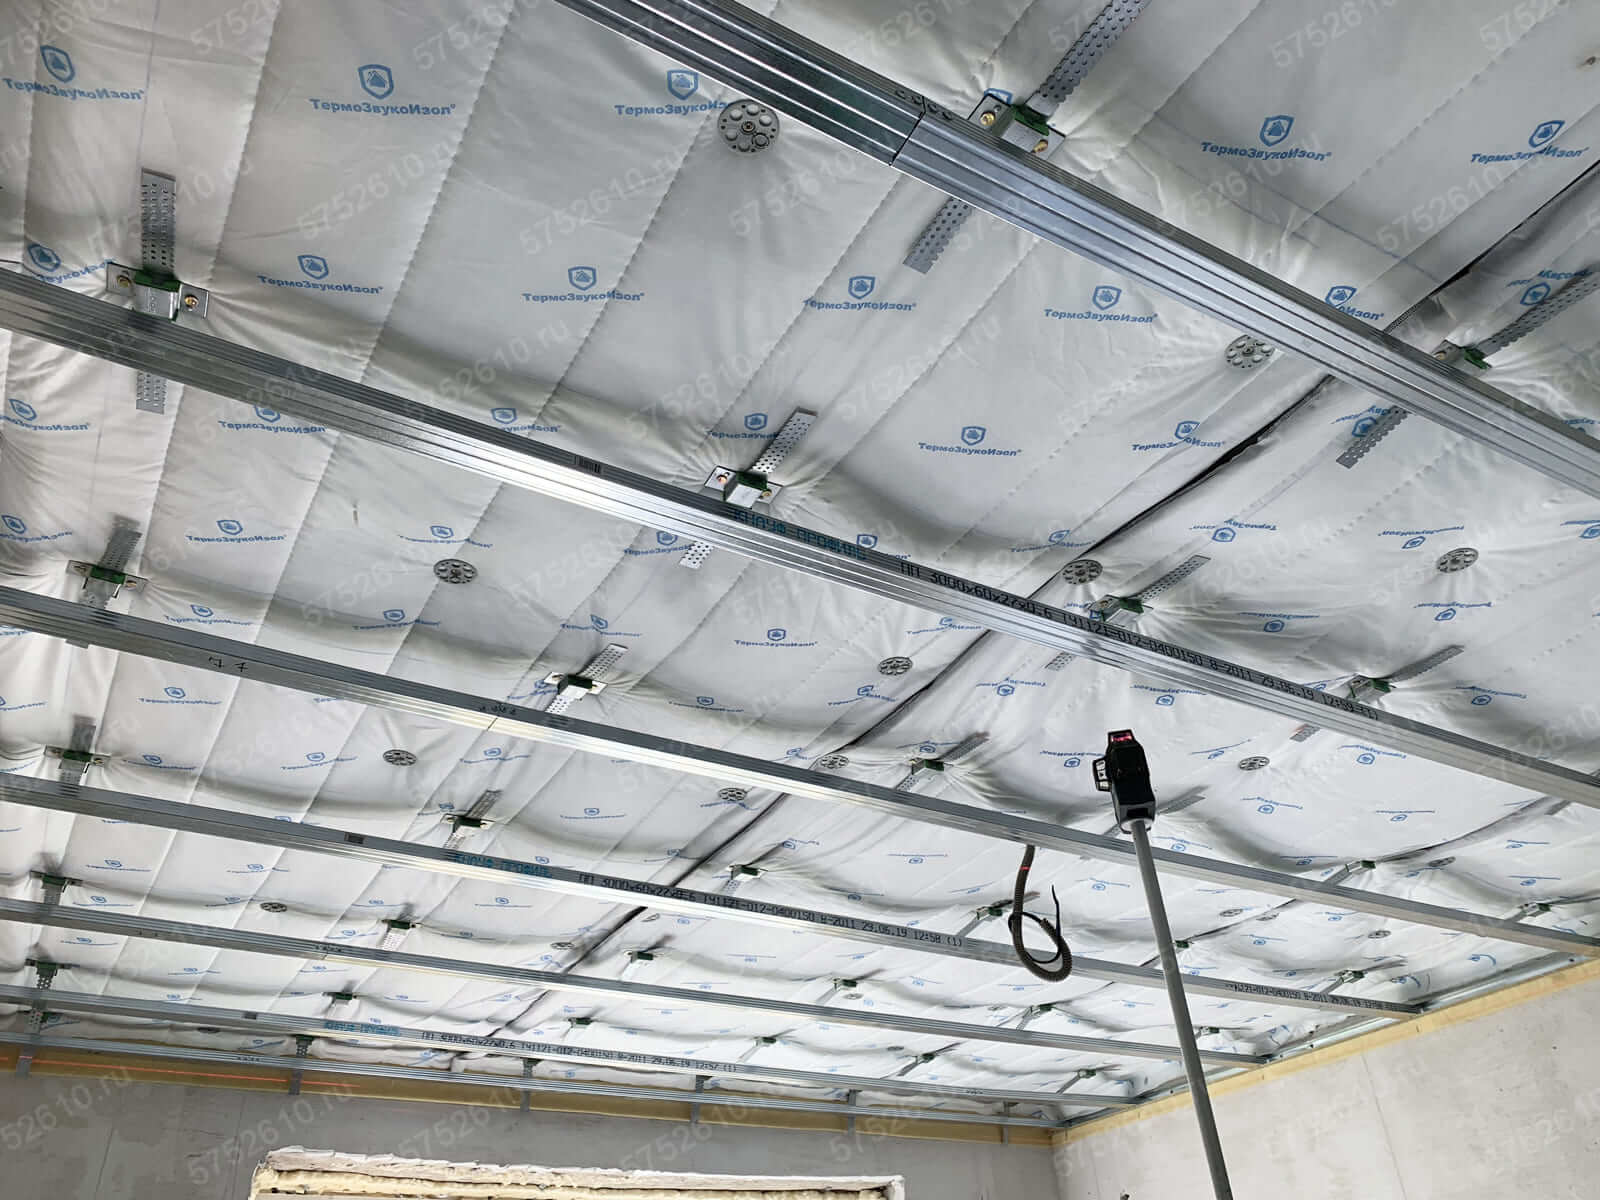
After all the longitudinal profiles have been installed, the transverse profiles of the ceiling sound insulation frame begin to install. To do this, in the profile, make a rectangular recess using stationery scissors. In the place where the transverse profile will be installed, a vibration suspension is set to fix the frame tightly. The result should be a frame with equal rectangular cells.
Photo: the frame has rectangular honeycombs
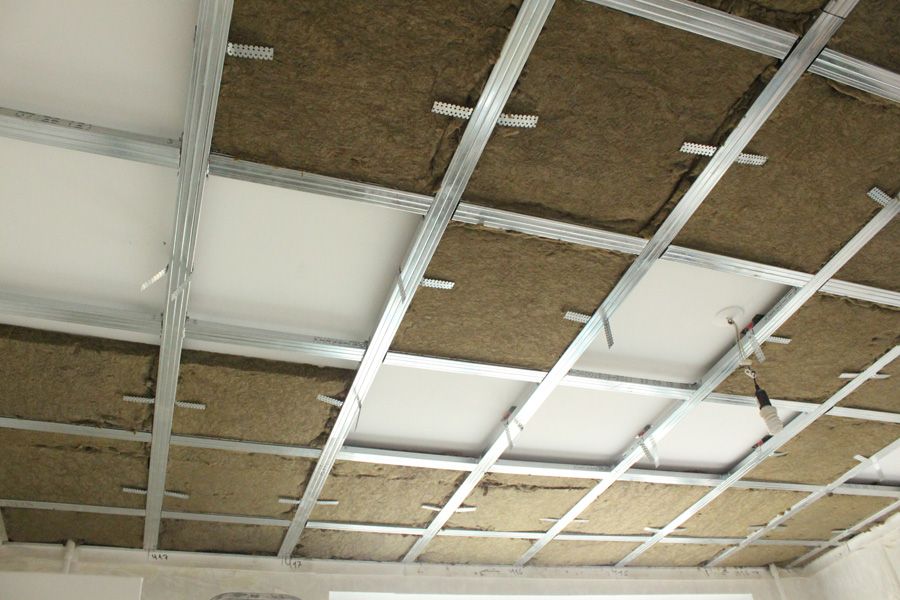
Stage 6. Sound insulation installation
Next, you need to fill out the entire structure with soundproofing stoves “Stopzvuk”.
Photo: sound insulation slabs
Plates must be cut under the honeycomb. It is important that the profiles themselves are also filled with cotton wool.
Photo: frame with soundproofing slabs
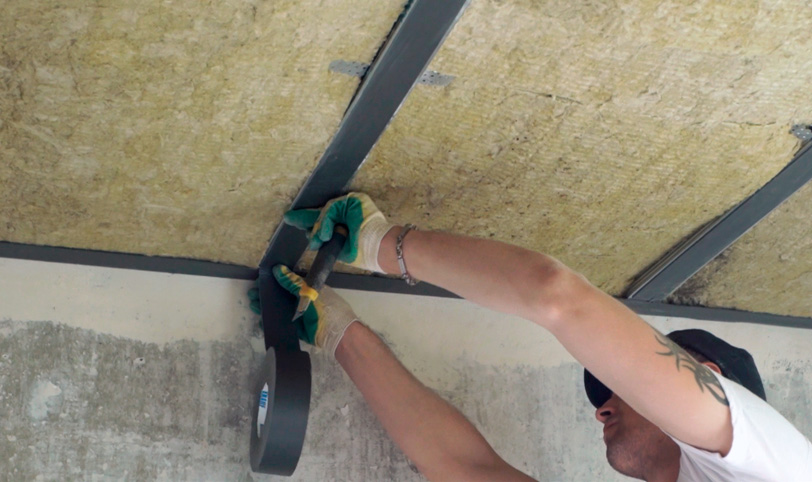
Stage 7. Play the frame with a dumpfer ribbon
After installing the frame, it needs to be pushed with a dumpfer ribbon so that the vibration is not transmitted to the ceiling.
Photo: Dampfer ribbon needs to be sealed all metal profiles
Stage 8. Installation of GVL sheets in 3 layers
Next, the entire frame is sheathed with gypsum fiber sheets (GVL). It is advisable to make several layers from GVL so that the sound is reflected back towards the neighbor. Gypsum cardboard is attached to the ceiling in a checkerboard pattern using screws.
Photo: GLL sheets must close the joints of the previous layer

Stage 9.
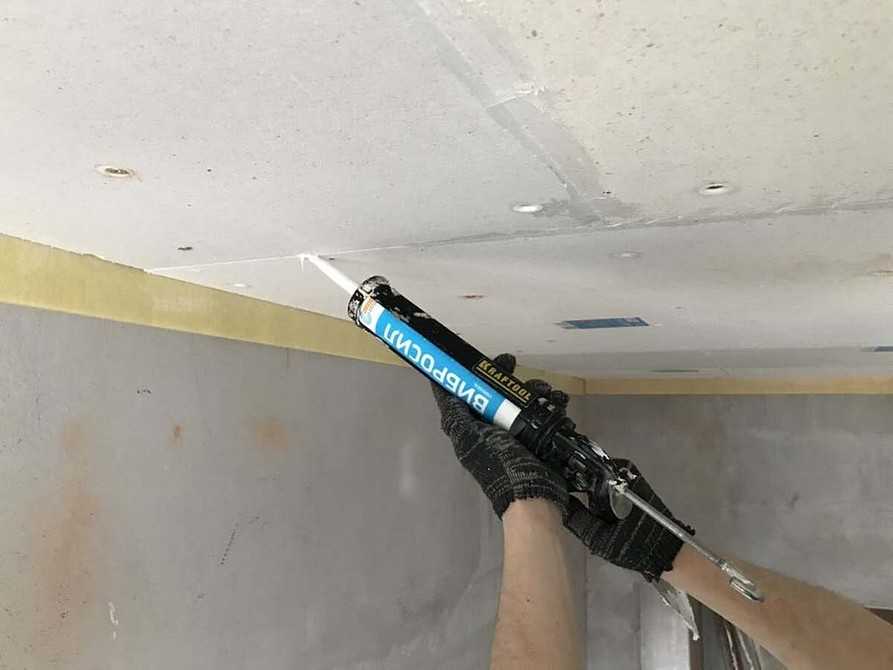
All joints between the sheets are smeared with a vibro -acoustic sealant.
Photo: all joints are covered with sealant
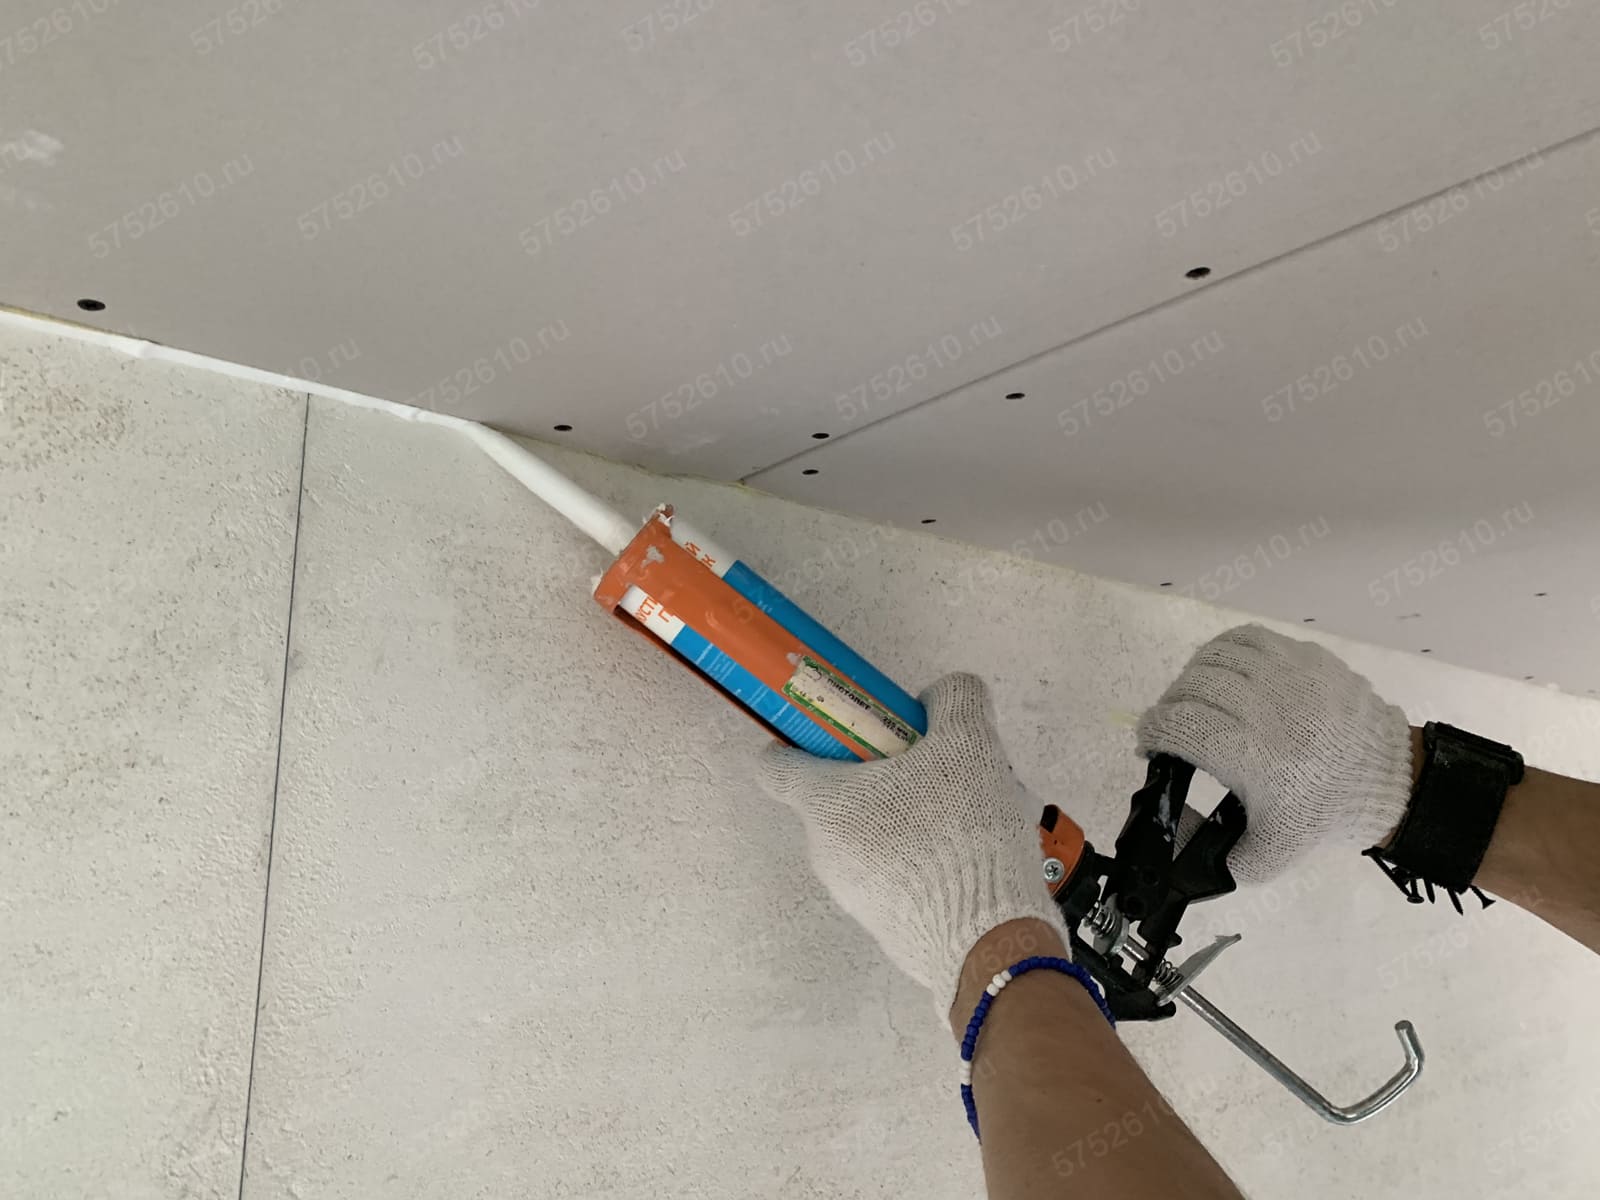
Then they cut off the damping tape under the ceiling and all the joints between the wall and the ceiling with a sealant are crushed.
Photo: the excess part of the damping tape needs to be trimmed
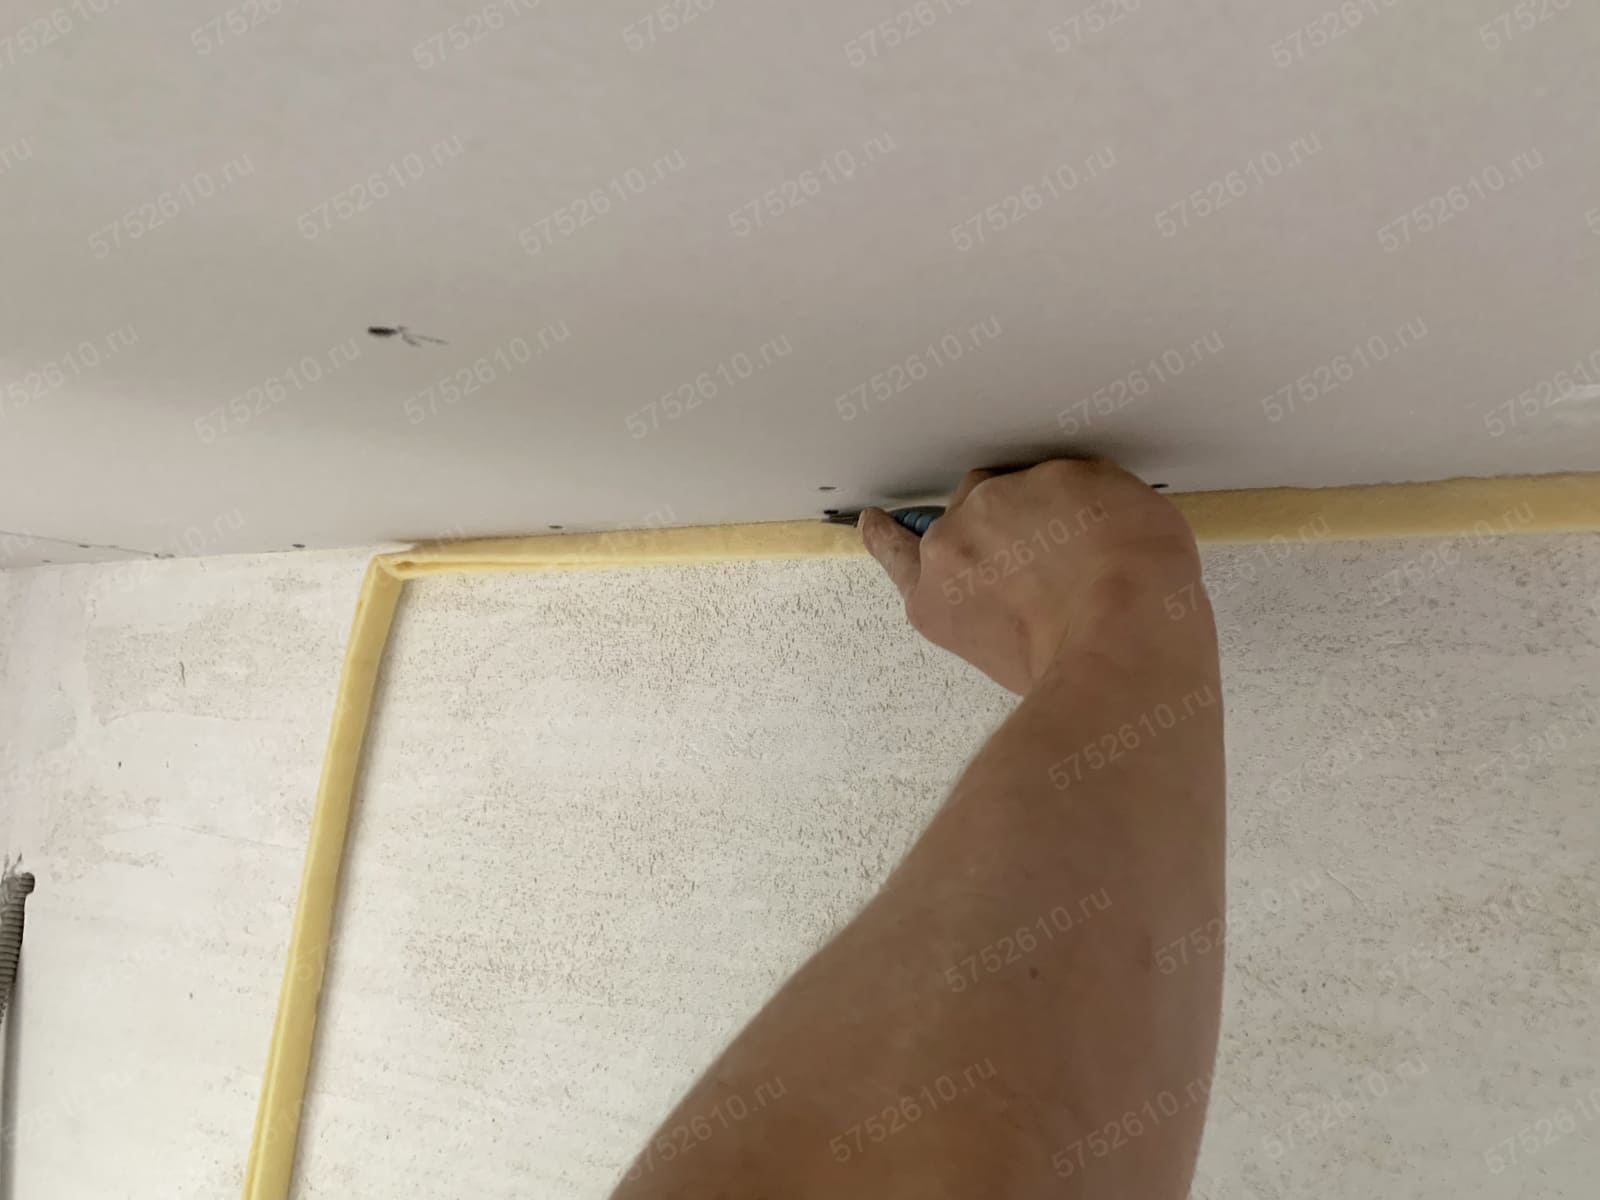
Photo: the edge between the ceiling and the sealant also passes into sealant
Conclusion
The frame insulation of the ceiling consists of a frame and soundproofing materials. Thanks to the multilayer structure, it helps to reduce the number of noise coming from the upper apartments.