Plaster is the basic decoration of walls, which is done at the initial stage of draft work. In this article, we consider what mechanized wall plaster is, what are the pros and cons and how to make mechanized wall plaster on the example of a plastering station.
Content:
- What is mechanized wall plaster?
- Pros of mechanized wall plaster
- Cons of mechanized wall plaster
- Mechanized wall plaster. How is it done?
- Type of control unit
- How to prepare a plaster machine for work
- How to configure the consistency of the plaster mixture
- How to make wall plaster
What is mechanized wall plaster?
The plaster is done to level the walls and prepare them for putty – the final layer before painting or gluing wallpaper. The plaster is cement and gypsum.
Cement is used in wet and unheated rooms, since it does not absorb moisture. Even cement plaster is made where they will glue porcelain tiles or ceramic tiles to the wall.

Photo: cement plaster
Gypsum plaster is used in other rooms. It lies easier on the wall, and after it it is easier to putty the walls.
The walls can be plastered manually and mechanized. In a manual method, the specialist first kneads the plaster solution, and then throw it on the wall and smooth. The process is difficult and long.
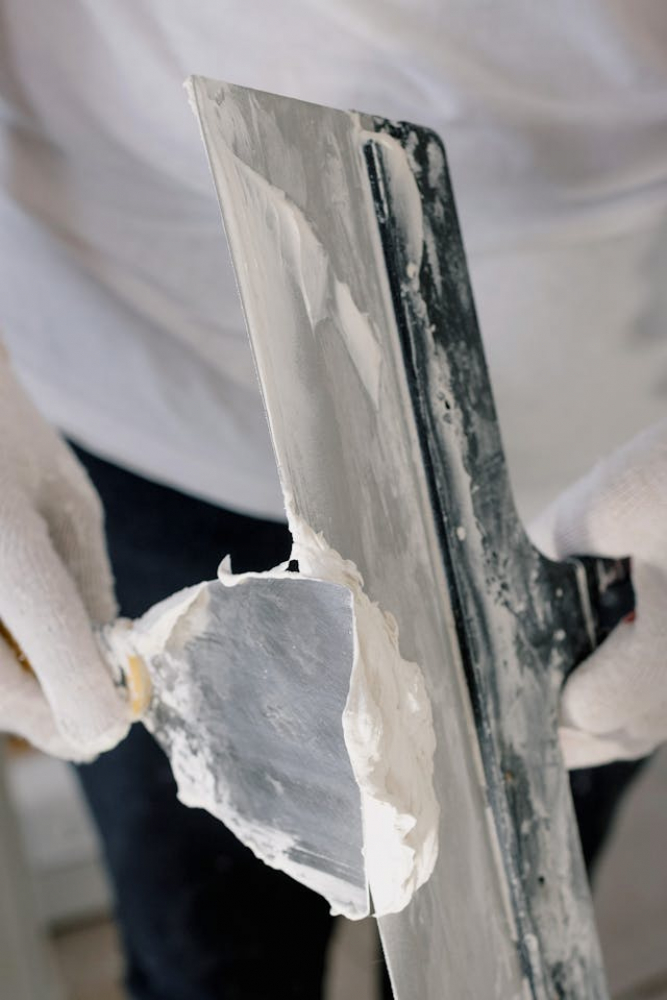
Photo: wall plaster manually
With mechanized plaster, a plaster station is used. This device first mixes the plaster, and then supplies the solution to the wall. It remains only for a person to flatter a layer of plaster using the instrument rule.
Pros of mechanized wall plaster
- The most important advantage of mechanized plaster is that it accelerates the process of plastering. A team of three people can plastered an apartment with an area of 60–70 m2 in just a couple of days. Manually such an apartment can be made for a couple of months.
- Mechanized plaster is cheaper than manual by about 2 times. If you use a gypsum mixture when plastering walls, then for mechanized plaster gypsum is slightly cheaper than for manual, since it contains less additives that give elasticity to the material.
- Mechanized plaster allows you to make walls with minimal deviations. This is due to the fact that workers devote less time to hard work and more to align the walls.
- In the machine method, you do not need to apply several layers of plaster. Only one layer is enough for the wall to become flat. With manual plaster, 2-3 layers are usually made.
Cons of mechanized wall plaster
- The disadvantage of mechanized plaster is heavy and bulky equipment. If you use an electric station, then it will have to be lifted into the apartment. This is a difficult event, especially if there is no elevator or it has not yet been connected.
- There are stations with an engine engine, but they, as a rule, are left on the street, and the solution is served through the hoses. This method creates a lot of dirt and requires additional cleaning of entrances and apartments.
- The mechanized way usually does not put small apartments with an area of less than 40 m2. Because the price of plastering walls does not cover the delivery and maintenance of equipment. Therefore, in small rooms, plaster is done manually.
Mechanized wall plaster. How is it done?
Consider the process of mechanized wall plaster on the example of the PFT Ritmo XL plaster station. This station operates from the network, kneads and supplies a solution under high pressure. It consists of such elements as:
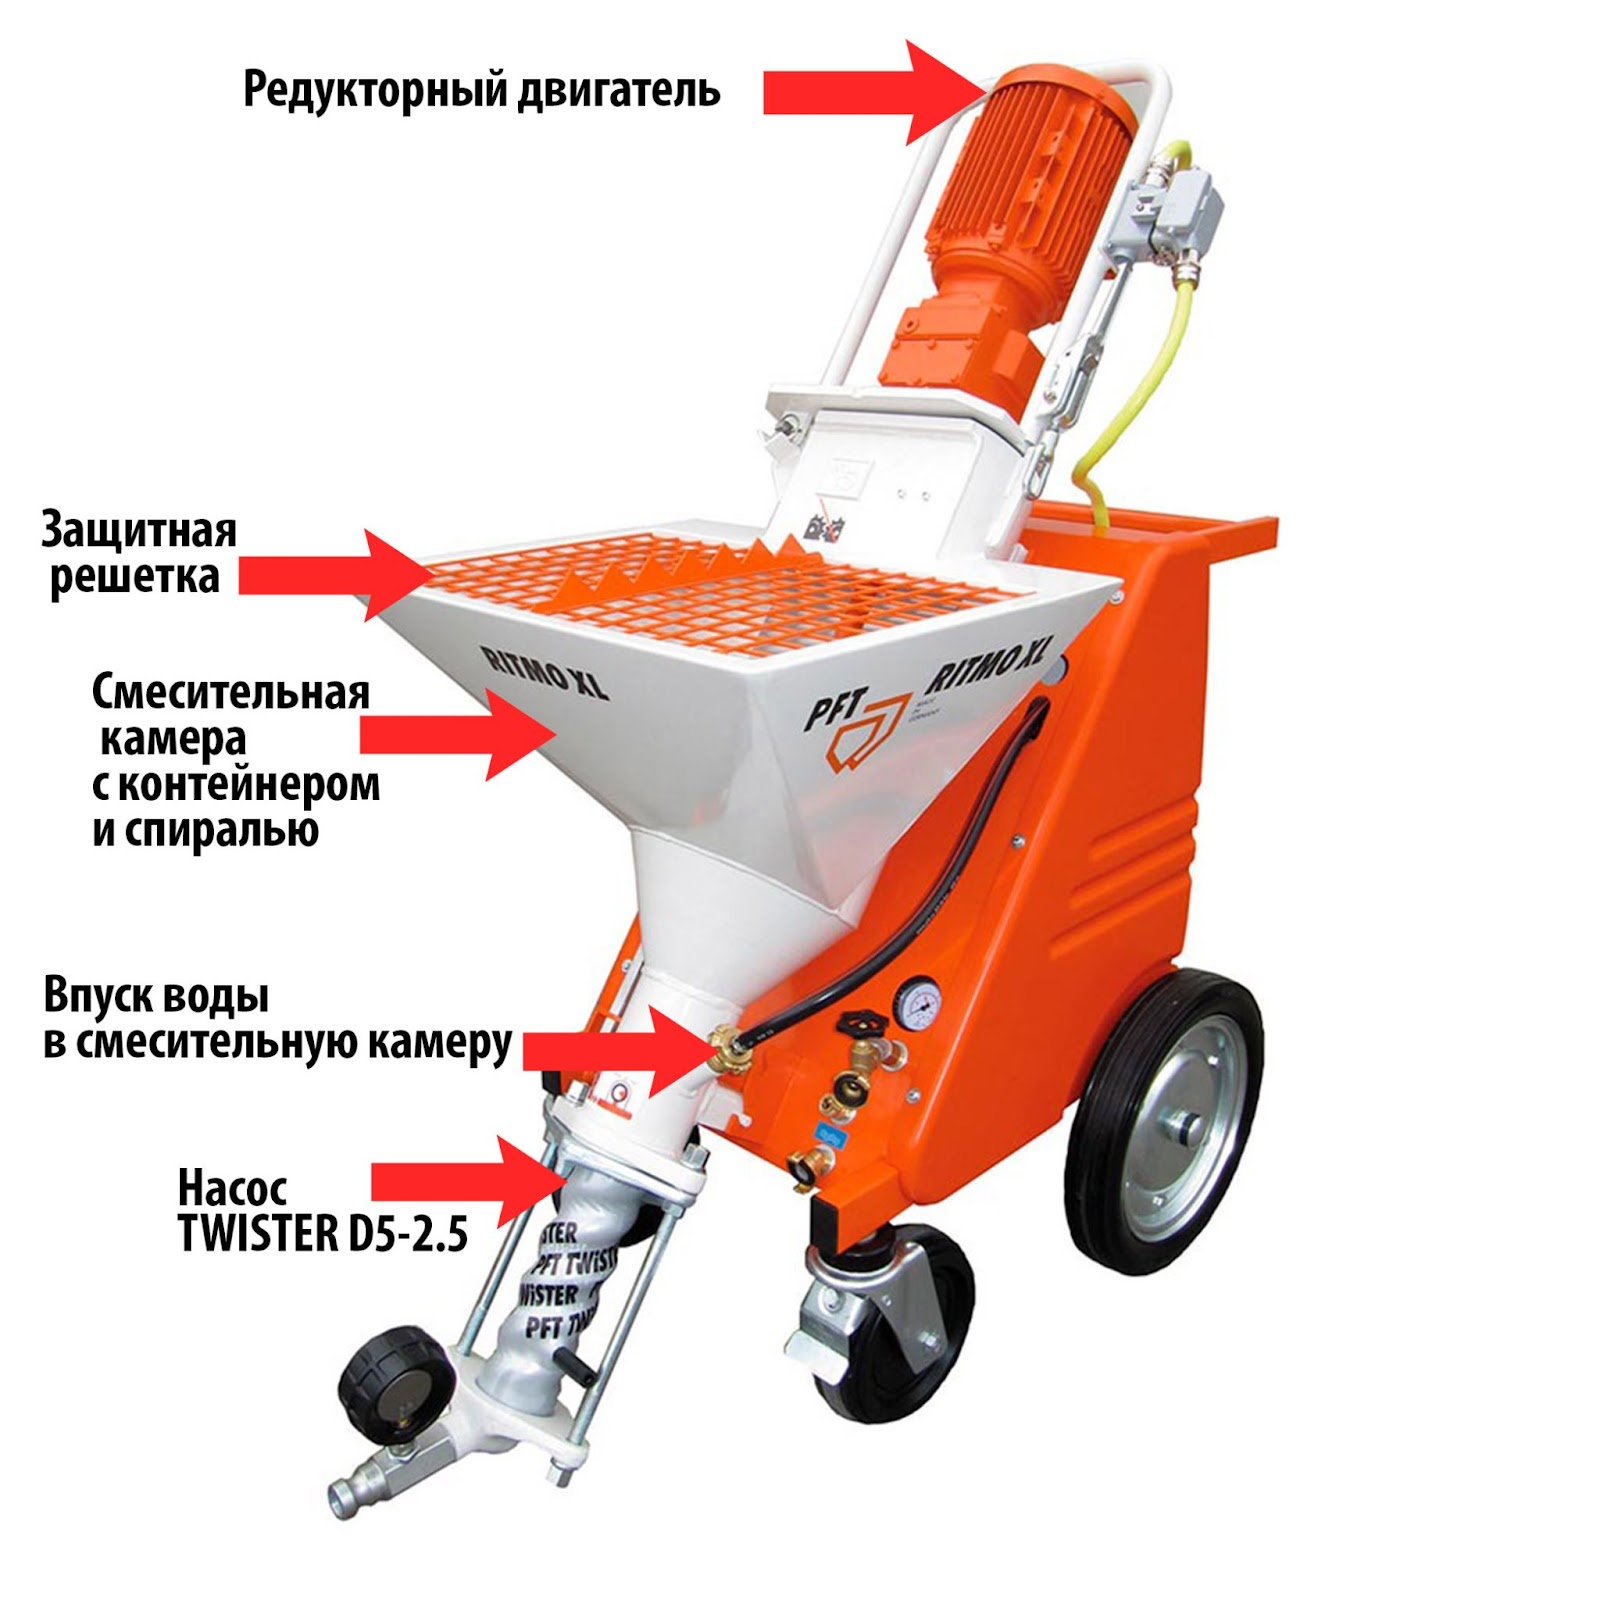
Photo: plaster station

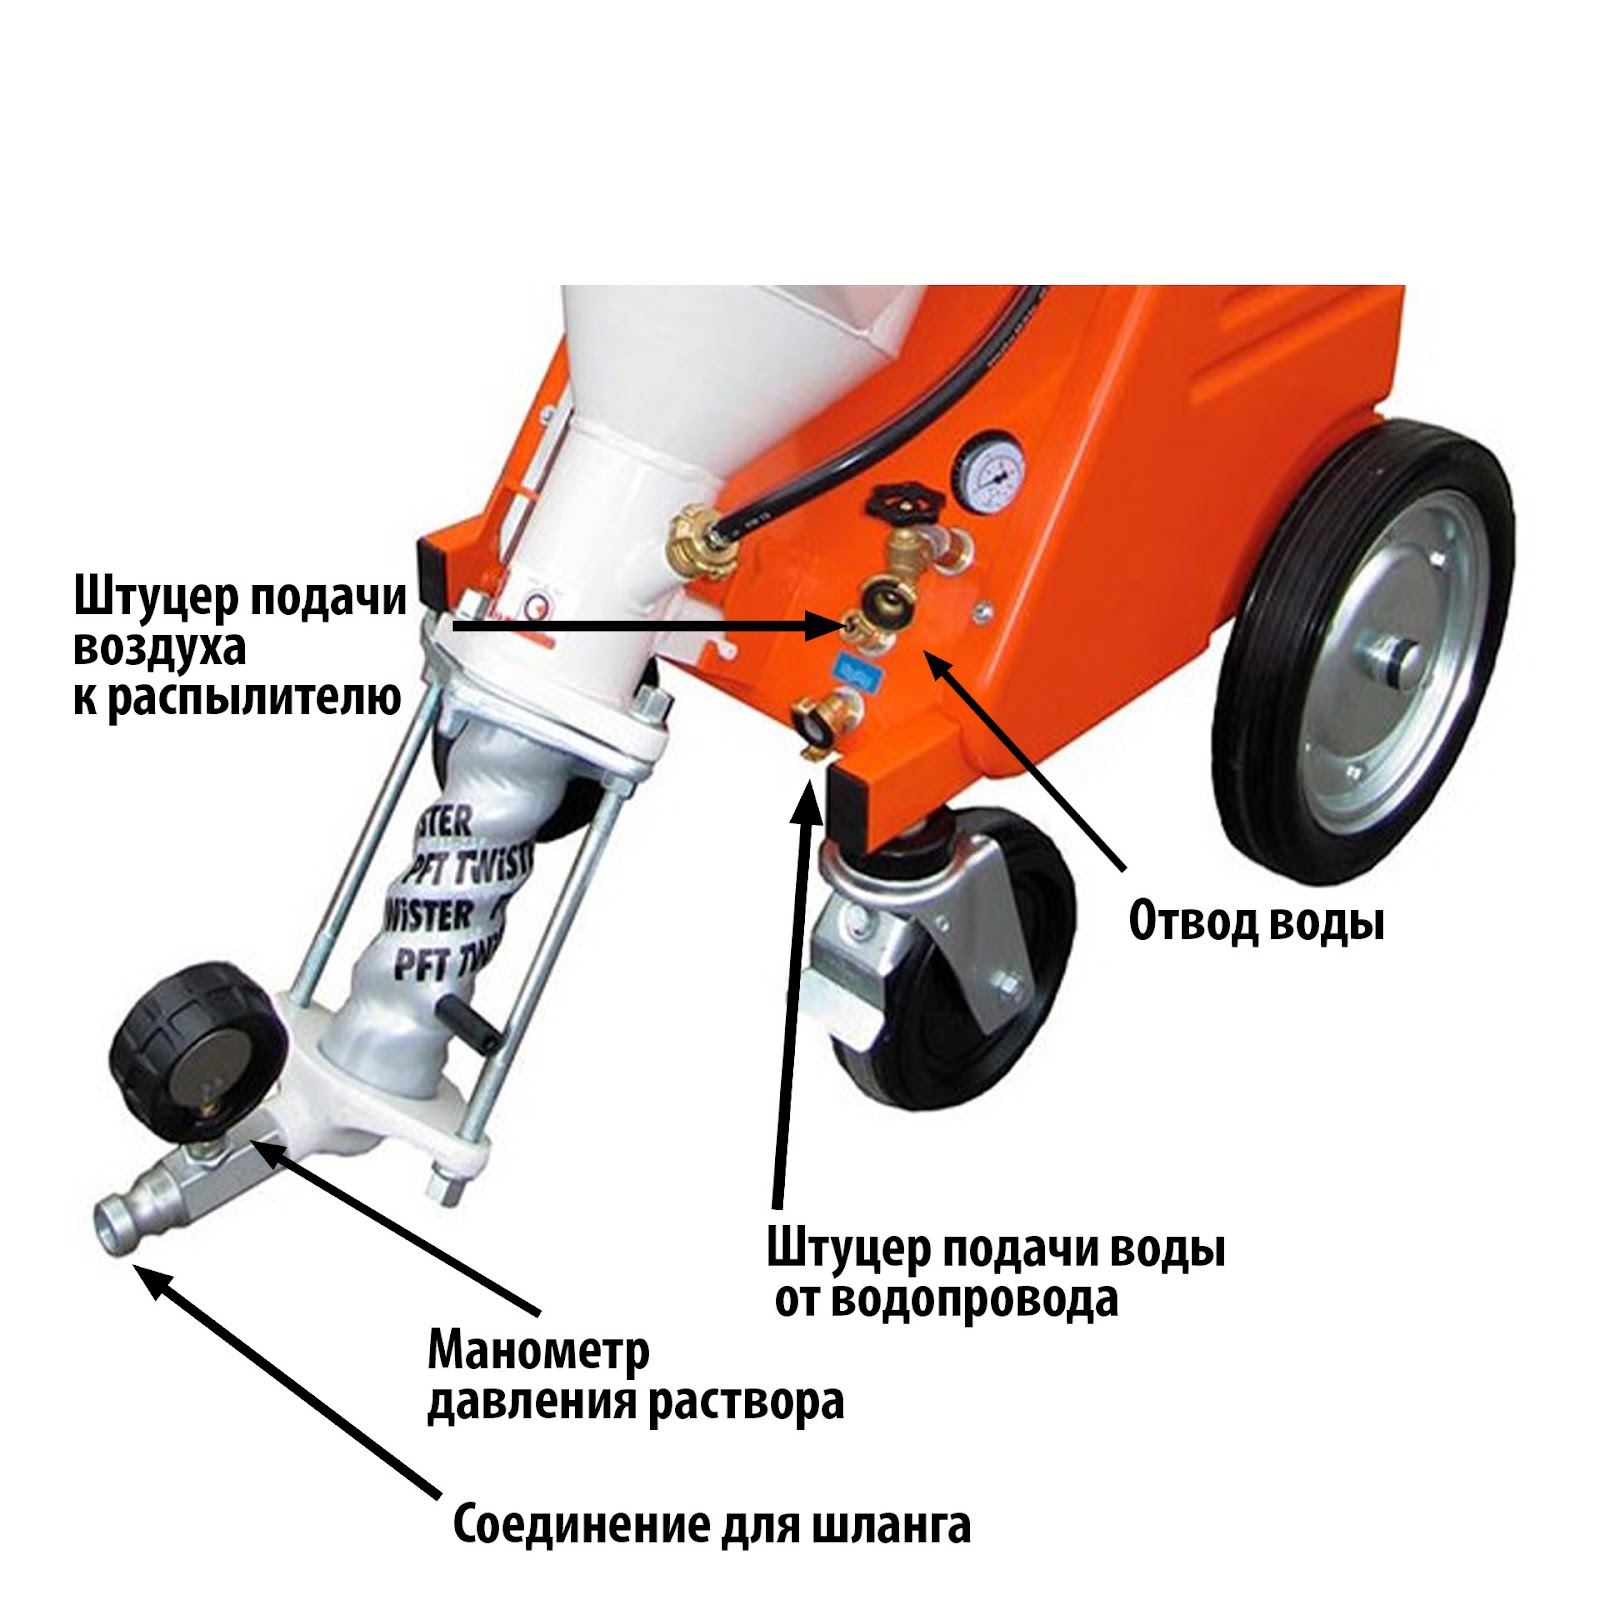
Type of control unit
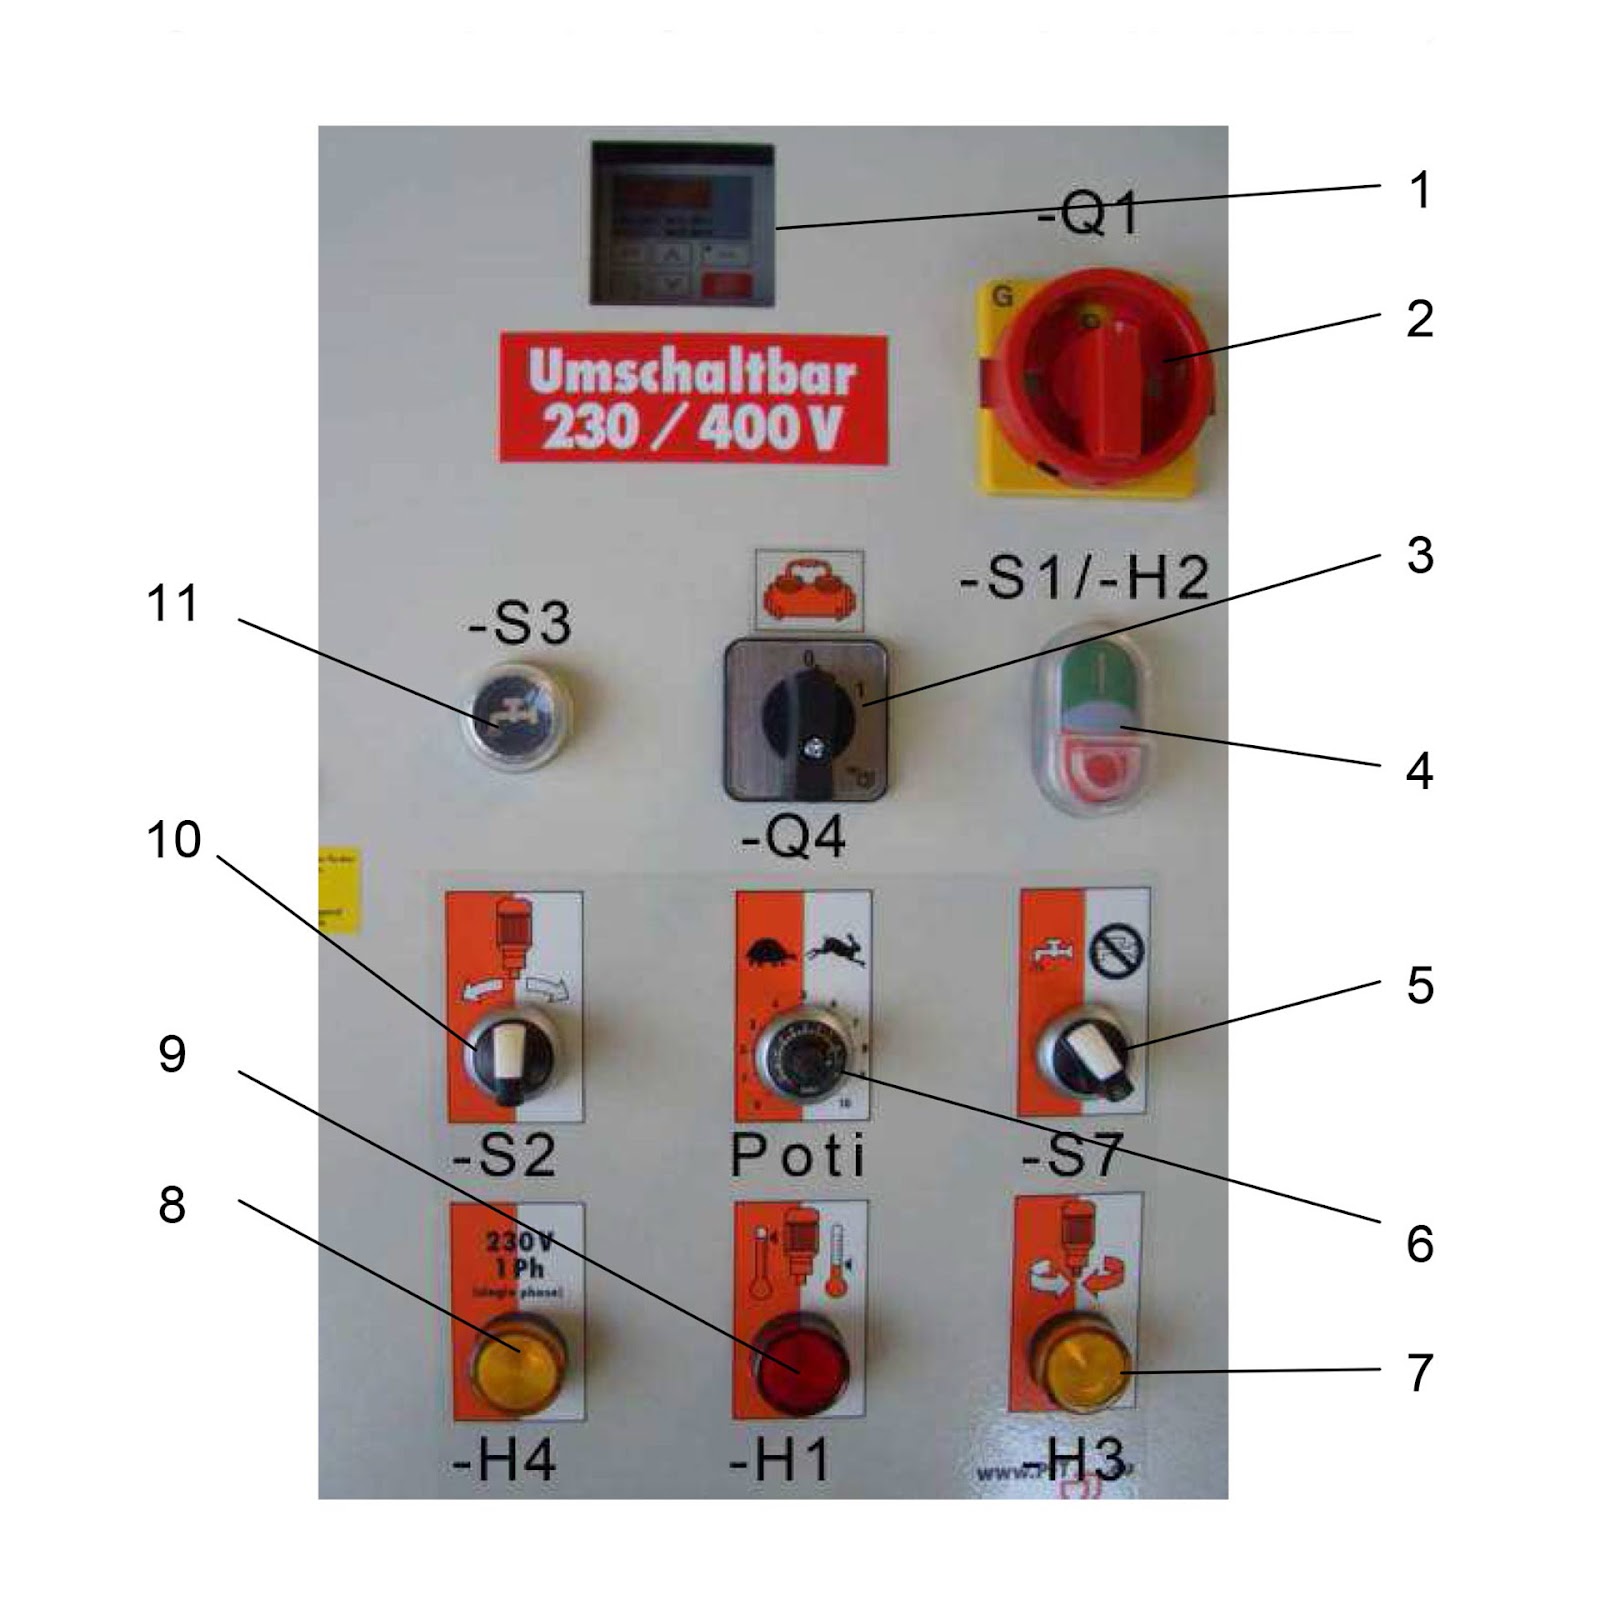
The control machine is controlled using the control unit. It is located on the back of the device.
Consider the control panel itself.
- The viewing glass of the frequency converter.
- The main reversal switch is simultaneously an emergency switch.
- Compressor switch on/off.
- ON/OFF voltage shutdown button.
- Switch to work with water (as a mixer), without water (as a pump).
- Engine speed, amount of material.
- Yellow lamp indication of the change in the direction of rotation.
- Red lamp indication of engine malfunctions.
- Yellow lamp indication of work on 220V.
- Engine rotation selector.
- Water launch button.
Photo: Plaster control panel
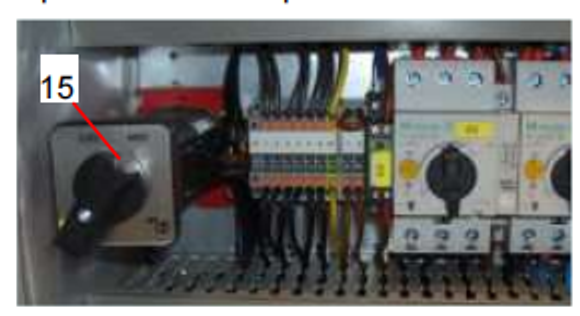
Just below the panel there are connectors for connecting to the network.
Photo: connectors for connecting a plaster machine to the network

12. The connector of the 380V 380V voltage, the current 32A or through an adapter of 1-phase 220V, 16A.
13. Compressor connection connector.
14. The connector connection of the pressure pump, 220 V, 1 phase.
Photo: switch 220 V / 1 phase or 380b / 3 phases
How to prepare a plaster machine for work
First you need to assemble a screw pair.
Photo: The screw part of the plaster machine
This follows:
- Screw the rotor into the stator.
- Lubricate the rotor and stator with grease.
Next, the screw itself is installed in the regular place and evenly tighten the bolts with hairpins.
Next, the mixing spiral is installed.
Photo: mixing spiral
It is located inside the mixing chamber.
Photo: Basic elements of the plaster machine

To do this, first you need to throw off the gearbox, then remove the protective grill. After that, the spiral itself is installed in the groove of the rotor.
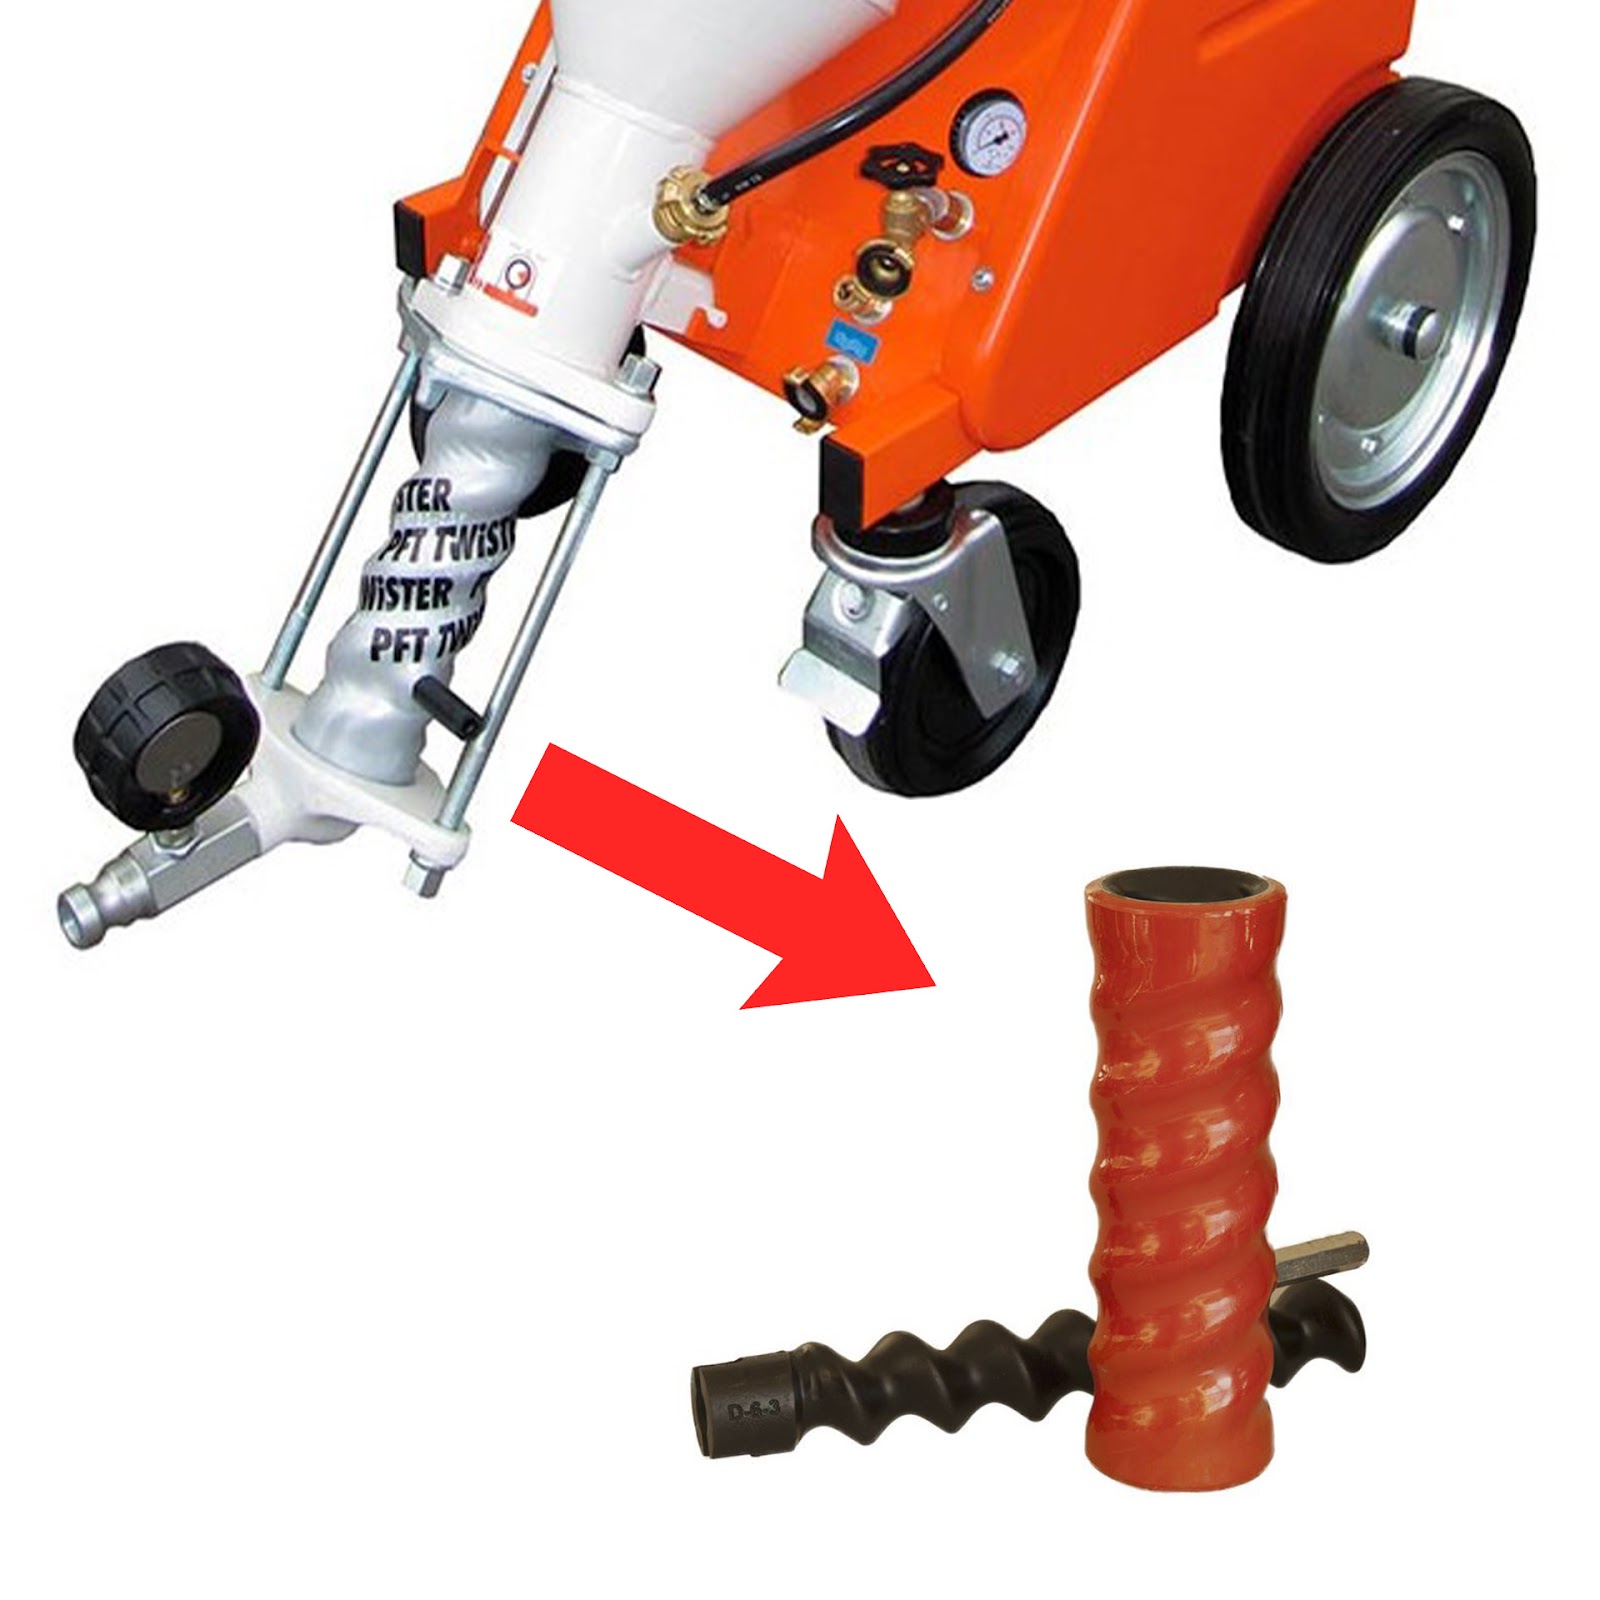
The next step is to connect water to the mixing zone. To do this, the hose is connected to the water supply fitting from the water supply.
Photo: Basic elements of the plaster machine
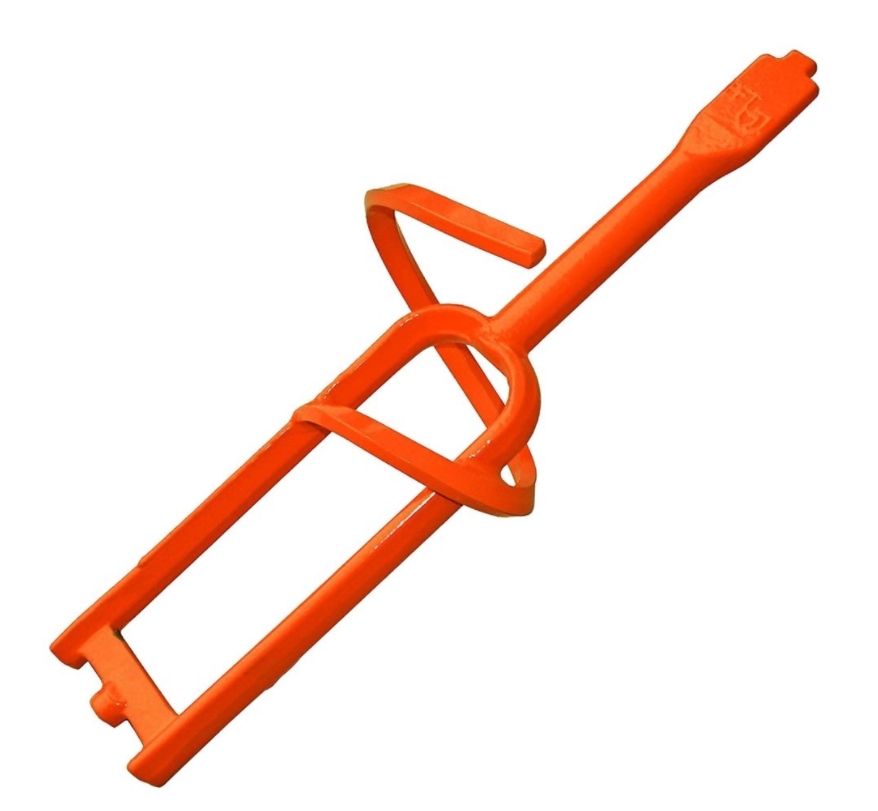
Then connect the solution of the solution to the mortar gun.
The hose with a gun is connected to the station in the screw, where the pressure gauge.
After that, the air hose is connected to the station to the air supply to the sprayer.
Next, the hose is attached to the gun.
Before work, you should check the water pressure in the system using a pressure gauge and make sure that the compressor is turned on.
How to configure the consistency of the plaster mixture
In order for the plaster to be the desired consistency, the technology of preparation of the solution should be observed.
- It is necessary to pour a dry mixture into the bunker, start the station, remove the hose and configure the consistency of the solution with a needle valve.
- The density of the solution depends on the amount of water supplied. This value is regulated in a flask with water.
By the way: The more the solution is the solution, the better. It is optimal when a 2.5 cm layer is already sliding along the wall.
How to make wall plaster
Before plaster on the wall, lighthouses should be installed. These are metal profiles that are exposed to the laser level perpendicular to the surface.
The wall should be cleared of dust and cement residues.
Next, a solution is applied to the wall from the bottom up. At the same time, the gun must be kept horizontally.
After applying putty, the wall is smoothed with the rule according to the lighthouses. 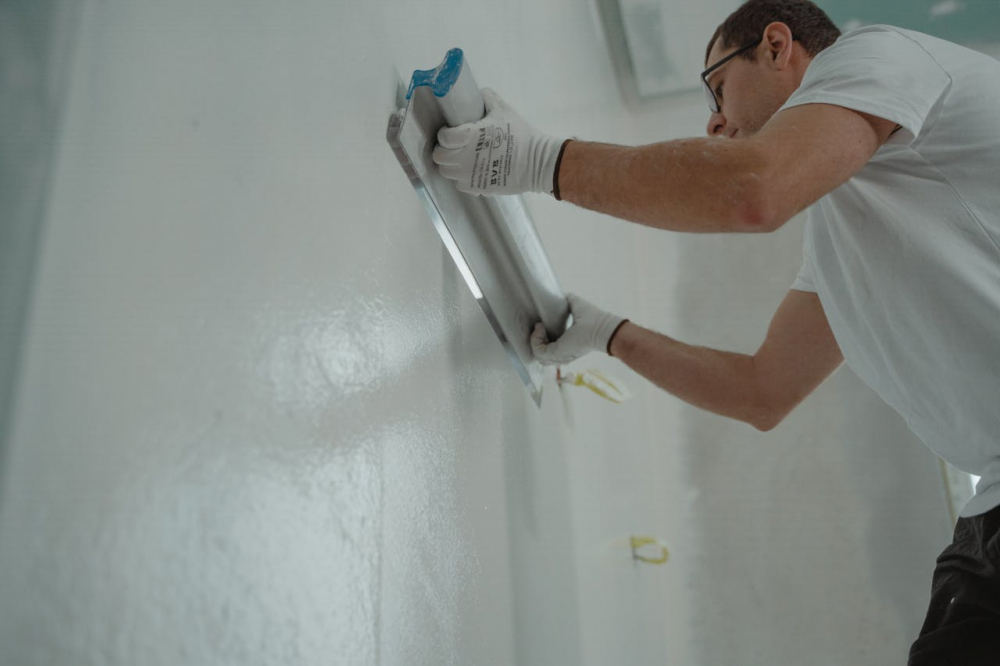
Photo: alignment of plaster rule
If after smoothing somewhere there is not enough solution, it is added with a gun or manually.
Then the entire surface is curved with a rubber sponge so that the plaster becomes more smooth.
After the solution is slightly dried, the beacons are taken out of the wall, and the strokes are covered with plaster. The plaster station itself should be thoroughly washed with water after work.
Conclusion
Mechanized plaster is cheaper and faster than wall plaster manually. But it is not done in small rooms. Mechanized plaster allows you to make a smooth and even surface, which will then be conveniently putty.