If the room has high ceilings of more than three meters, then you can diversify the space using a two -level ceiling from GKL. This solution allows you to create an unusual voluminous design made of drywall, which will consist of several tiers.
If you insert the backlight into the frame, you can create the effect of a “soaring” ceiling. In this article, we will consider what a two -level ceiling made of GKL consists of and how to make a two -level gypsum cardboard frame.
Content:
- What is the two -level GKL ceiling
- The main materials for the frame of the two -level ceiling
- Materials for lining a two -level ceiling
- Equipment for creating a two -level GKL ceiling
- The installation plan of the frame for the two -level ceiling
- Installation of guides, suspensions and profiles of the frame of the first level
- Installation of a second -level frame
- Installation of GKL to the frame of the two -level ceiling

What is the two -level GKL ceiling
The two -level ceiling can be of any shape and size, but it always consists of a frame and external skin of drywall.
Photo: two -level GKL ceiling
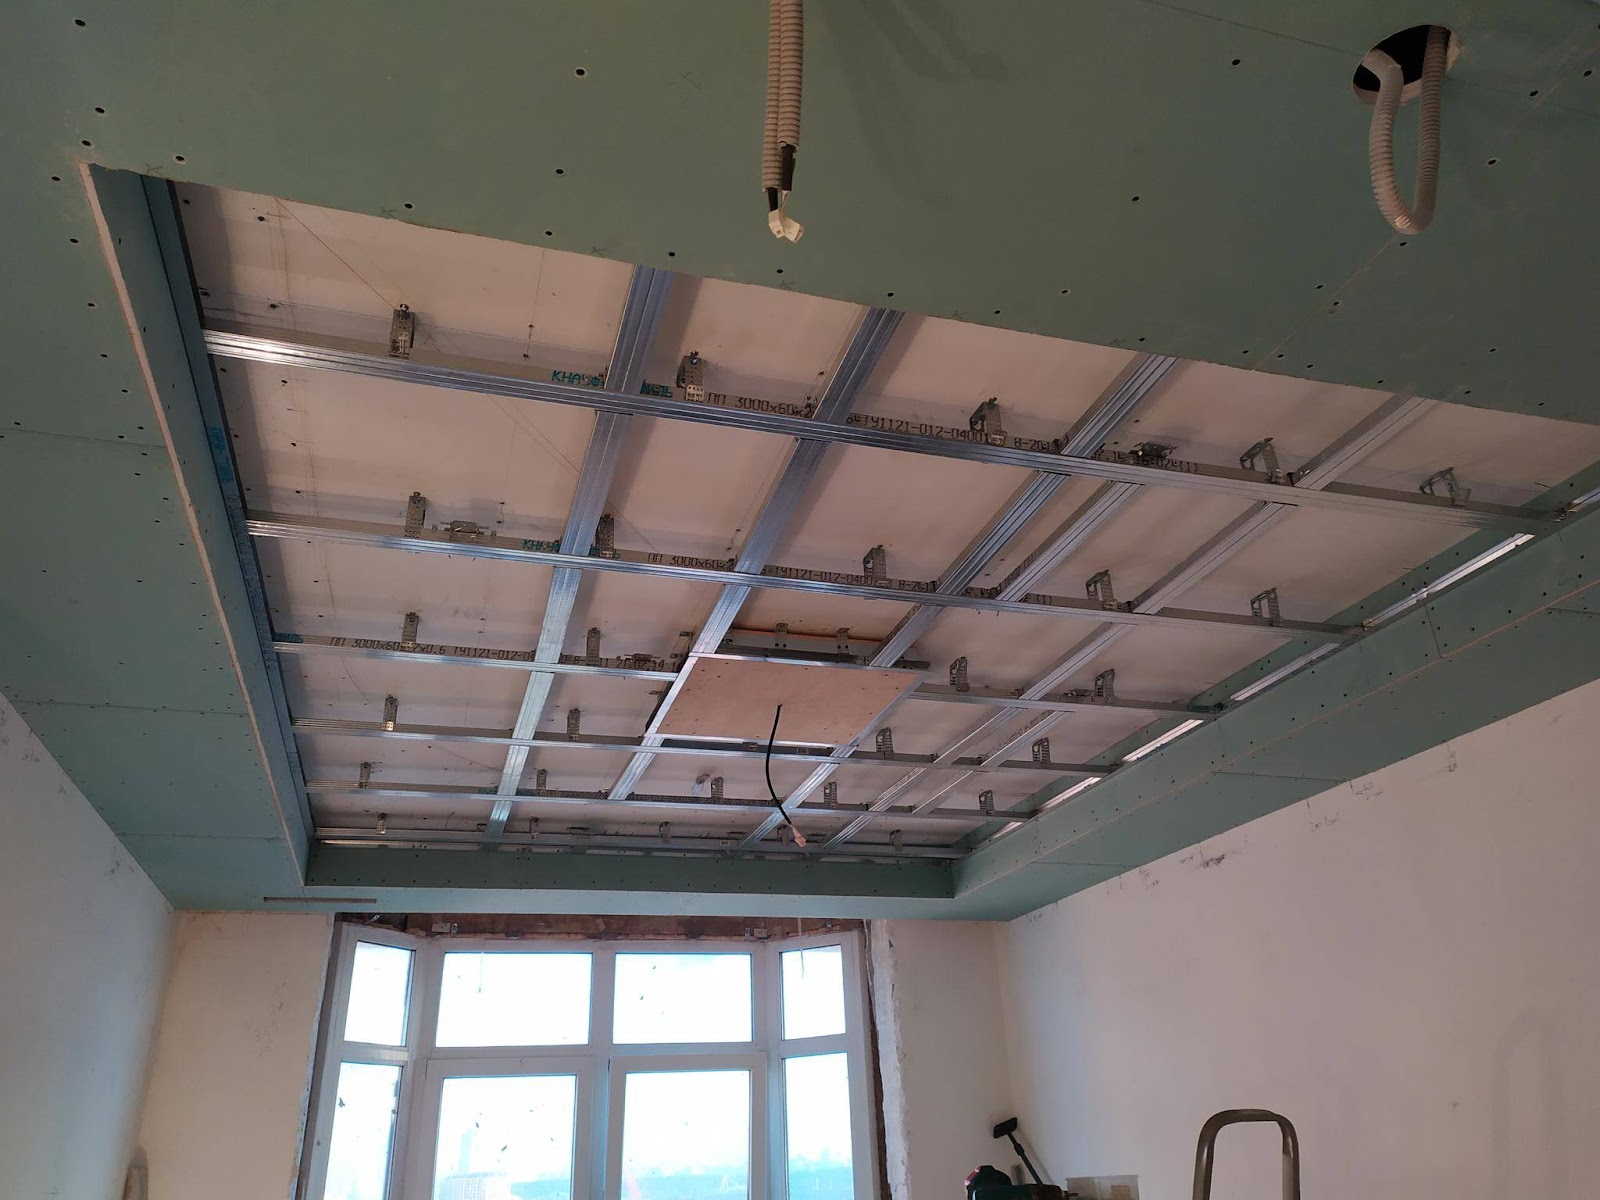
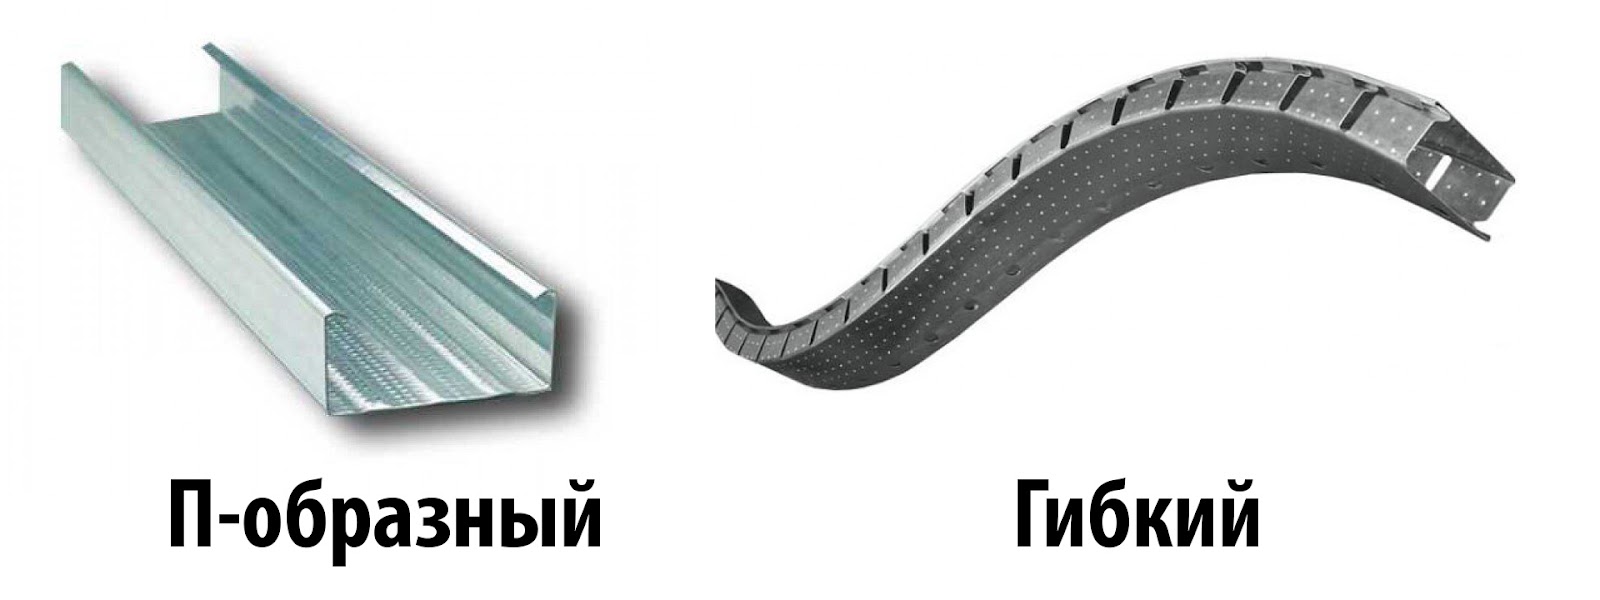
Steel metal profiles are used to create the frame. The lattice structure is strong and can withstand several layers of GKL and the finish putty of the ceiling. The rectangular frame is made of P-shaped profiles, and oval and round are made of flexible profiles.
Photo: Types of profiles for a two -level frame
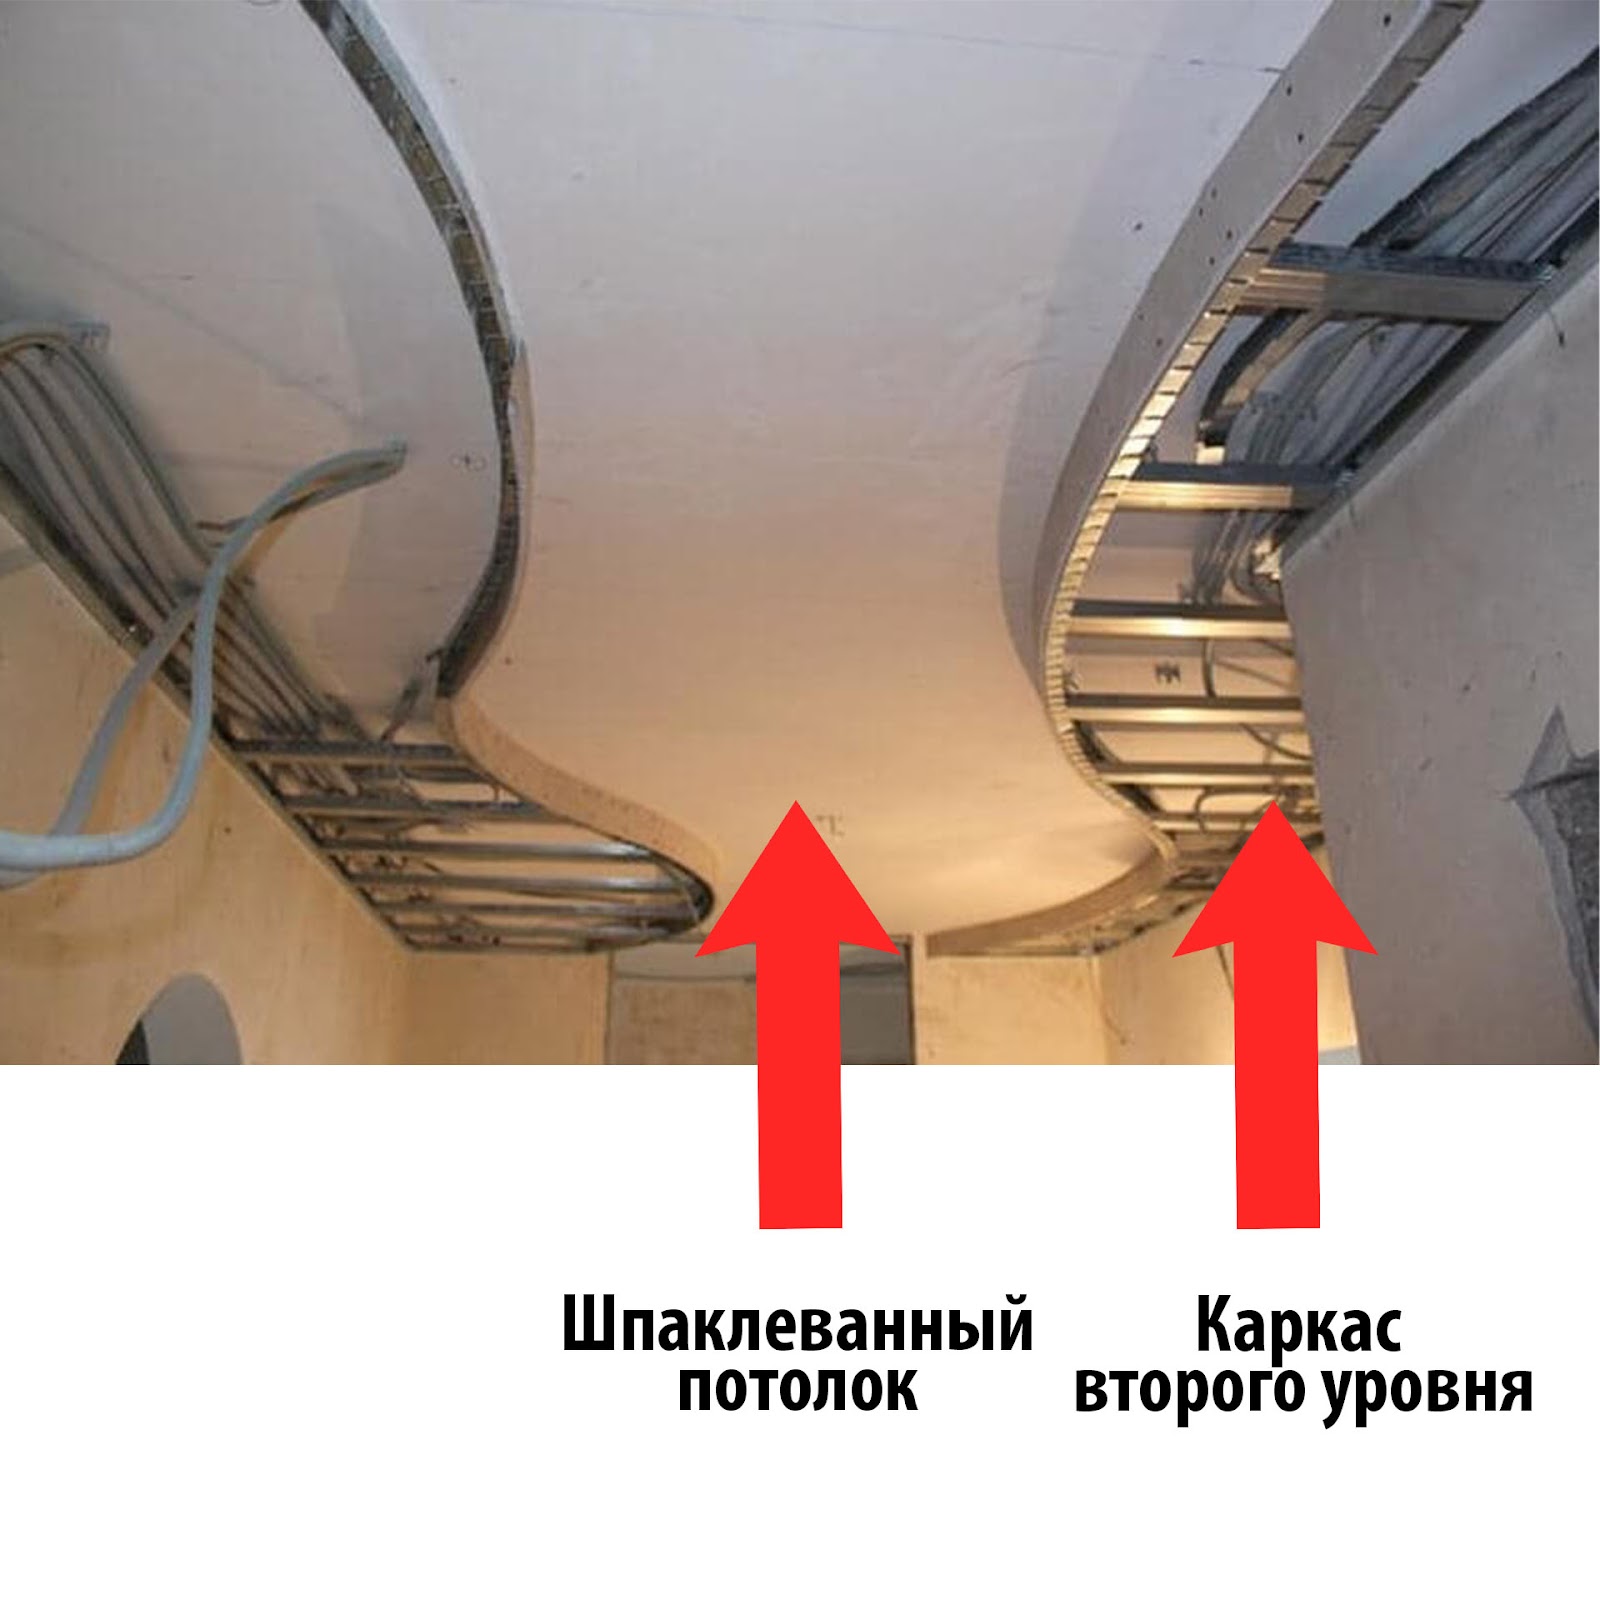
The frame is attached to the ceiling using suspensions. On top, the frame is sheathed with sheets of GKL or GVL. After that, the ceiling is covered with glass chick and put down with several layers.
The main materials for the frame of the two -level ceiling
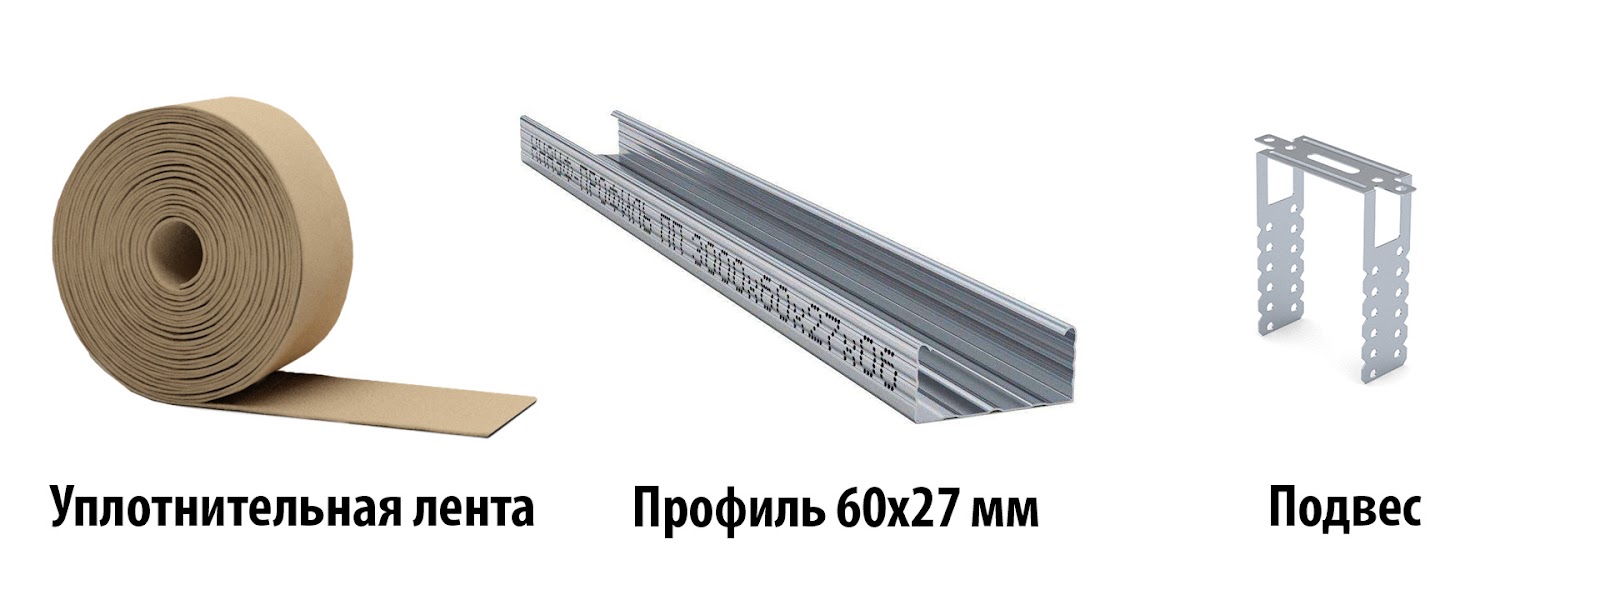
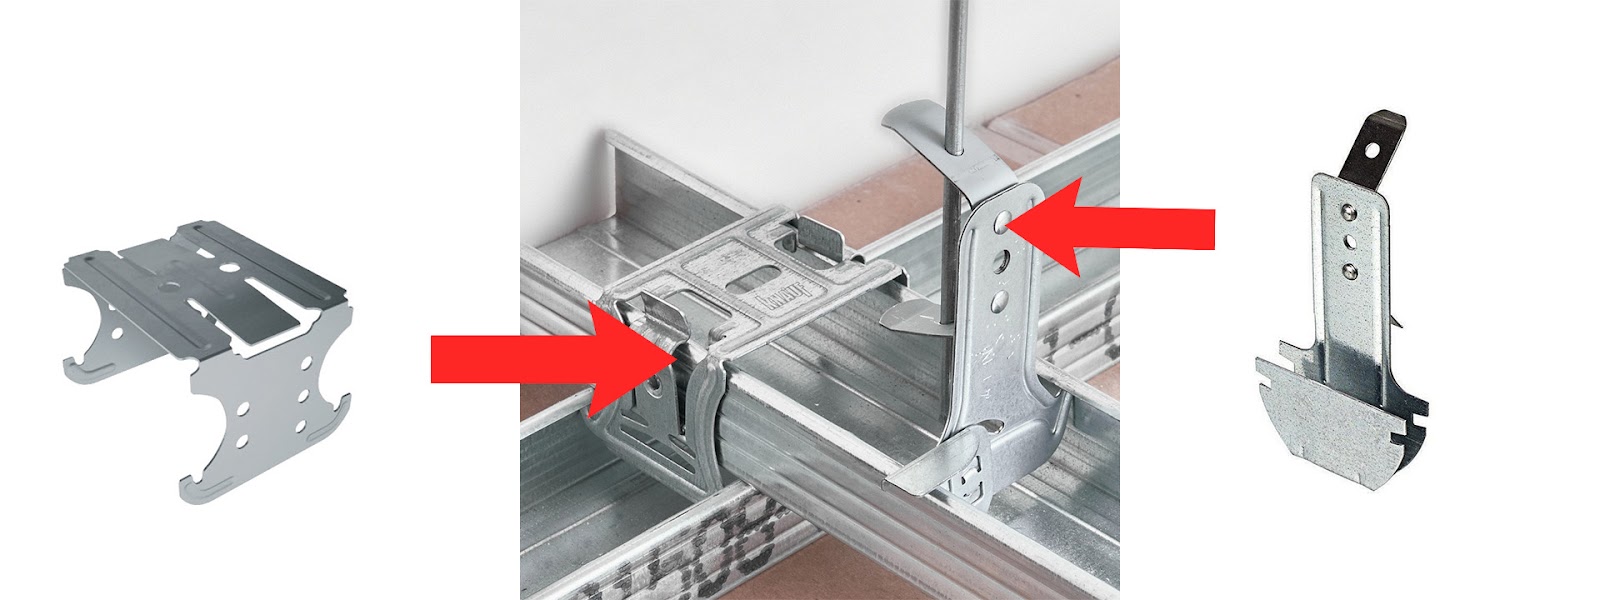
To create a frame, the following materials can be used: sealing tape, KNAUF PP Profile in size 60×27 mm, suspension KNAUF.
Photo: Basic elements of the frame of the two -level ceiling
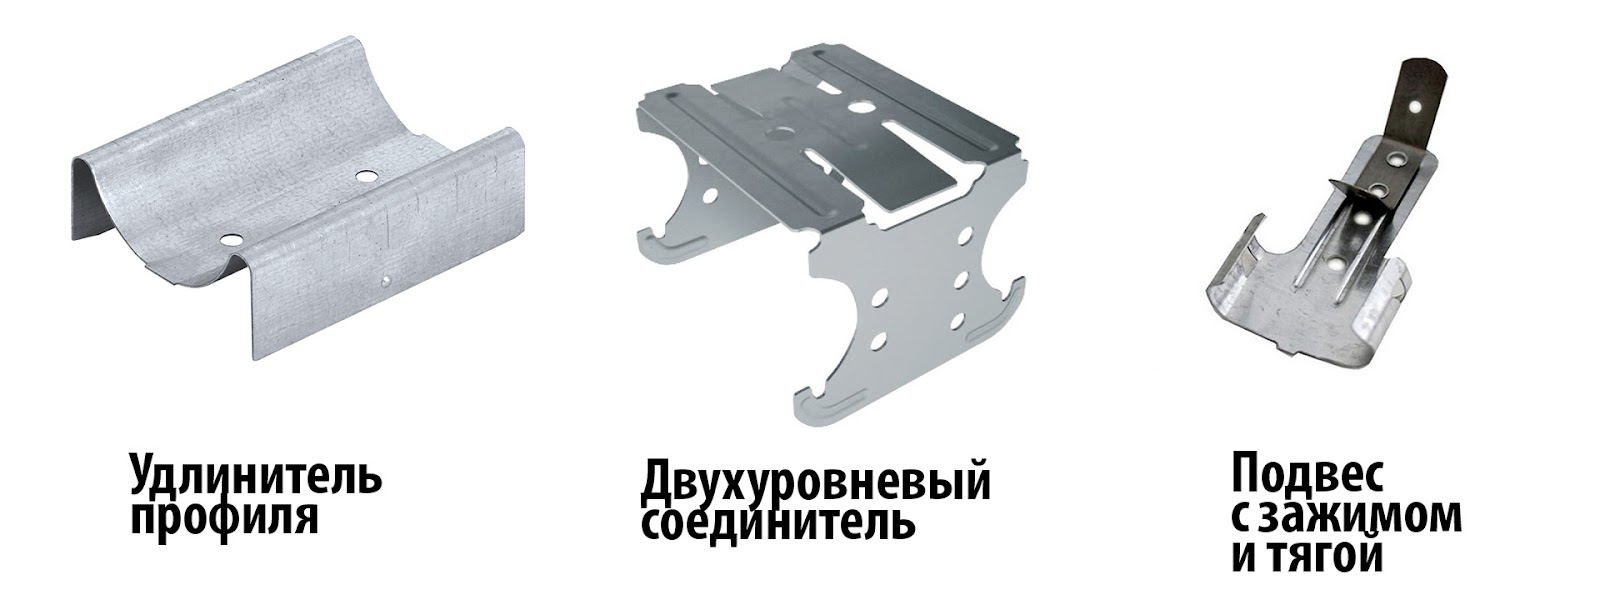
Profile extension cord 60×27 mm, two -level connector 60×27 mm, suspension with a clamp and thrust, screws LN 25 and anchors.
Photo: Basic elements of the frame of the two -level ceiling
Materials for lining a two -level ceiling
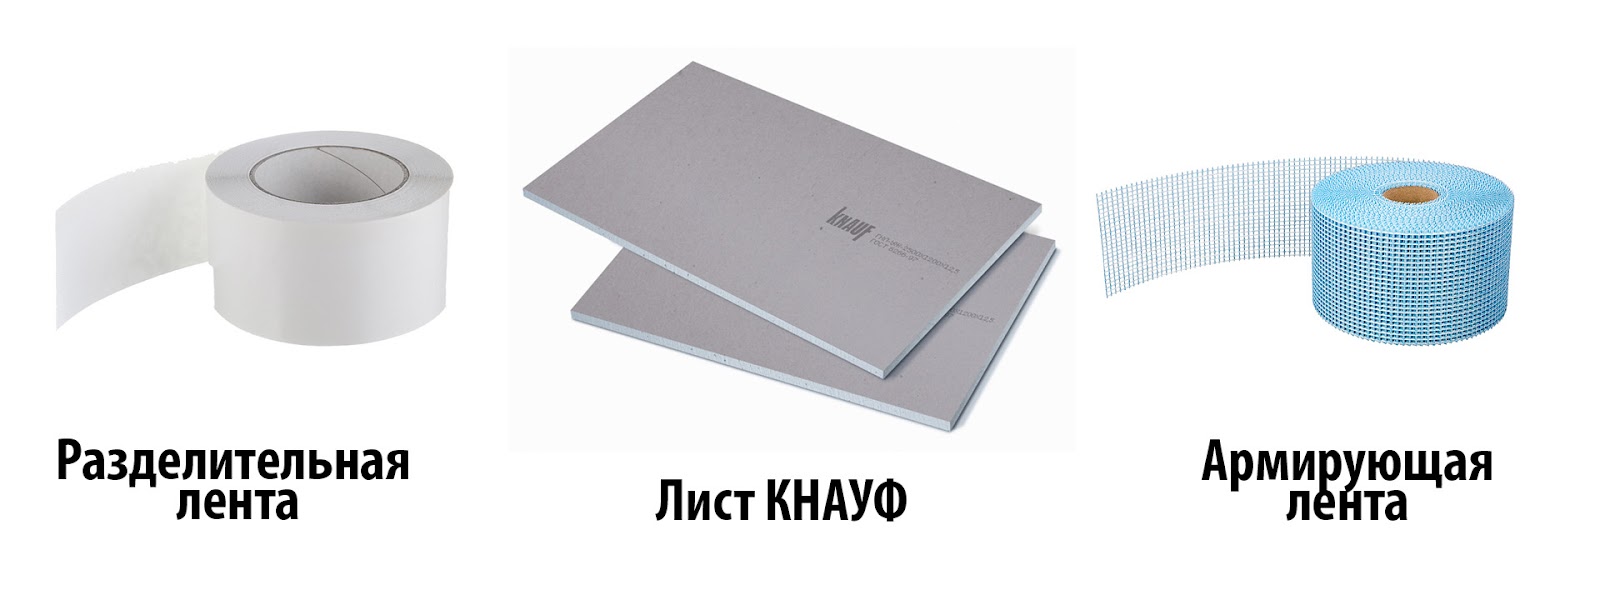
To finish the frame of the two -level ceiling, special materials are used. Among them are KNAUF dividing tape, sheets of KNAUF GSP-A or GSP-N2 (moisture-resistant), reinforcing tape, screws TN 25.
Photo: basic materials of the ceiling
Equipment for creating a two -level GKL ceiling
To work with a two -level ceiling, you will need: a grinder, strip screwdriver, laser level, metal scissors, perforator, roulette, ladder.
The installation plan of the frame for the two -level ceiling
There are 3 ways to make a frame for a two -level ceiling:
- The first way – This is an installation of the second level of the frame with GCL on top of a plump and colored ceiling. The frame is attached on the sides of the ceiling. Thus, the first level of the ceiling is a cursed surface, and the second level is already a frame with GKL itself. This option is especially convenient when a two -level ceiling needs to be made in secondary housing, where there is already a plucked ceiling.
Photo: Installation of the second level on top of the plowed ceiling
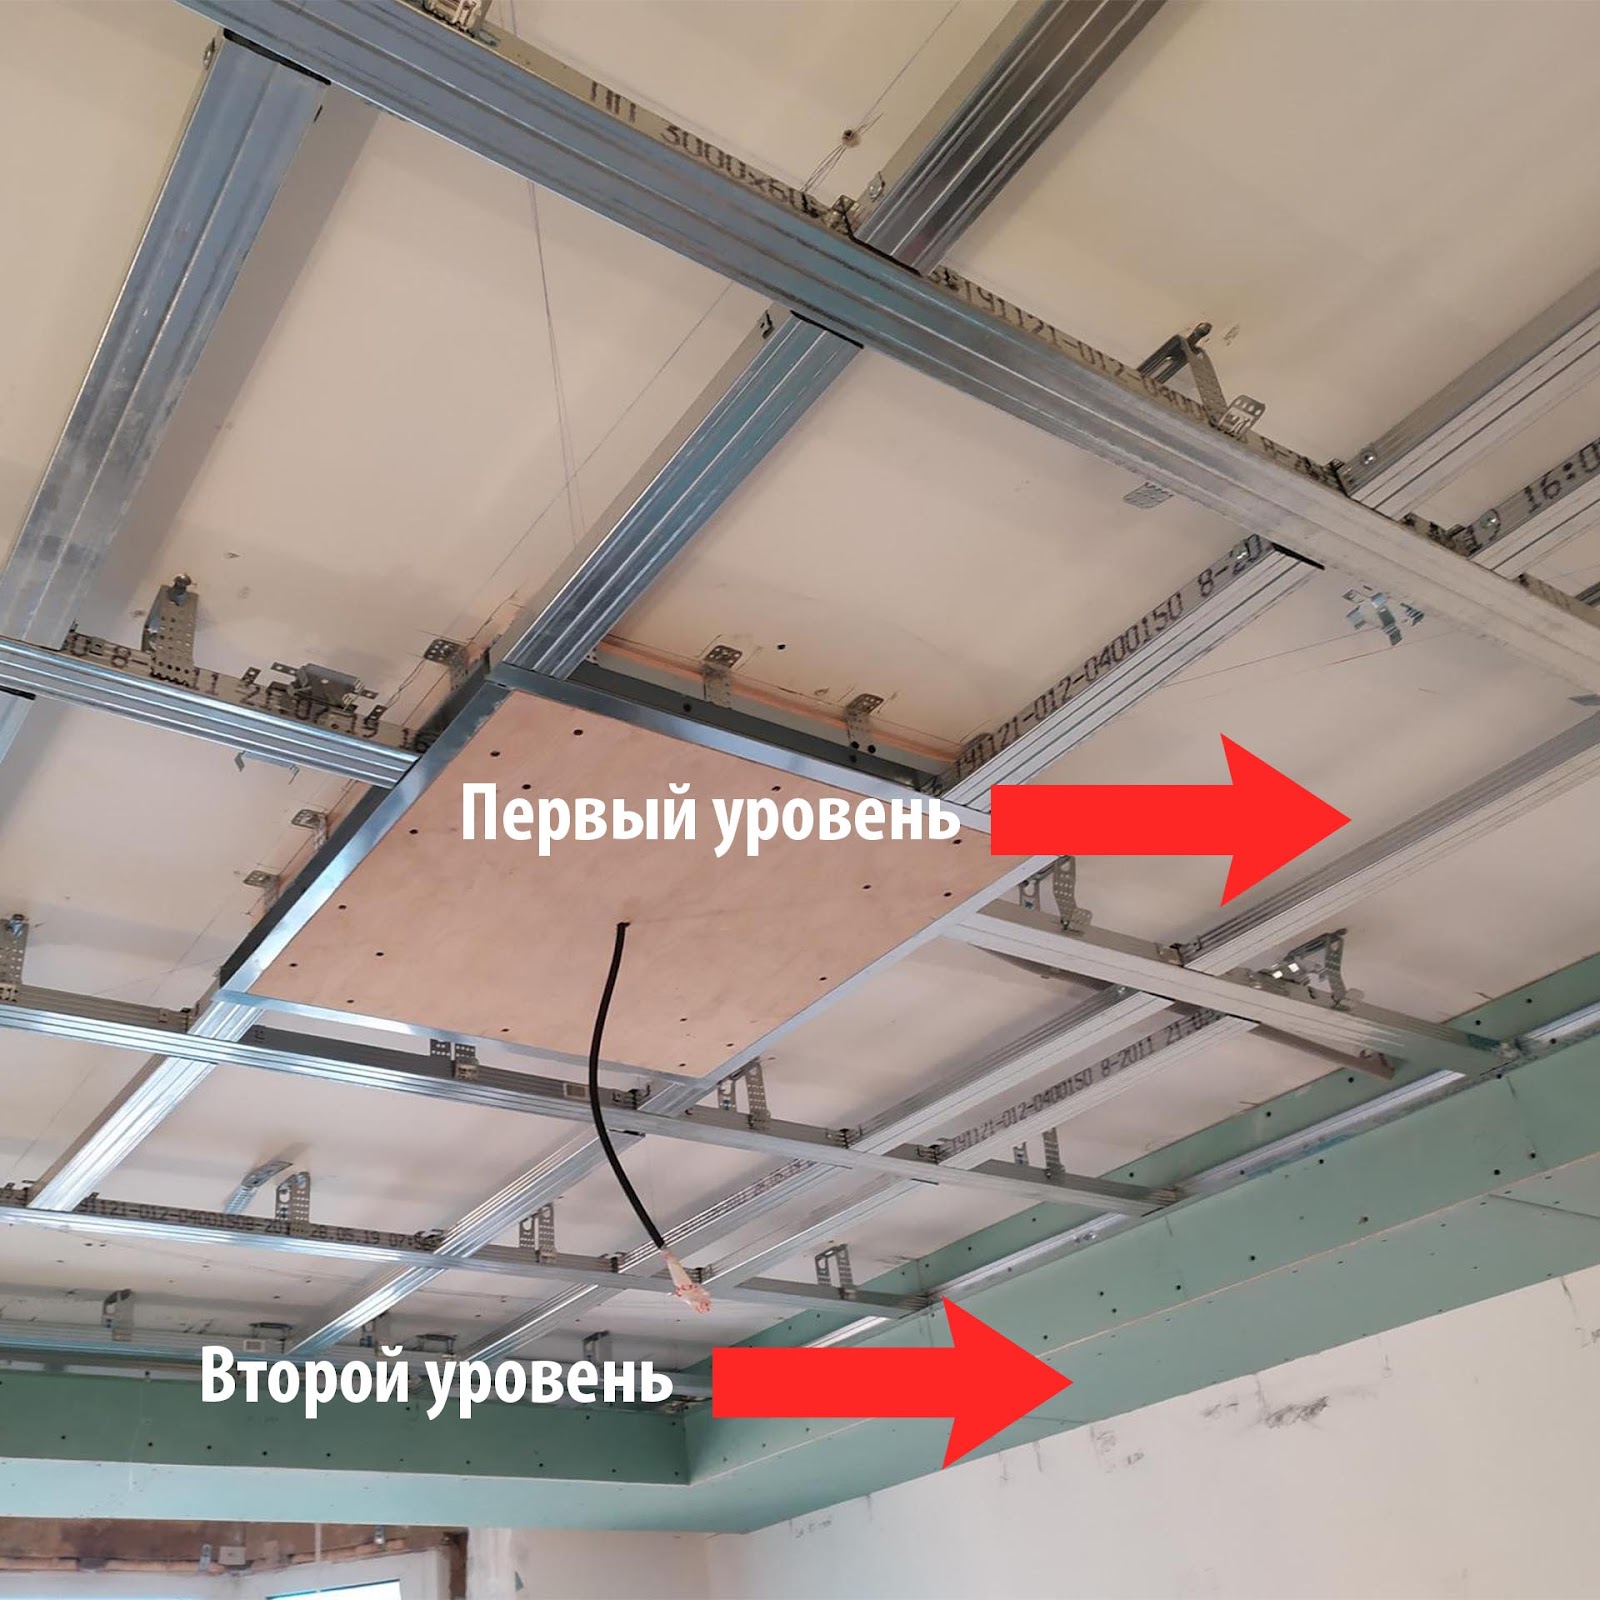
- Second The method consists in the fact that first the first level of the frame is attached to the concrete base, and the second is already attached to it. This option is most often practiced in new buildings.
Photo: gradual construction of the first and second level of the frame
- Third The method consists in the fact that the second level is first set, and then the first level of the frame is attached to it. This is a more complex solution that requires an accurate fitting of each element, so it is used extremely rarely. As an example, we will consider the second method of installation of a two -level ceiling.
Installation of guides, suspensions and profiles of the frame of the first level
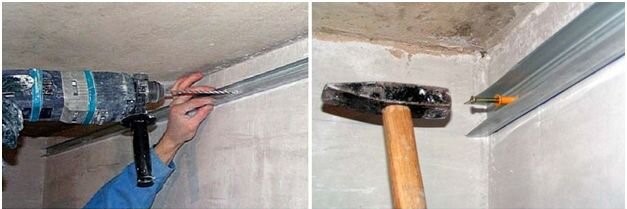
Installation of a two -level ceiling begins with the installation of a guide profile. It is attached to the wall and ceiling using self -tapping screws and anchors.
Photo: Installation of profile to the wall
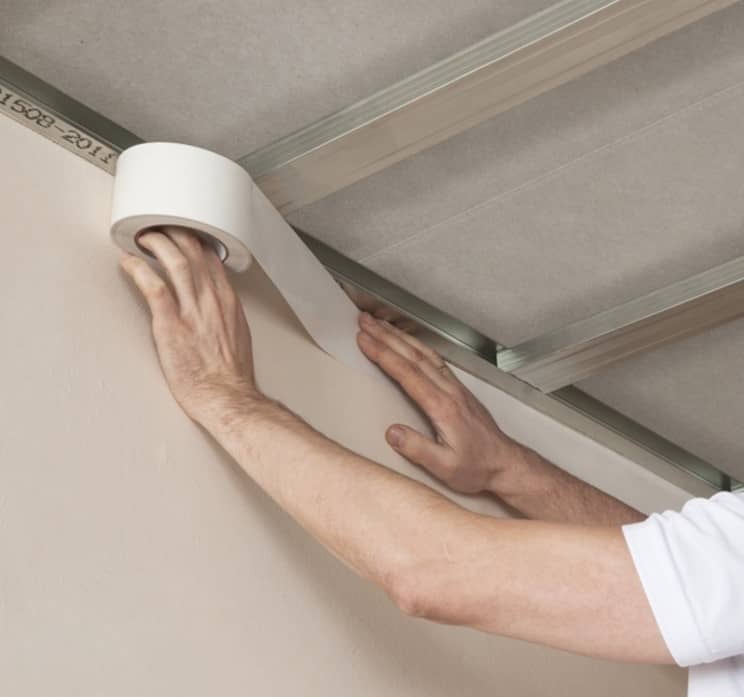
In order for the profile to fit tightly to the wall, a sealing tape is glued to the wall around the perimeter.
Photo: The joint between the wall and the profile is sealed with a sealing tape
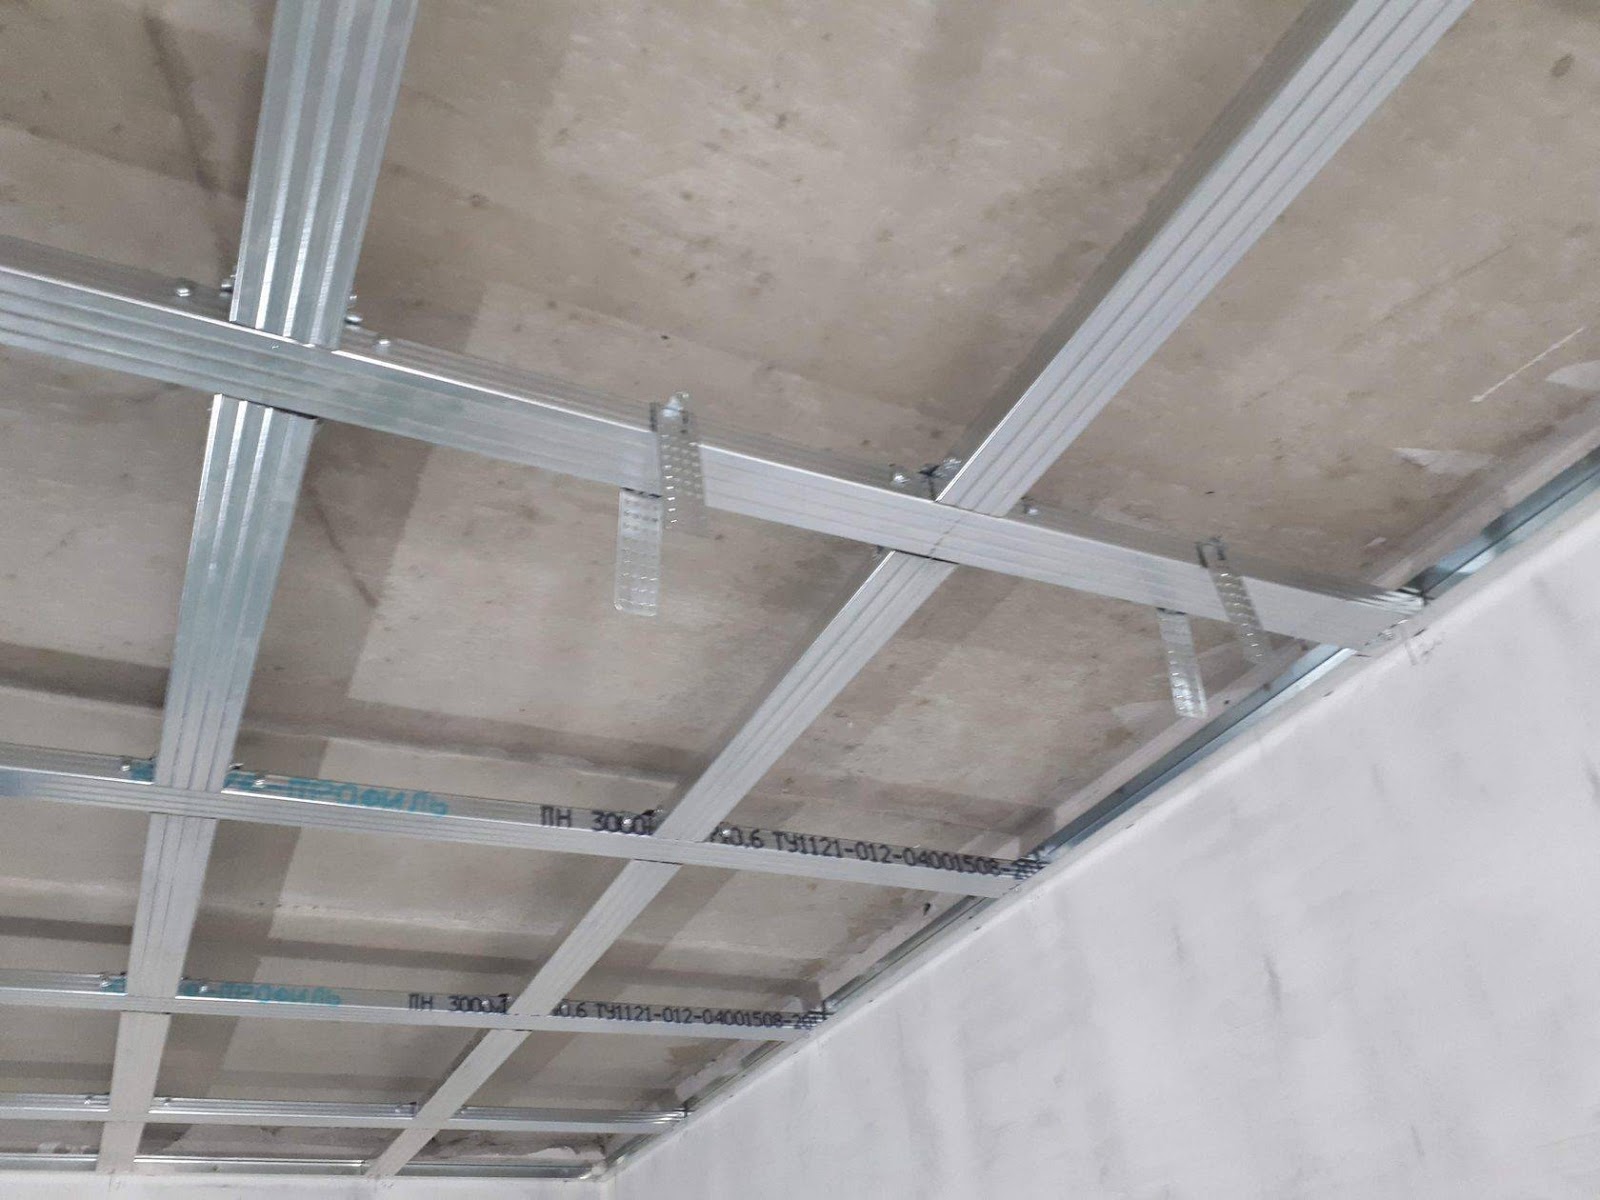
The profiles should be attached to the wall with a step of 40 cm, and to the ceiling – in a step of 25-30 cm. In the places of connection of the corners of the room, the profiles are inserted into each other.
After installing the guides, other profiles are perpendicular to them and fixed with screws. Then the metal structure is connected to the concrete ceiling through suspensions. This allows you to evenly distribute the load throughout the frame.
Photo: first frame level
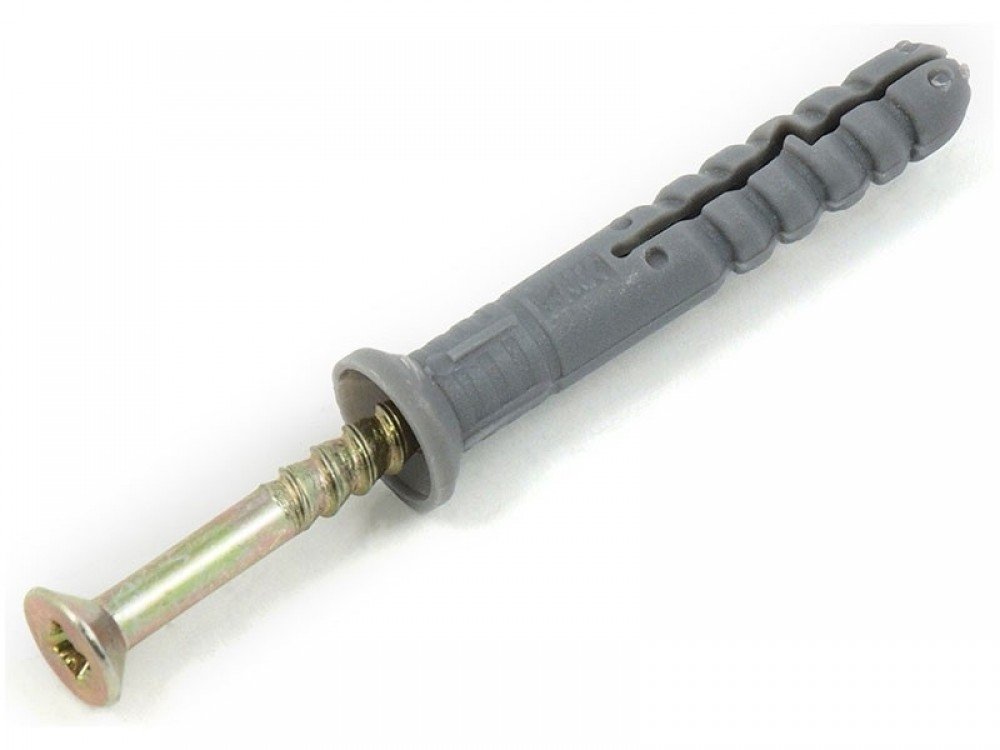
The suspension is attached to the concrete base using a 6×40 dowel-clamp. To do this, a hole is drilled with a perforator and a plastic dowel-gvo is inserted into it.
Photo: dowel-gvo for the frame of the two-level ceiling
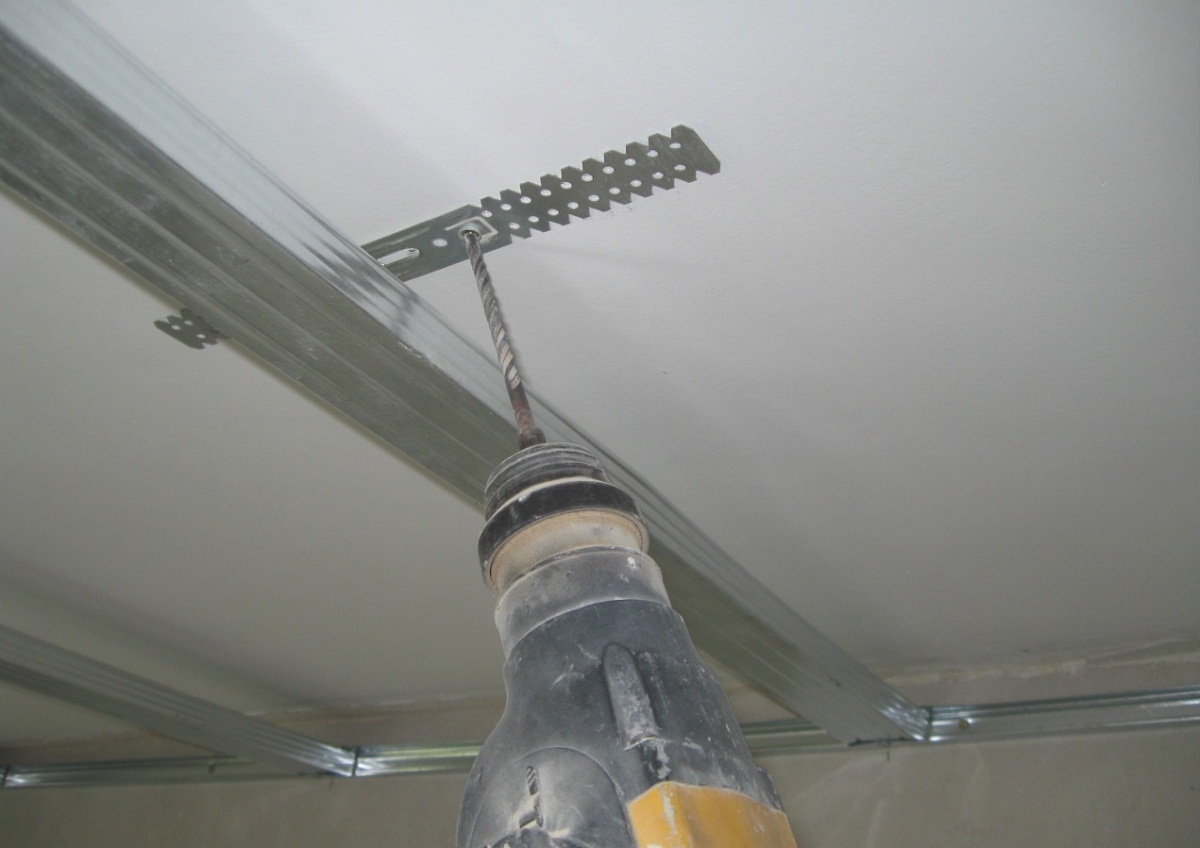
Next, the suspensions are mounted in a row with a step of 30–40 cm. From the wall to the nearest suspension, there should be a distance of less than 25 cm.
Photo: installation of a suspension for the ceiling frame
After the suspensions are made to them on the side, metal profiles are attached using screws.
Photo: suspension and profile connection
If the metal profile is not enough to cover the entire ceiling length, you can use the extension cord of the profile. Thanks to it, you can create a row of more than three meters. Profiles are cut off with scissors for metal.
Photo: extension cord of the profile

Installation of a second -level frame
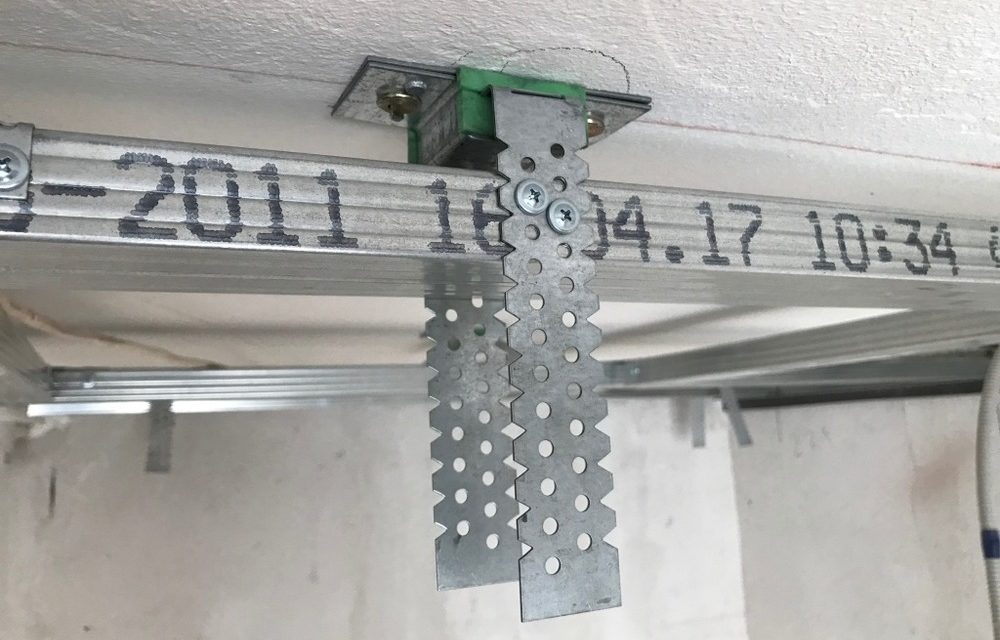
The second -level frame is attached to the first using suspensions and two -level connectors. Sometimes they use suspensions with a clamp and traction. They are attached to the ceiling.
Photo: Installation of the second level of the ceiling to the first
The result is a massive design for a two -level ceiling.
Photo: Two -level ceiling frame

Installation of GKL to the frame of the two -level ceiling
After the two -level frame is assembled, it is glued with a dividing tape. This is done so that drywall fits tightly to the frame.
Photo: installation of the tape to the frame
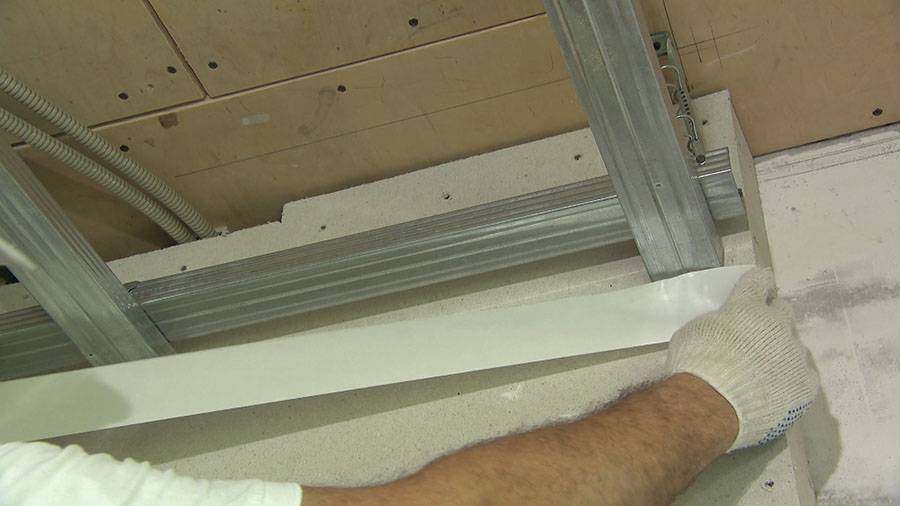
After that, the GCL is screwed with screws TN 25 to the frame. First, the first level is closed with drywall, then the second. GKL is cut by a clerical knife. This operation is more convenient to perform with a ribbon screwdriver.
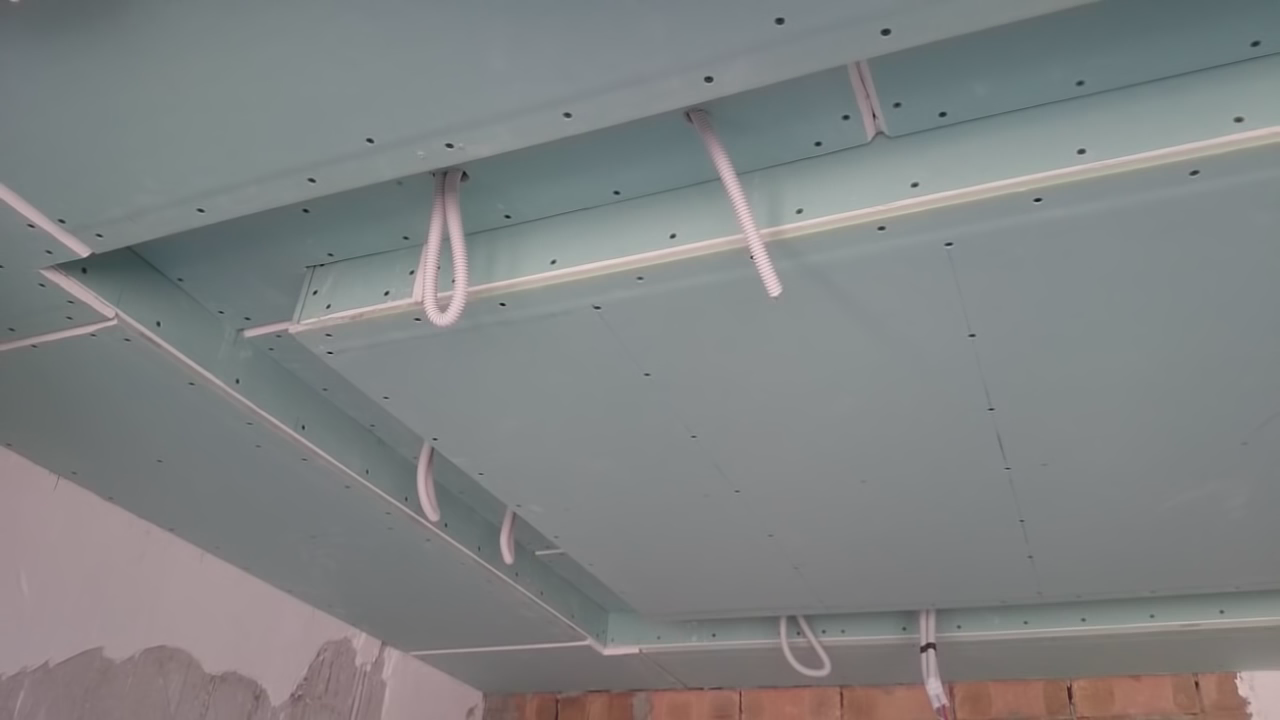
Photo: All wires should be taken outward, for this, round holes are made in the GCL
After assembling the two -level ceiling, all joints pass with a sealant and cover them with a reinforcing ribbon. Now the ceiling is ready for putty and subsequent painting.
After all the work, the two -level ceiling in the interior looks like this:
Photo: two-level GKL ceiling in the interior of the kitchen-living room

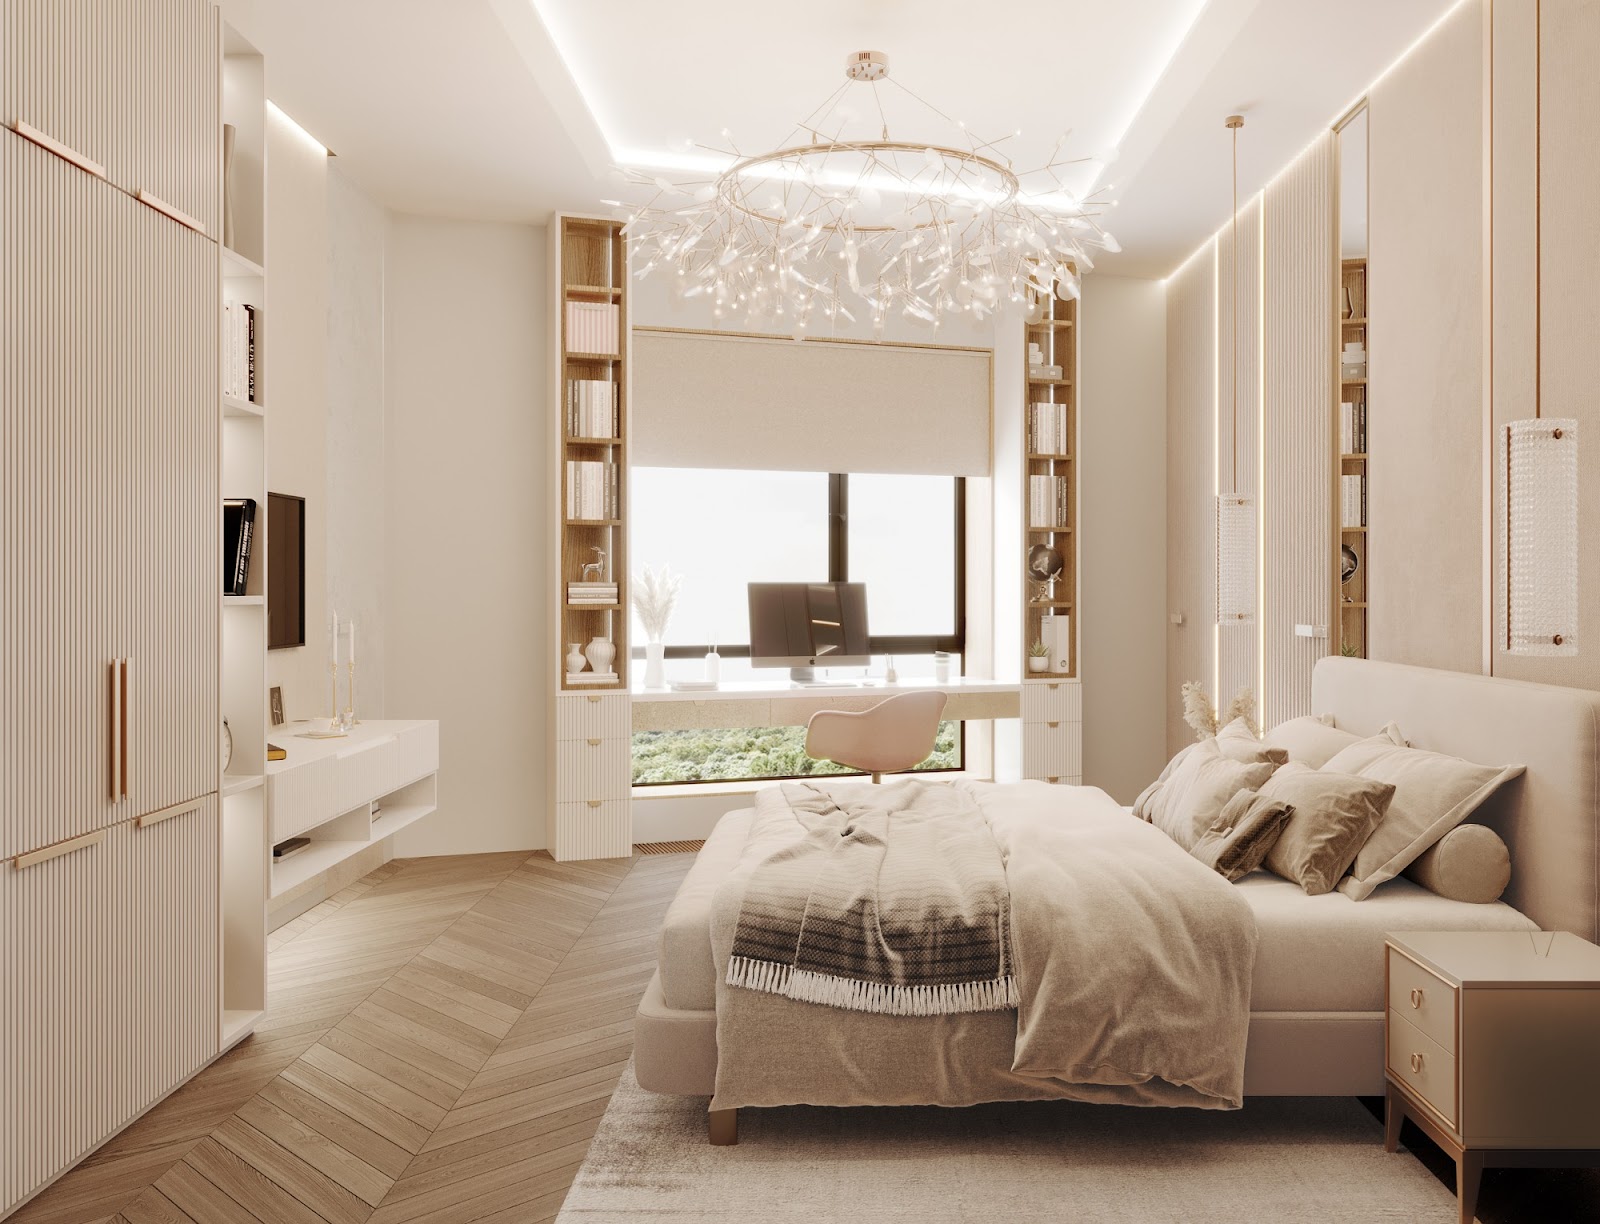
Photo: two -level GKL ceiling in the bedroom interior
Conclusion
A two -story ceiling creates a sensation of volume and allows you to make the interior more interesting. A two -level GKL ceiling is mounted in rooms with a height of more than three meters. The ceiling frame is made of steel profiles, which makes it possible to create ceilings of any shape. Elements of the frame are interconnected and attached to the walls and ceiling. Drywall sheets (GKL) are attached to the frame with screws. After the installation of a two -level ceiling, all joints are filled with sealant and glue the reinforcing tape on top. This is done so that there are no cracks.