The flood of the apartment always occurs unexpectedly and brings many problems. At such moments, you have to haste water in a hurry while the neighbors from below knock on the door. Even if you managed to block all the taps and there are no traces of water left on the floor, the problems do not end there.
The long process of calculating losses begins, which can seriously hit your budget. Unfortunately, expensive repairs or premium decoration cannot protect you from such situations. The only thing that can help is the installation of a system for protection against leaks.
In this article, we will consider on the example of a system of protection against “Neptune” leaks: how it works, what elements the system of protection against leaks consists of, and how to correctly install “Neptune” in the apartment.
Content:
- How the system works from leaks
- What is included in the defense of the “Neptune” leakage?
- How to install Neptune?
- Installation of the control module
- Installation of cranes with servo drive
- Installation of protruding protection sensors
- Connecting protection from the “Neptune” leakage
How the system works from leaks
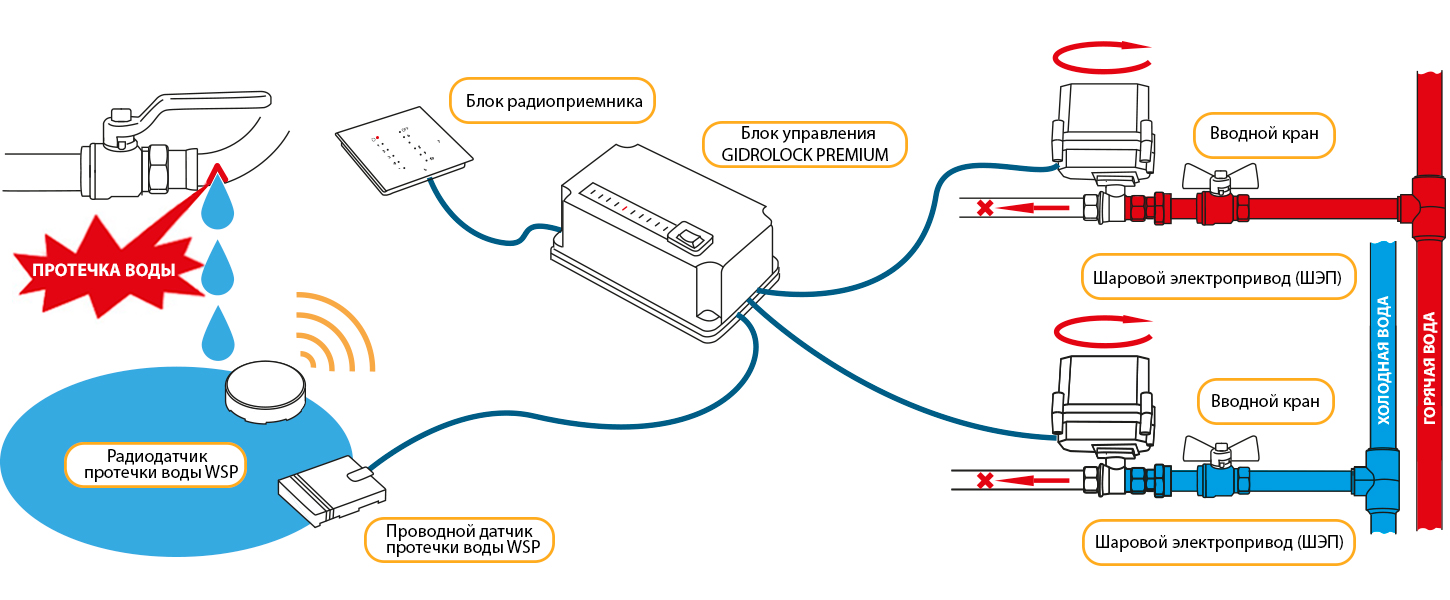
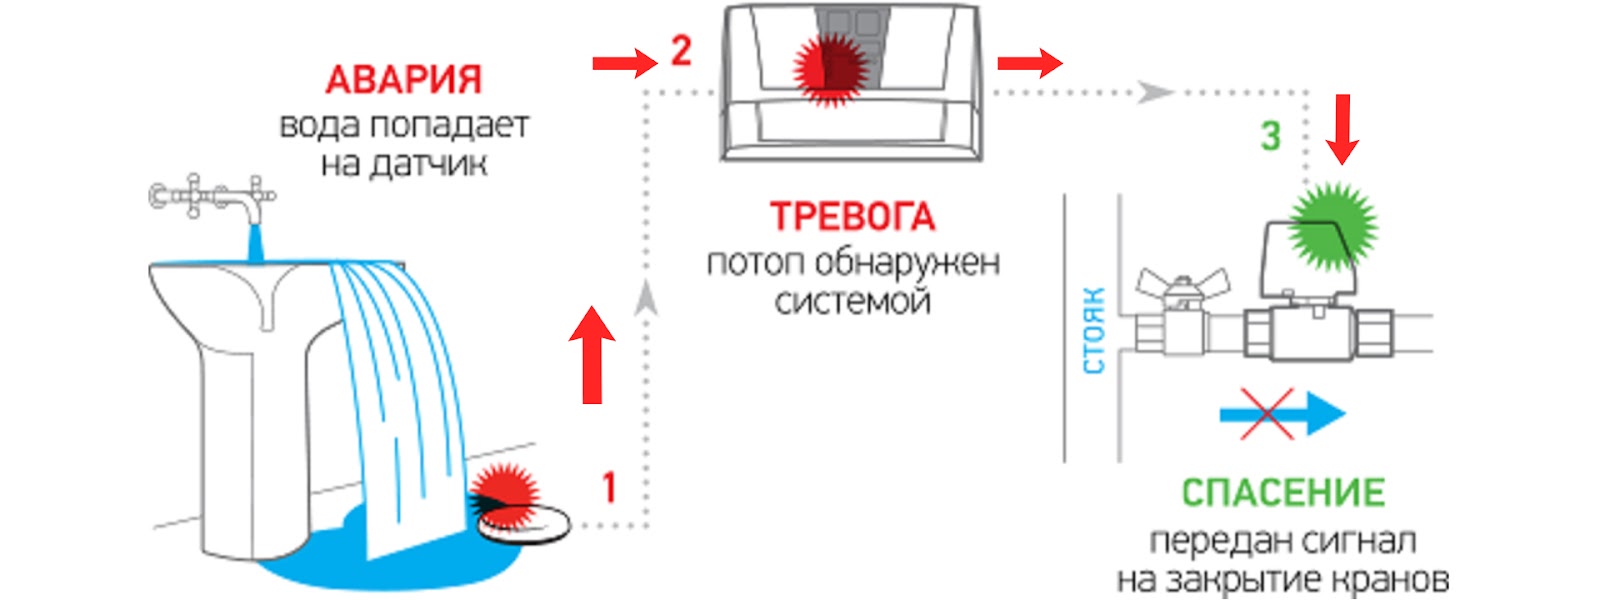
The system of protection against leaks is a set of devices that can detect water leakage in the water supply or heating system and automatically block the water supply. In addition, the system can give a sound signal so that the owner of the house will learn about the problem.
Photo: the principle of action of protection against leaks in the event of a flood
What is included in the defense of the “Neptune” leakage?
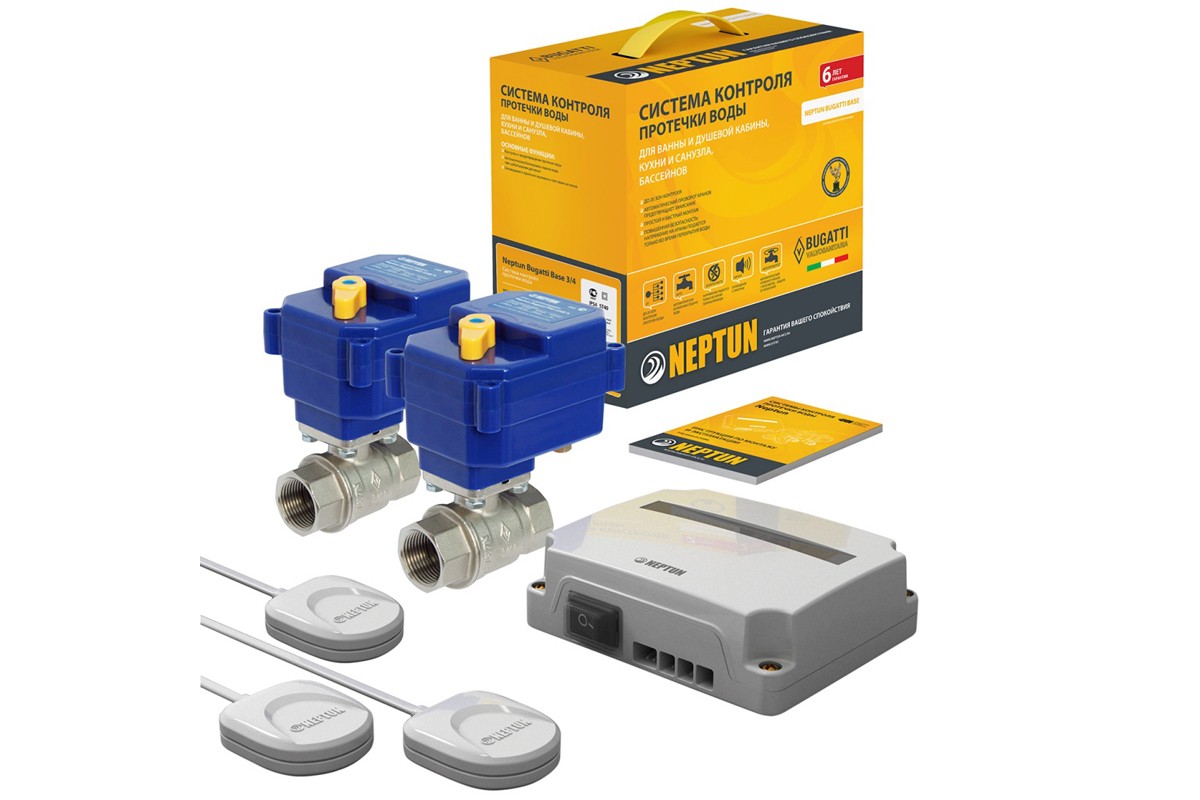
The Neptune Protection System has a large number of different configurations, but they all contain elements such as the control module, the water leakage control sensor and the ball crane with electric drive.
Photo: Set of Protection from the Flood “Neptune”
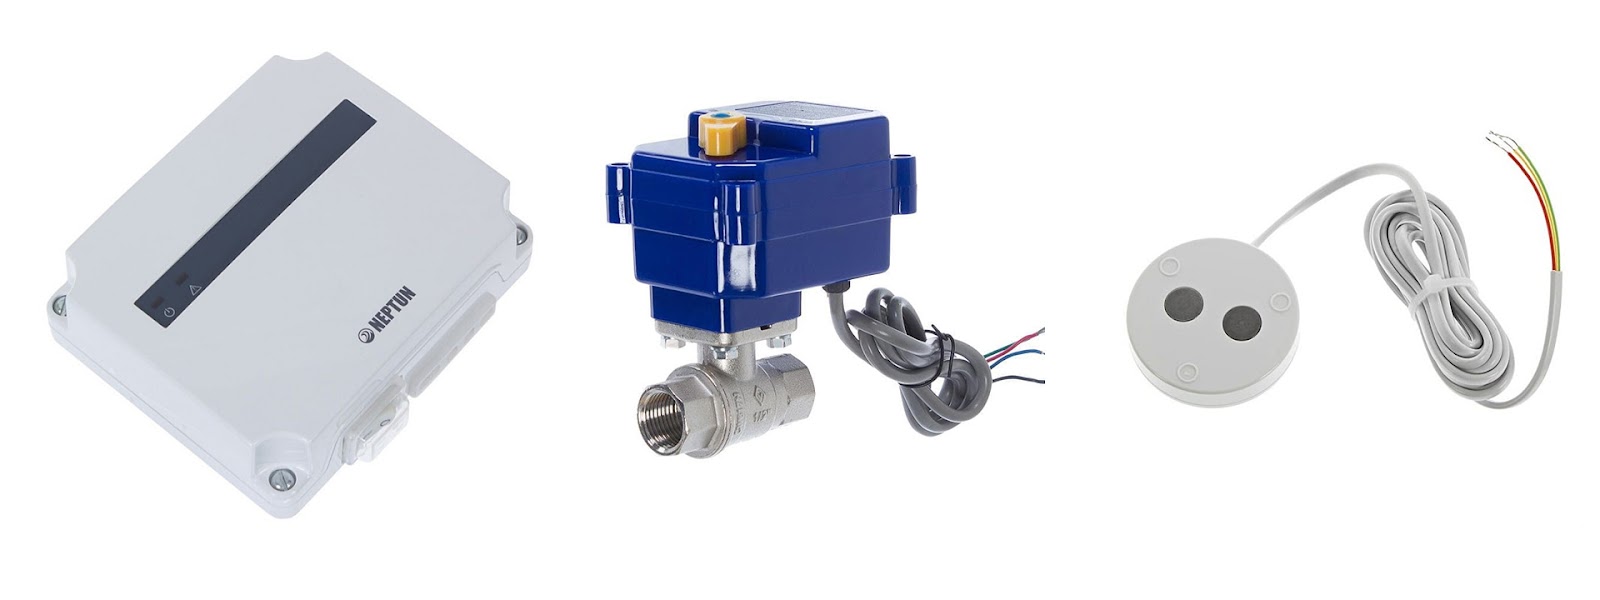
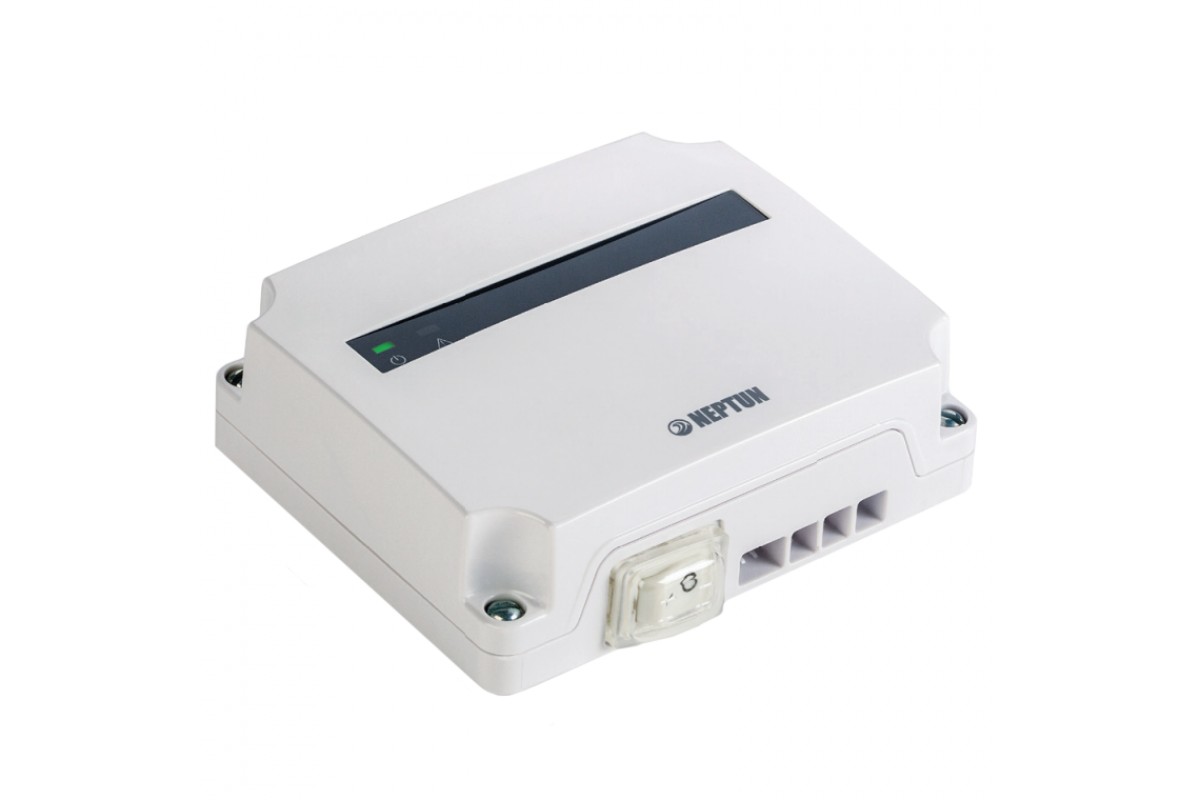
The control module is a device that processes the signal from the sensors of control of the water leak and controls the cranes with the servo.
Photo: control module
Water leaks of water leaks have 2 or 3 plates in their design. When water enters the plates, a weak electric current occurs, and this information is immediately transmitted to the control module.
Photo: wired sensor protection sensor from leaks

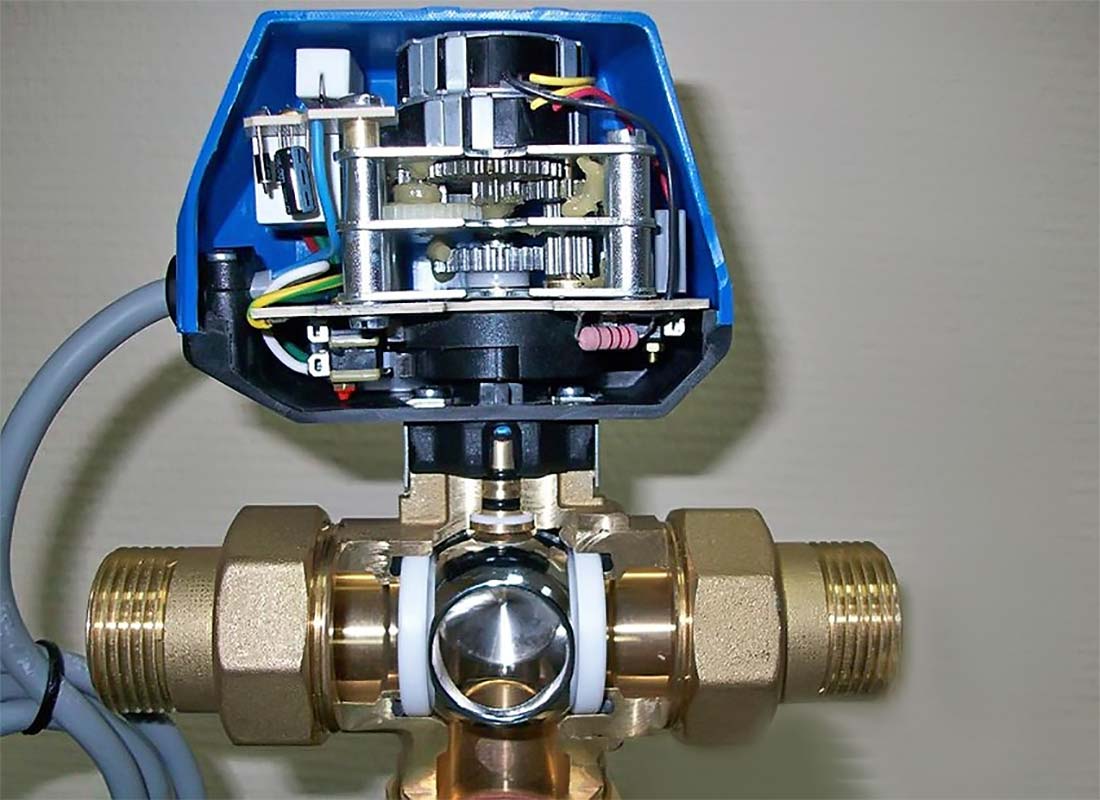
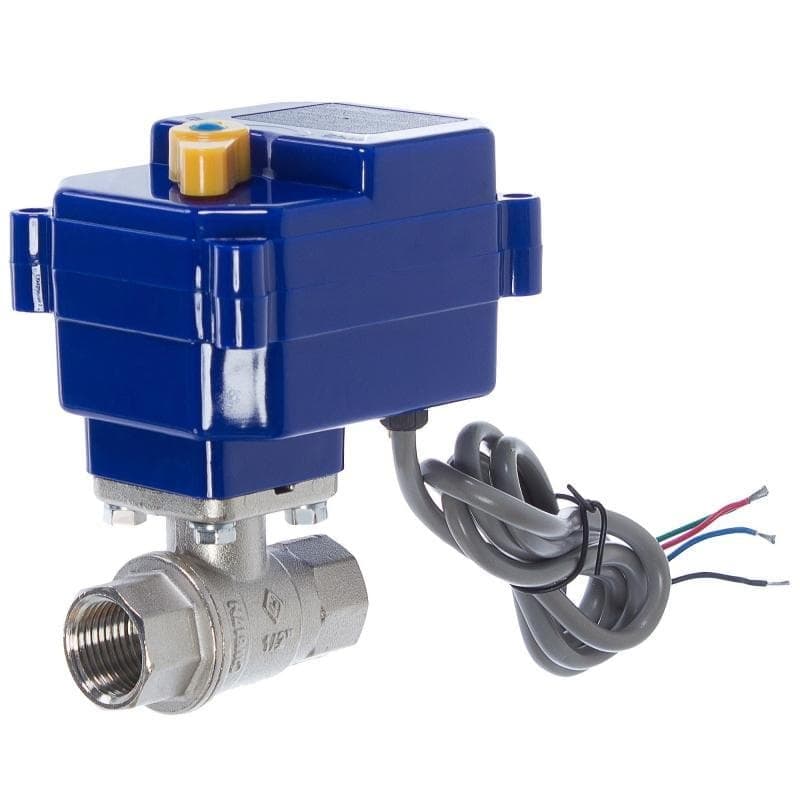
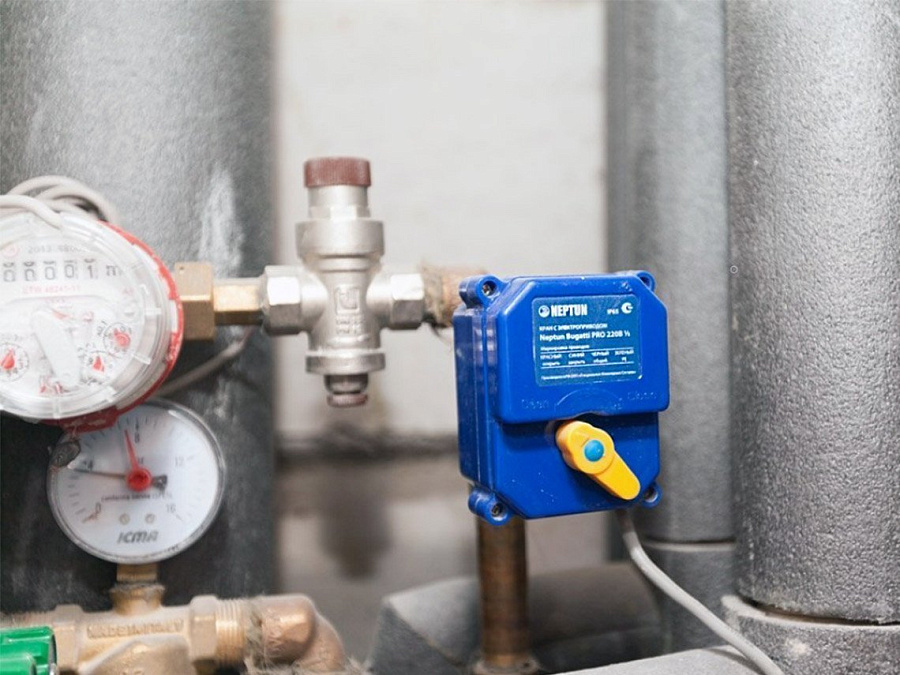
Ball tap with electric drive is a water tap equipped with a special electric drive. This drive allows you to open and close the crane, controlling it remotely. In the case of an accident, for example, during a flood, such a crane will automatically block the water until the problem is eliminated.
Photo: servo crane
In more affordable systems, the ball crane closes 30 seconds after receiving the leakage signal. In more advanced and expensive systems, the closing time of the crane is only 2-3 seconds.
Photo: a servo crane for protection against the flood
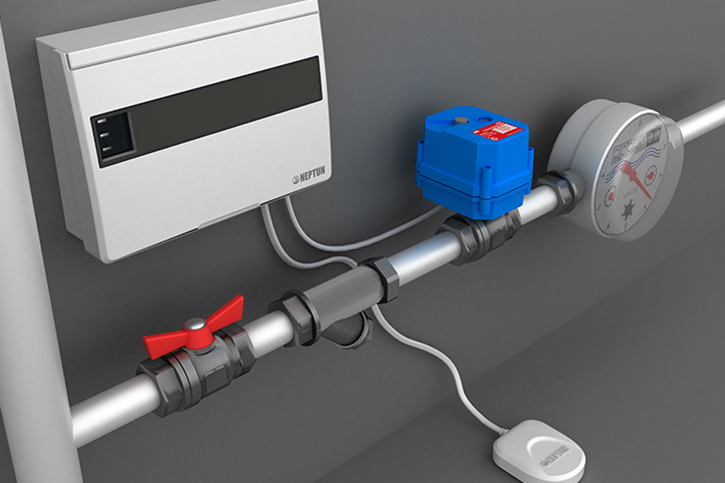
Thus, when water enters the sensors, they send a signal to the control module, and using a control voltage, it closes the cranes with a servo driven to it.
Photo: The principle of system action
How to install Neptune?
Protection against leaks is best installed at the stage of draft work. In this case, it will be possible to choose a convenient place for the control module, cranes with a servo drive and hide all the cables under the finish.
Photo: Module and cranes with a servo can be installed in an engineering cabinet
Installation of the control module
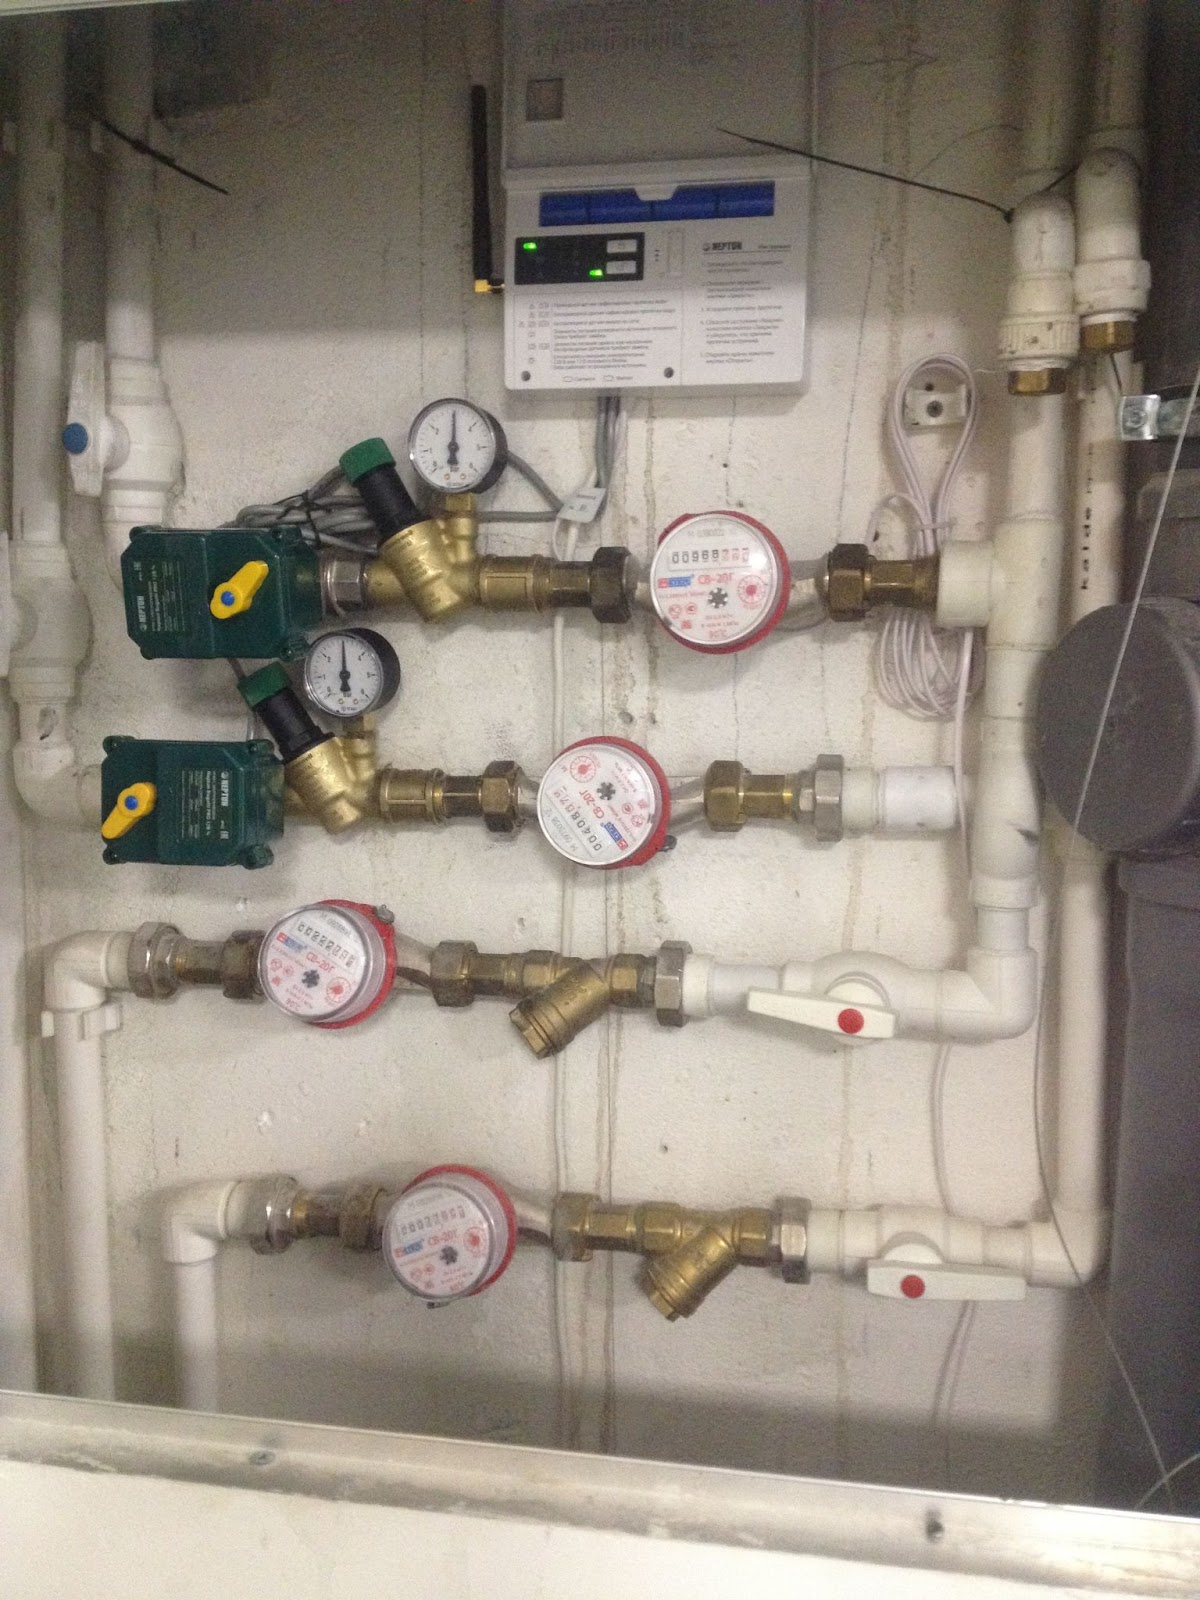
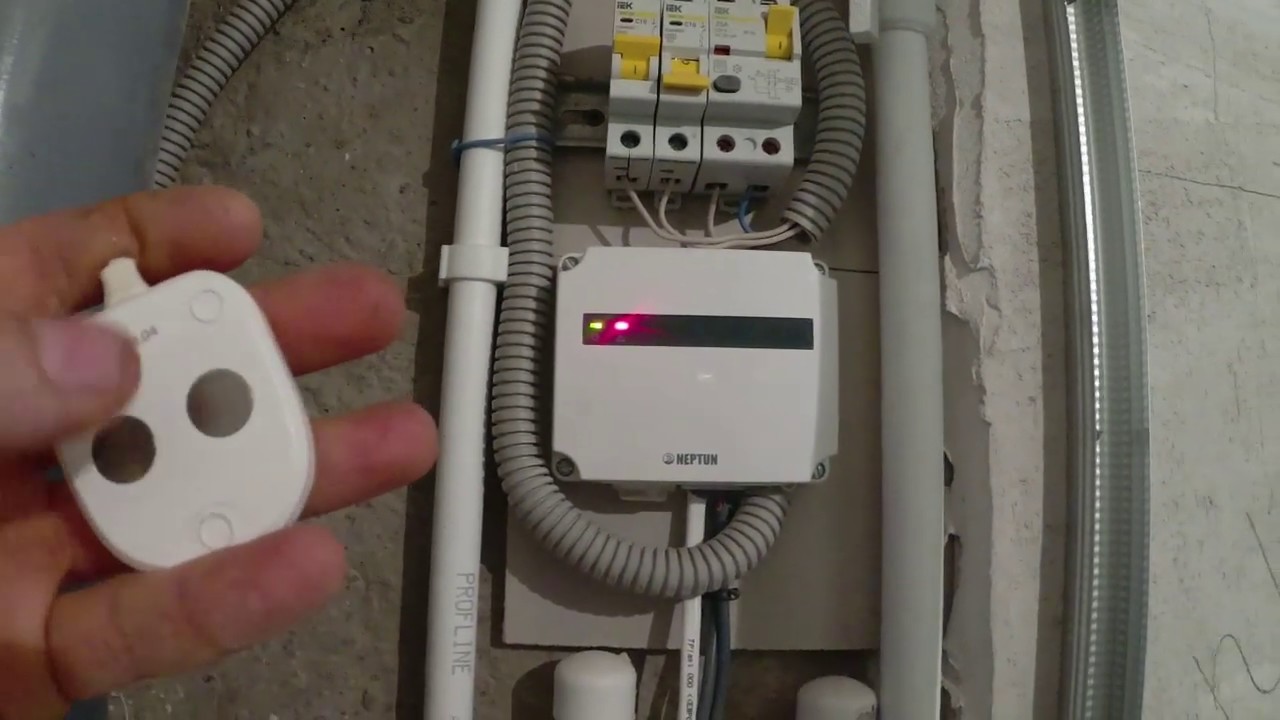
First of all, you should find a suitable place for the control module. It can be installed anywhere: in a low -cost shield, in a shield with an electrician or in a technical node, where all counters and taps are located. In this case, you need to lay a wire on 220V under the control module or make a socket.
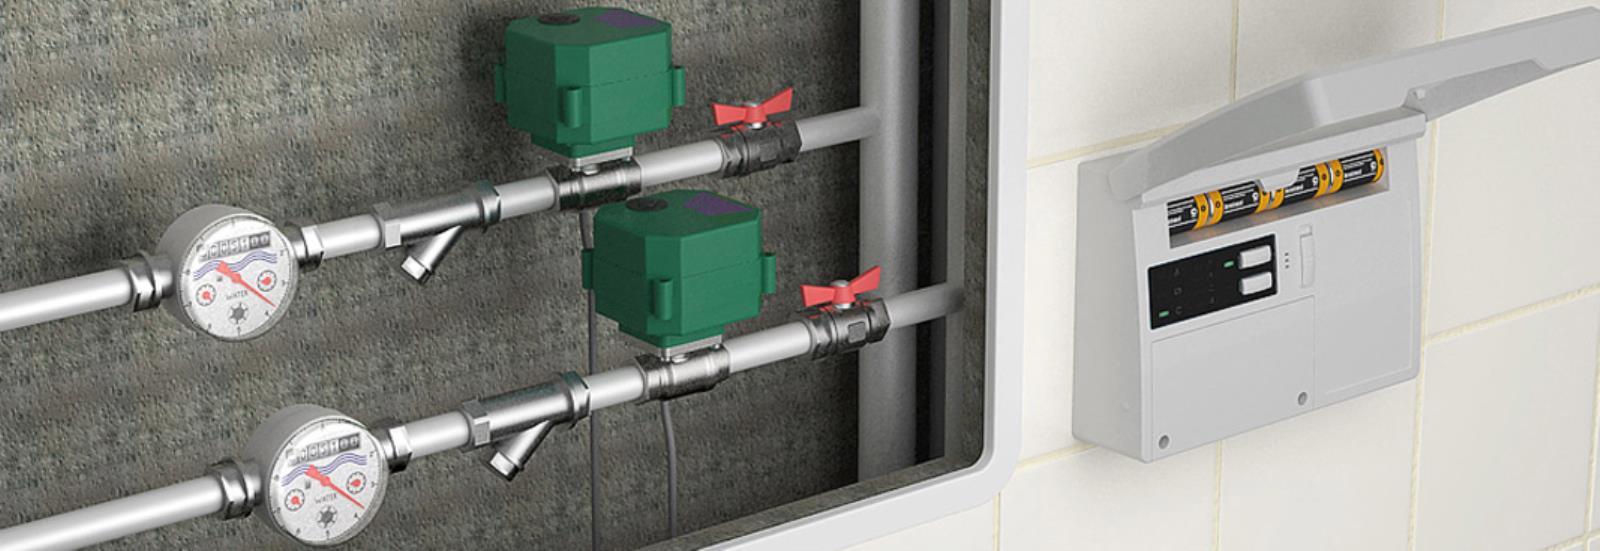
Photo: control module in a water supply mine
Installation of cranes with servo drive
Next, you should find a place under the servo crane. It is installed in an engineering cabinet immediately after the valves.
Photo: Cranes are placed immediately after the main crane
Important: Cranes with a servo cannot be installed instead of water valves. If the control module burns, the water in the apartment will not be able to open or close manually.
Photo: inserting cranes with servo into the water supply
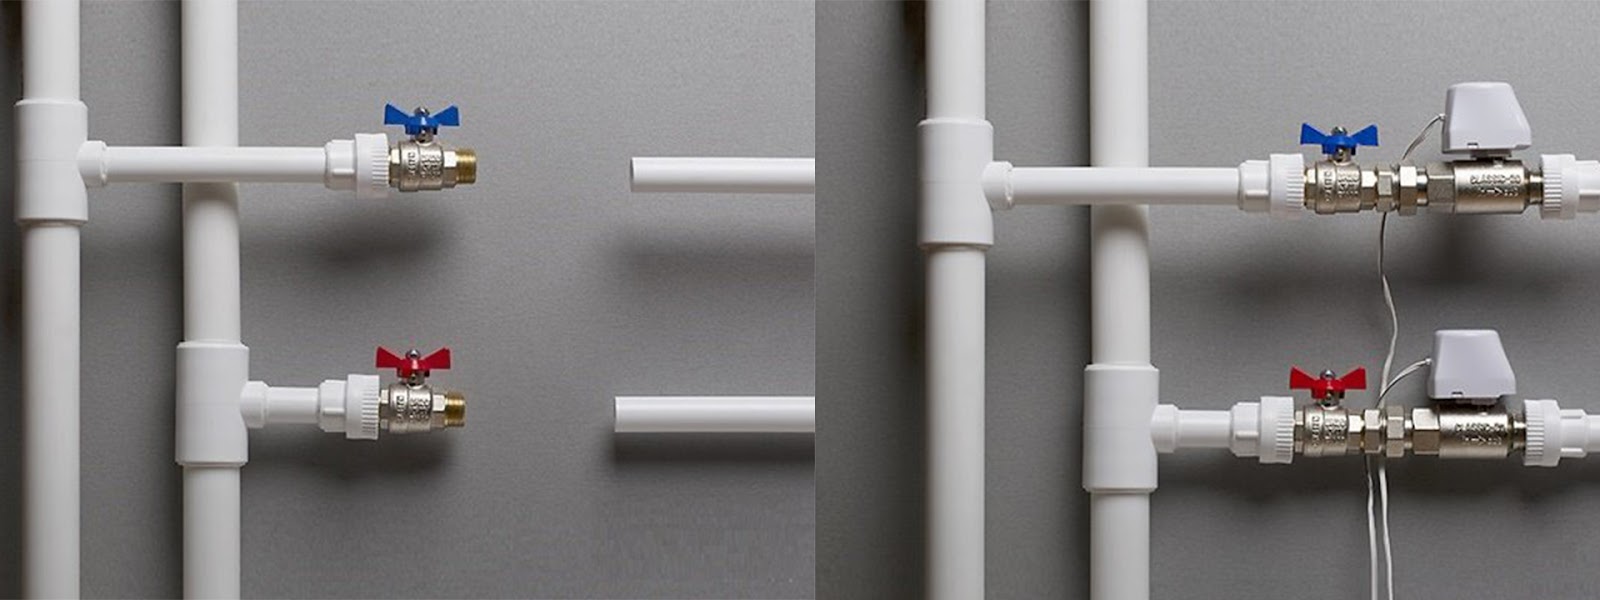
When installing a crane, a servo drive should be on the side or from above. It is impossible for him to be below. Cranes are installed on pipes with hot and cold water, as well as on a central pipe with heating.
Photo: a servo drive can only be from above or from the side
By the way: If a double -circuit boiler is installed in the apartment, then the servus crane should be installed only on a pipe with cold water. In case of leakage, cold water will close and block access to the boiler.
It is recommended to install the second cranes with a servo on a heating pipe coming from the boiler. Because in the system, even with a closed tap, there is a small amount of water. If the leaks occur in a radiator or heating pipes, the system will automatically block the water, preventing the flooding of the apartment.
Photo: Crane with a servo drive on hot and cold water
The wires from the crane with a servo drive to the control module are carried out in the corrugation under the finish. If the standard wire is not enough, it can be lengthened. To do this, use wires with the same cross -section and number of cores.
Installation of protruding protection sensors
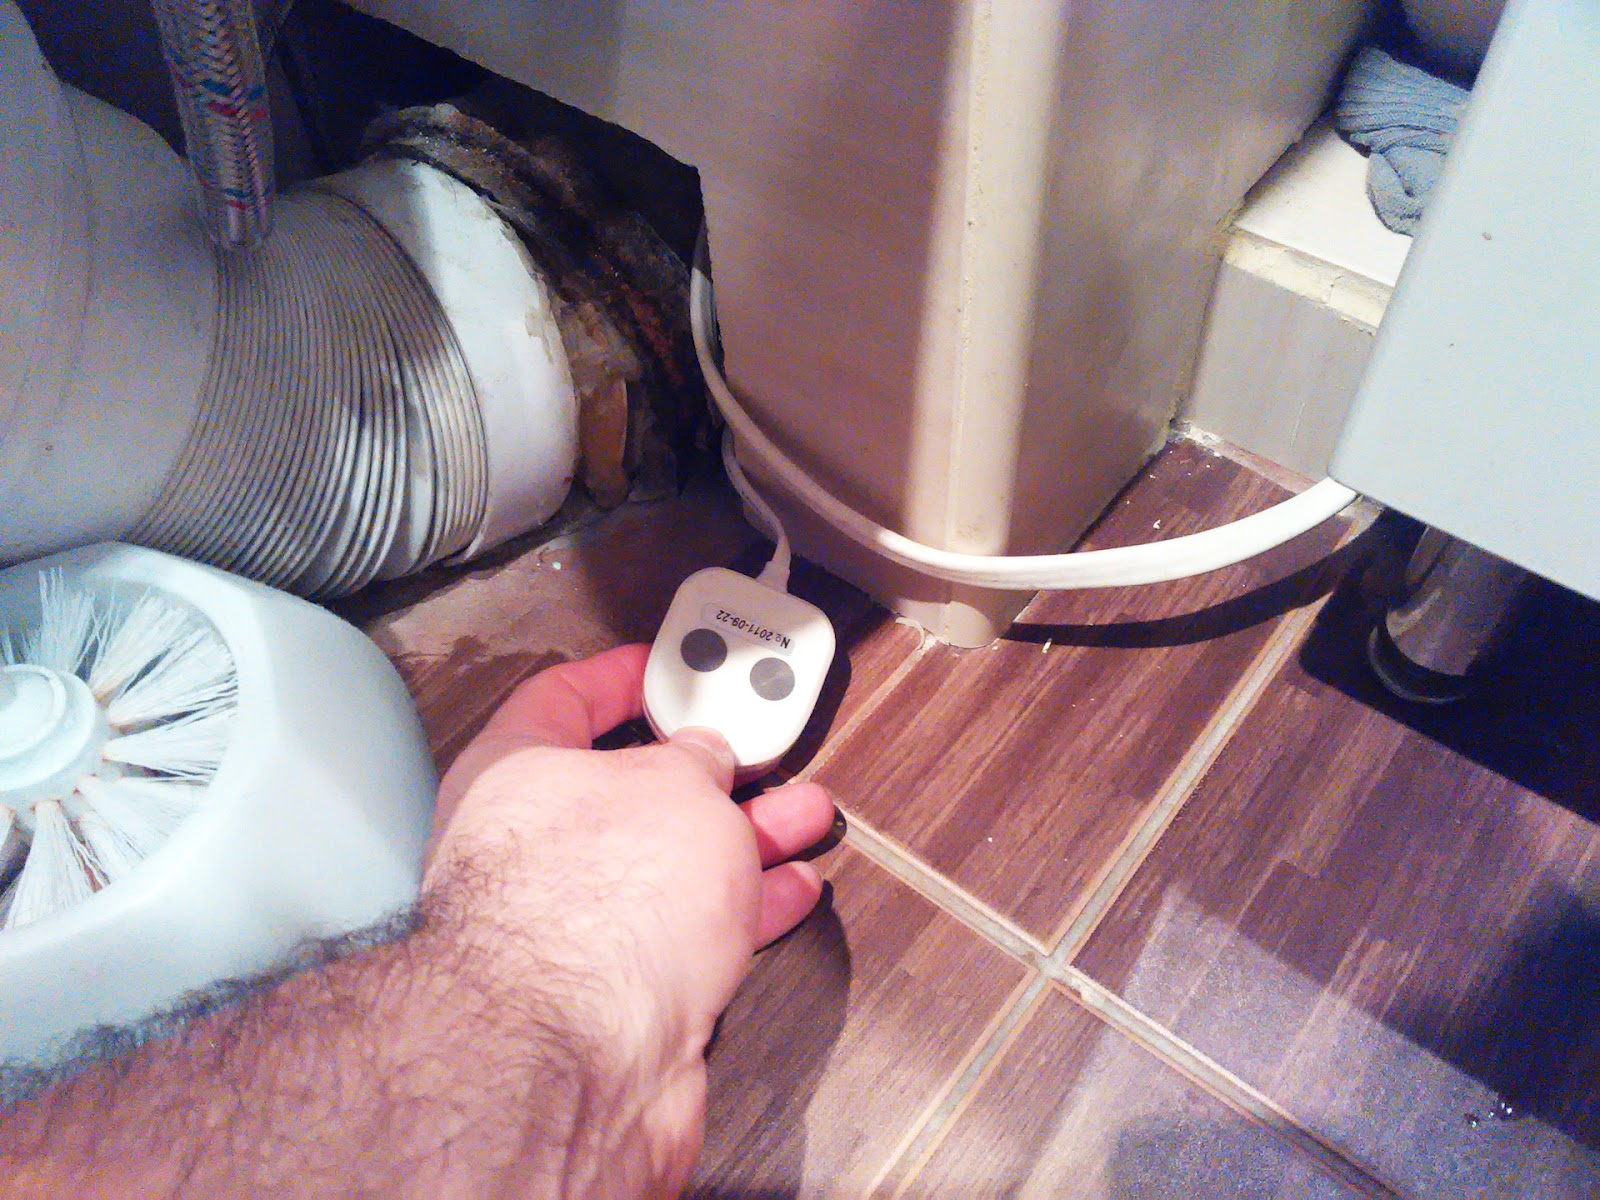
The leakage control sensors are installed on the floor at the lowest point. Usually behind the toilet, near the washing machine or in a common -house mine with pipes. As a rule, 3-4 is enough.
Sensors are wired and wireless. The wired are put on the floor, and the wires are pulled to the control module in a corrugated pipe. In this case, if the wire deteriorates in the corrugation, it will be possible to stretch out a new one.
Photo: The sensor is installed at the lowest point
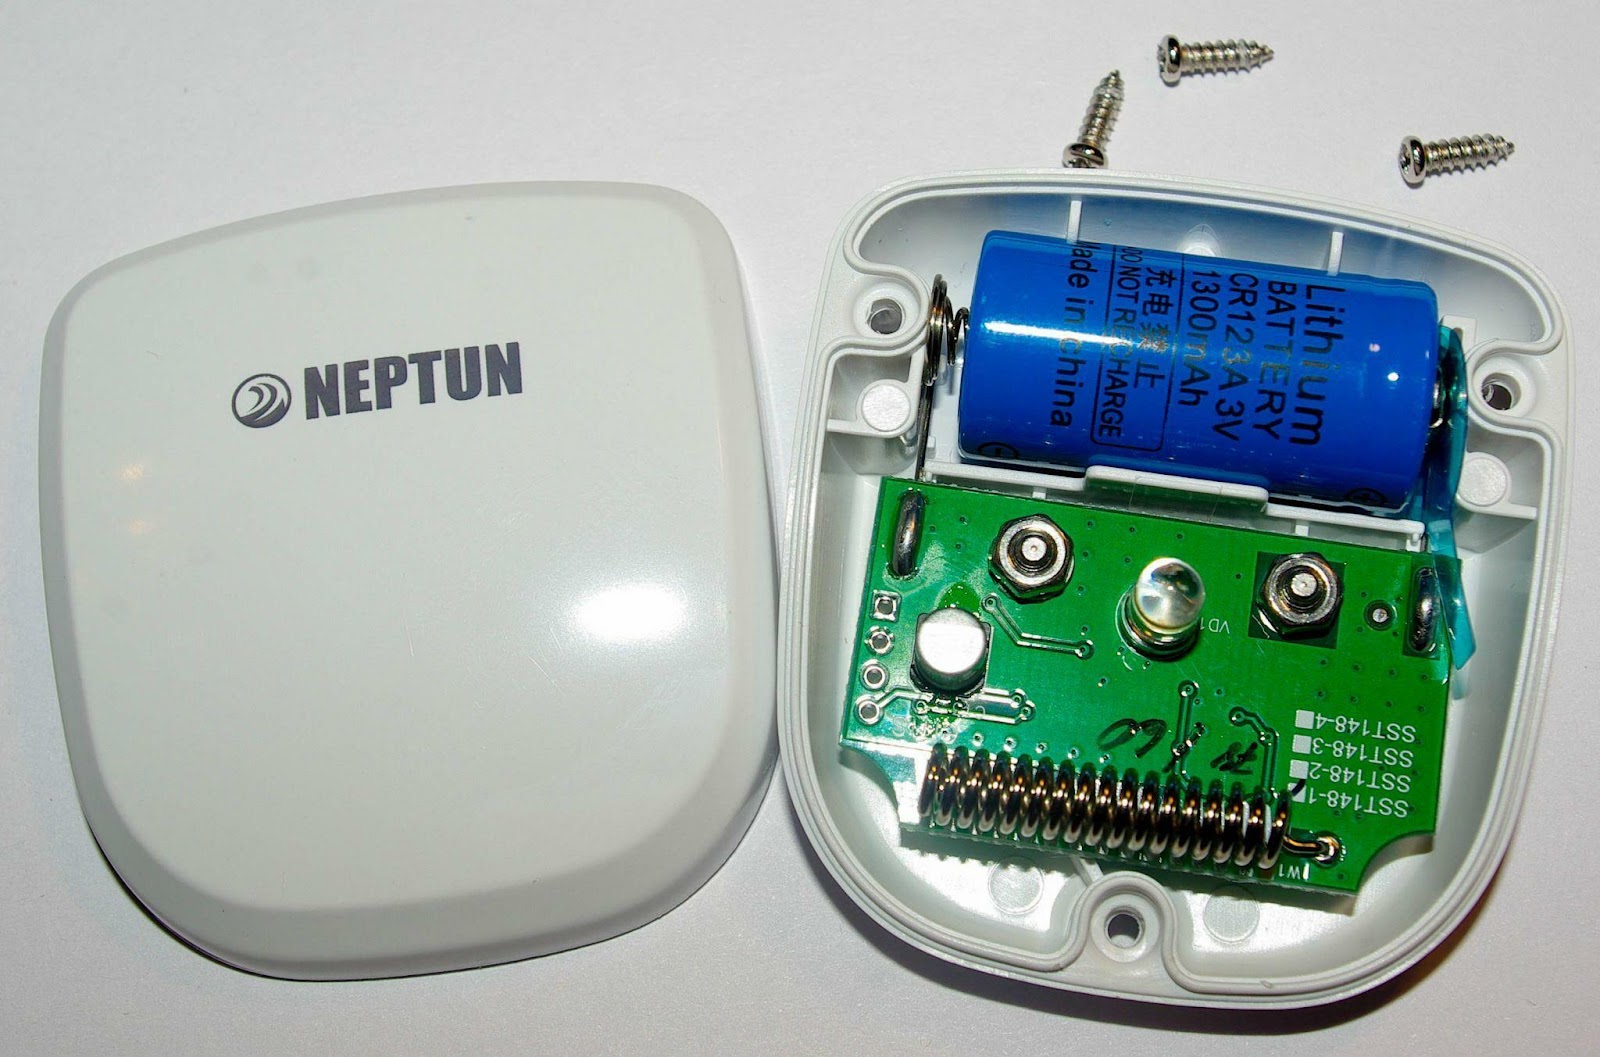
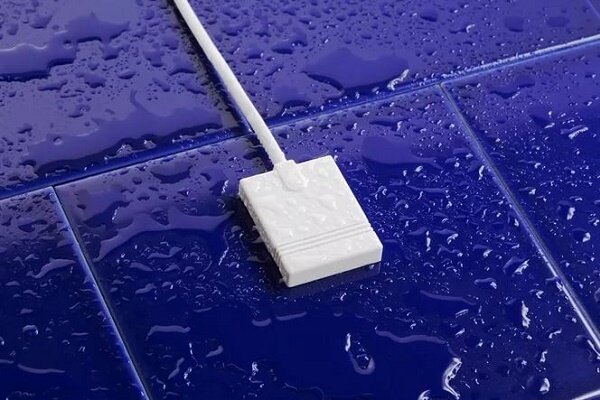
A new battery is placed in a wireless sensor and put on the floor. Such sensors can be cut into tiles. The main thing is that it is convenient to get them to replace the battery.
Photo: a wireless sensor with a battery inside
By the way: Any sensors cannot be glued to the floor, because they may not work in the event of a flood.
Connecting protection from the “Neptune” leakage
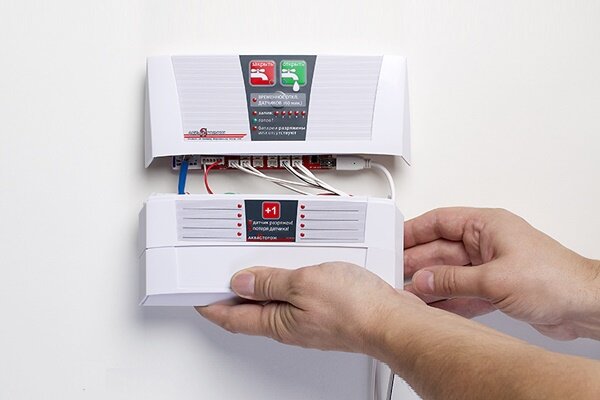
When the control module is installed and all the necessary wires were brought to it, you can start connecting and assembling the system.
To connect the wires, you must first unscrew the module lid.
Photo: To connect the wires, you need to disconnect the lid
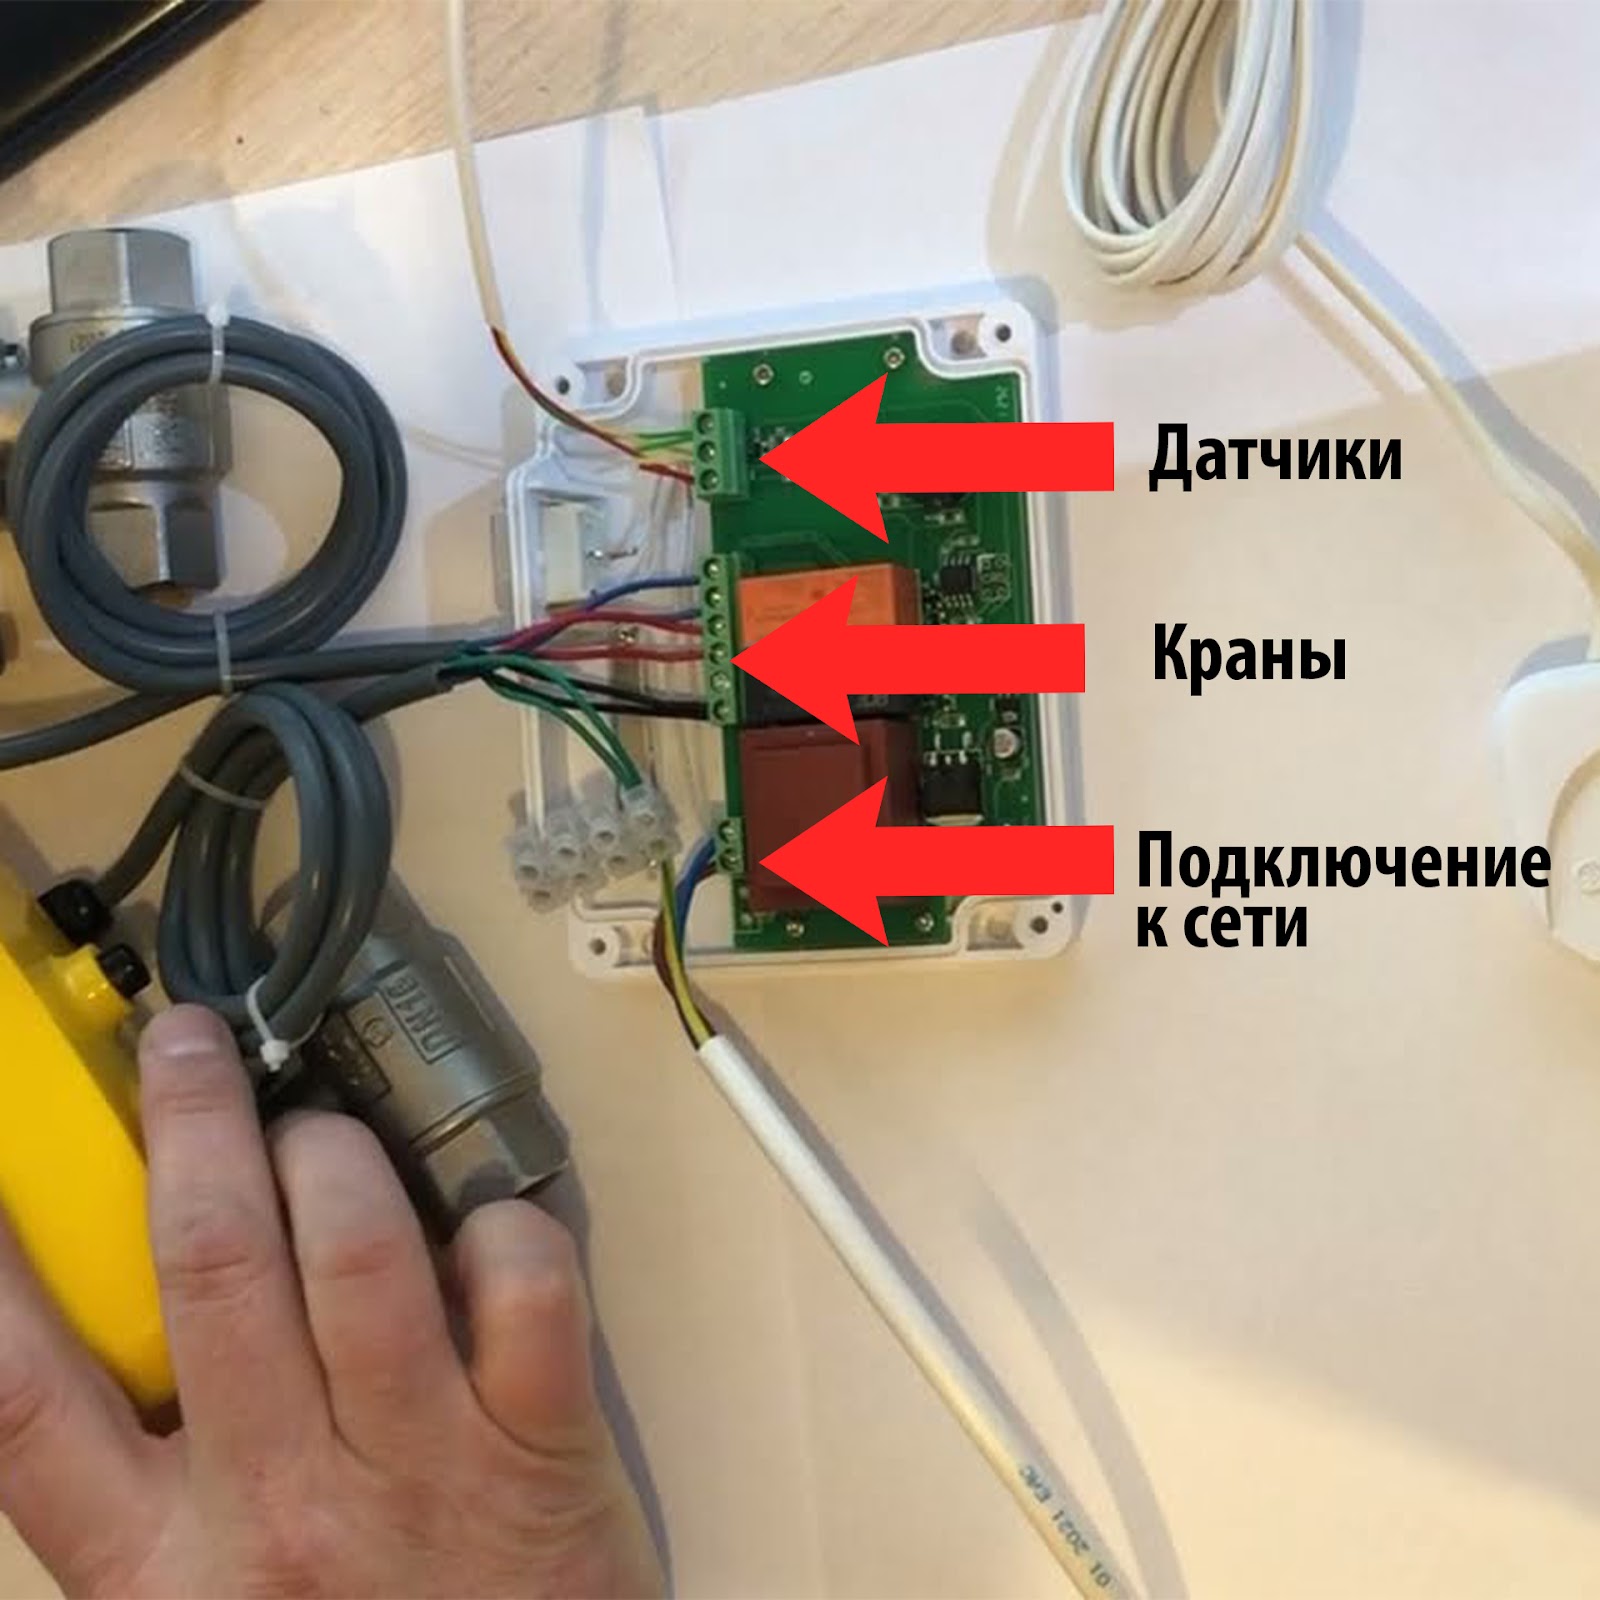
After this, the wires are connected according to the scheme:
Photo: Scheme for connecting a protection system from leaks

It looks like this:
Photo: Method of connecting to the control module
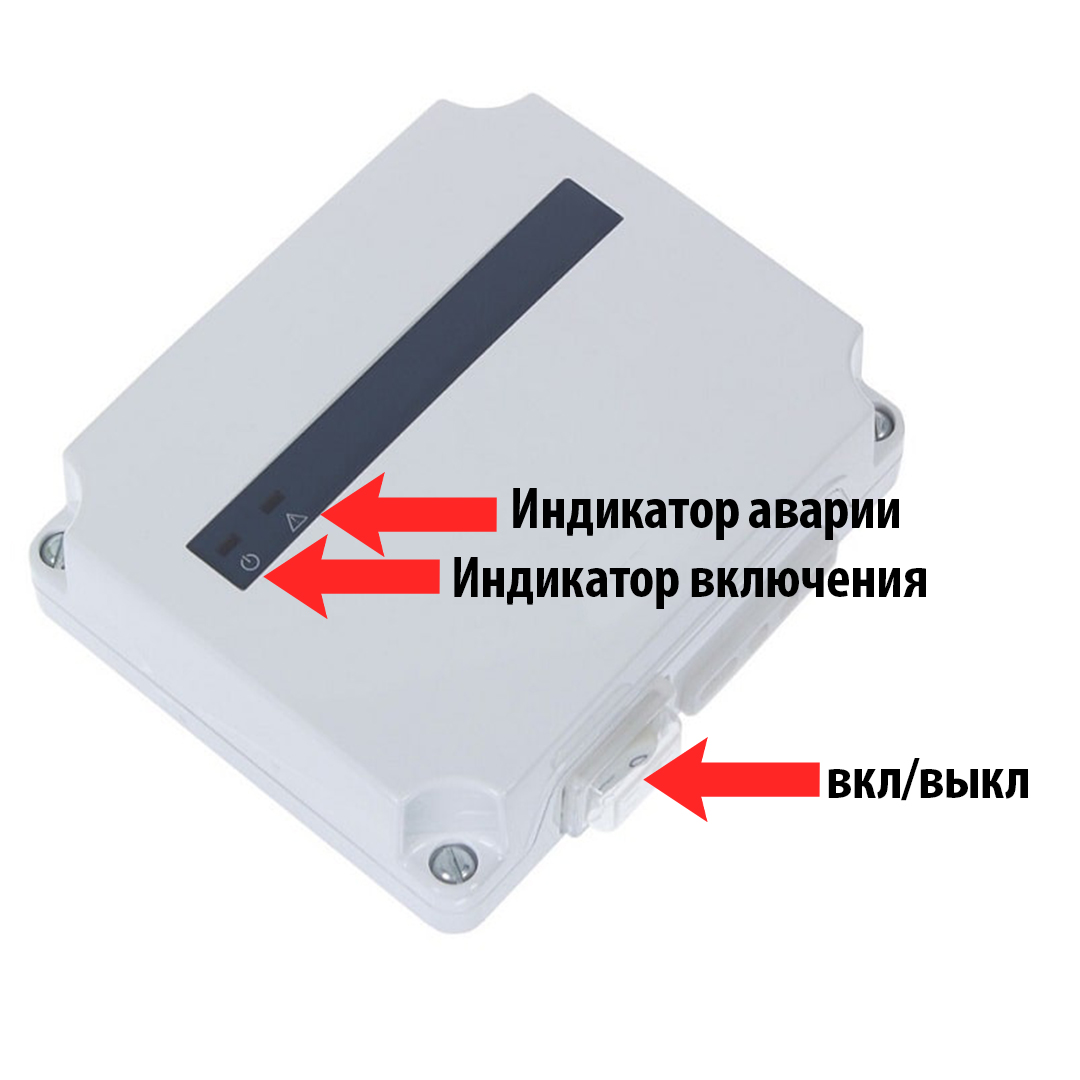
After the connection, the green network indicator should light up. Next, you need to check the system by wetting the sensor with water.
Photo: To check the system, you need to wet the sensor
If everything is regular, then the accident indicator will work: it will blink, and the module will make an alarming sound. This will lead to the fact that the taps will block the water supply.
Photo: indicators of control module
To open the crane, you need to dry the sensor with a hairdryer, and then turn off/turn on the module. The taps at this moment will open the supply of water, and the system will again be in standby mode.
Conclusion
- Protection from the “Neptune” leaks consists of a control module, cranes with a servo drive and leakage sensors.
- Sensors are installed on the floor in the bathroom at the lowest point.
- Cranes are placed on pipes with hot and cold water after the main valve. Cranes are also placed on a pipe with central heating.
- The module itself is placed in an engineering or electric shield, all wires are pulled to it under the finish.
- If the flood occurs, the sensor will pass the signal to the control module, and it will block the water supply using a crane with a servo.