Before starting installing the LED tape with your own hands, I propose to find out what it is and what is it used for? These tapes are used to light any rooms in a house or apartment, it is especially good to install them in niches and inaccessible places. LED strip is a strip of special material on which LEDs with a certain interval are placed. It has a number of distinctive qualities: a small energy consumption, a long service life, high fire safety, environmental friendliness, etc. LEDs come in various colors of glow – white, red, green, blue and multi -colored.
Its advantages include the ease of installation – I propose to make your apartment with your own hands in your apartment, and you will make sure that it is really simple. The only requirement is strict compliance with all installation and connection rules.
Step -by -step instructions for installing LED tape behind a decorative baseboard
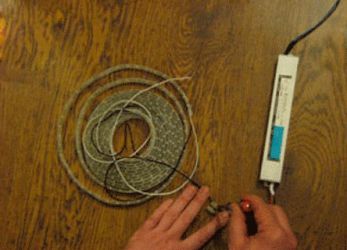
To begin with, you can make a LED tape with your own hands or purchase a ready -made one. The first option is better – you always in the case of a breakdown, repay it yourself.
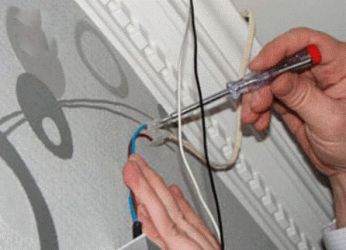
- We connect the tape to the controller using special wires soldered to it.
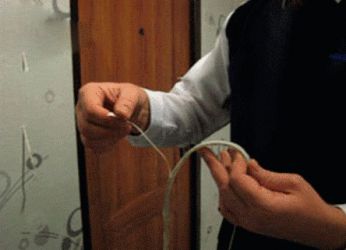
- For fastening the tape there is a sticky strip that is protected by a film – we remove it.
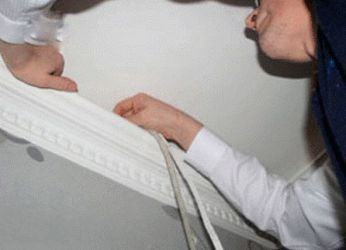
- The basis on which we will fasten the tape should be dry, clean, not to crumble – it will help it better to hold on. Gently stick the tape.
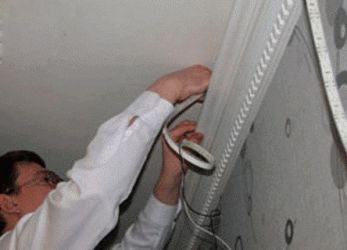
- We cover the controller with a ceiling skirting board.
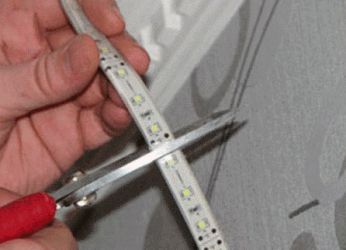
- If the tape is larger in length than you need, we cut off the excess in a specially marked place.
- The next step is to connect the power supply to 220 V using terminals. At the entrance of the power supply there are two L+ and N- connectors. We connect the phase to l+, and zero to n-. Then we connect the controller to the power supply – at the output of the power supply there are two plus and minus connectors, the same connectors are at the entrance to the controller. We connect all the pros, and then all the disadvantages. The most important thing is not to confuse anything with the entrances and exits on the controller and power supply. The entrance is indicated – “Input”, and the output is “output”.
- DIY LED backlighting is ready!
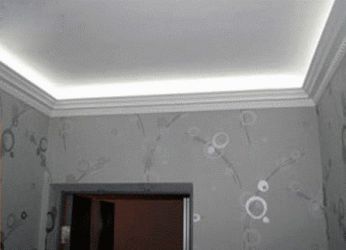
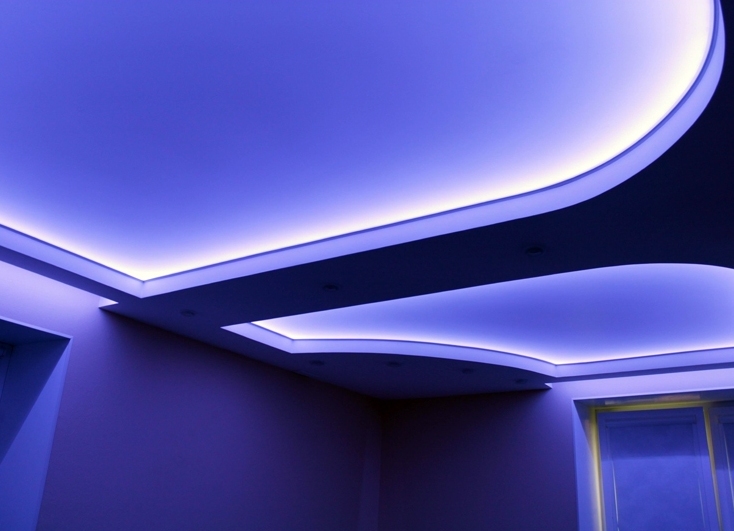
The resulting LED ceiling justifies itself – it adds the space of expressiveness, emphasizes the design of the room, it looks stylish and beautiful. LED backlight can be the main source of light, and also serve as an element of decor. In any case, the apartment will no longer look boring and monotonous.