The loggia and the balcony are the coldest rooms in the apartment. The cold gets there literally from all sides – from the floor, ceiling and walls. In order for the apartment to be comfortable in the winter, and it was not necessary to overpay for heating, the loggias and balconies are insulated. In this article, we will consider how to properly insulate the loggia and what materials to use for this.
Content:
- Is it possible to insulate the loggia?
- What is the best way to insulate the loggia?
- Materials for insulation of loggia
- Loggia insulation tools
- How to insulate the loggia by stages
- Window protection
- Preparation of the base
- Mounting foam
- Installation of the second row of thermal insulation
- Installation of GVL to the wall
- What to pay attention to when warming the loggia?
Is it possible to insulate the loggia?
The loggia can and should be insulated. This is an absolutely legal event. Moreover, if ordinary insulation is not enough, a warm floor can be made on the loggia. Another question: is it worth it to insulate the loggia and how profitable it is? The insulation of the loggia allows not only to protect the balcony from the cold, but also to protect the room from the scorching sun in the summer. Insulation costs usually do not exceed 50 thousand rubles, and the effect of this work remains for many years.
What is the best way to insulate the loggia?
The loggia can be insulated with foam, foam or mineral wool.
Photo: main insulation for loggia
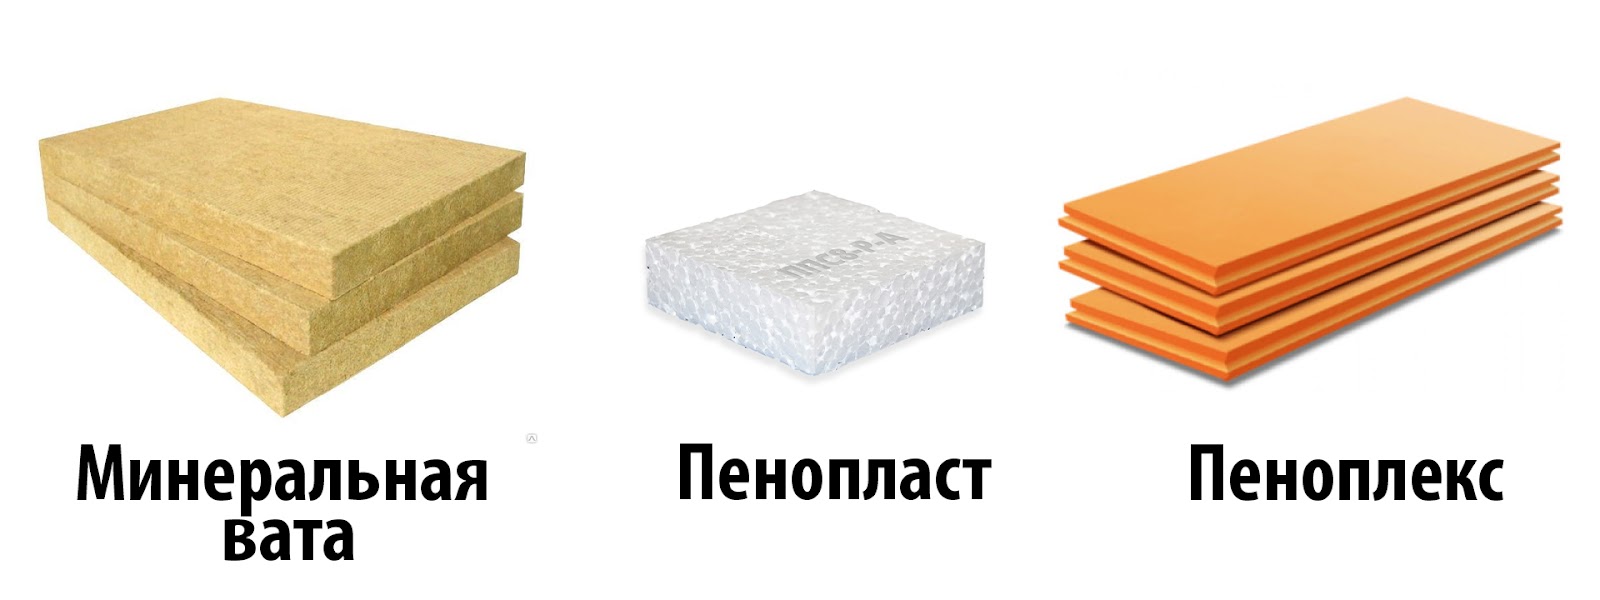
Foam is the cheapest insulation for loggia. It provides good thermal insulation, but crumbles during installation. In addition, this material burns well in a fire and emits harmful substances.
The foam has a denser structure. It does not crumble and differs in the convenience of installation as thermal insulation for walls, floor and ceiling. Penoplex sheets have special grooves. With their help, the insulation is assembled as a mosaic, so the seams are more protected from cold.
Mineral wool has not only thermal insulation properties, but also protects well from sounds from the street. This material also does not burn. Mineral wool can absorb moisture, and with it you need to work in personal protective equipment. This circumstance complicates the installation work.
Materials for insulation of loggia
To insulate the loggia, the following materials are needed:
- Foams with a thickness of 50 mm
- Glue “KNAUF SENENER” or MAPEI Mapetherm AR2
- Penoplex Fastfix or Tytan 60 seconds glue glue
- Painting tape for windows (Beorol for windows and doors)
- Film 100-150MKM
- Soil “Knauf Tifengrund” or any other deep penetration
- Tugs with plastic nails
- The mesh is plaster, facade
- GKLZ
- “KNAUF PERFLLIS” or glue-PEN “60 seconds”
Loggia insulation tools
- Grater for GKL
- Punch with boom 10mm
- Rowman 6mm
- Spatula 10mm
- Hammer
- Vacuum cleaner
- Magar knife 18mm
- Rule 1.5 and 2.5m
- Mixer with a nozzle
- Laser level
- Manual level 80cm
- Metal corner
How to insulate the loggia by stages
Consider the process of insulation of the loggia on the example of a foam. This material has good thermal insulation characteristics, and even a novice specialist is convenient to work with it.
Stage 1. Window protection
Windows on the loggia should be closed with a film. It is glued to the glass using painting tape. If thermal insulation has already been made in the apartment, then it is removed and all mounts are cut off.
Stage 2. Preparation of the base
The basis where the insulation will be mounted should be cleaned with a spatula of dried cement, glue and other garbage. If there are cracks in the wall or ceiling, from where cold air can enter the loggia, they need to be kneaded with cement. After the plaster dries, the surface is covered with a primer.
Stage 3. Foam Installation
For insulation of the loggia, a foam with a thickness of 50 mm is used. The foam is glued to the surface. In order for the glue to hold well, not on the sheets they make notches with a grater.
Next, the glue “Knauf Sevener” or Mapei Mapetherm AR2 is applied to the wall or floor.
Before applying, glue is diluted with water until a homogeneous consistency is obtained. Penoplex sheets are mounted on the base with glue. Their position must be checked at the bubble level.
So that the foamyplex does not depart in the process of drying, it is fixed with plastic dowels-gearboxes to the wall.
The thermal insulation sheets have special grooves, they connect a foam among themselves, like a mosaic. During installation, it is important to ensure that the grooves are clean and excess garbage does not get into them.
If you need to thermal insulation of the ceiling, then the foam is glued to the ceiling using glue-pen and fixed with fungi sheets.
Before this, you need to make a metal or wooden frame so that it can be fixed to it with GKL sheets.
Stage 4. Installation of the second row of thermal insulation
To improve thermal insulation on the walls, sometimes a second layer of thermal insulation is made. To do this, the foam heets are glued to the first layer with the run of the seams. This method allows you to block the seams so that the cold does not come from there. The second layer of the sheets of the foam is also advisable to fix with the help of fungi. All available seams in the corners are covered with sealant or foam.
Stage 5. Installation of GVL to the wall
After the insulation is installed, it can be closed with GKL sheets. Installation of sheets can be carried out in two ways.
1 method: on the foam, which is already fixed, they make notches with a grater. Next, the GCL is applied to the glue-foam “Titan 60” and the sheet is glued to the wall.
2 Method: Puppies are made on the foam, then the glue “Knauf Sevener” is applied to the surface with the insulation. After that, the facade mesh is shed into this glue and the surface is locked with a spatula so that the mesh is completely immersed in the glue. After the glue dries, you can mount GKL or put a putty. GCL is glued to the base using the Perflex glue.
What to pay attention to when warming the loggia?
- Deviations on the vertical plane should not exceed 2 mm to the entire height of the wall.
- The corners in the loggia after insulation should remain around 90 degrees.
- The corners, seams, adjacent walls to the floor and ceiling should be sealed and covered with foam or sealant.
Conclusion
The easiest way to insulate the loggia using a foam. This material is convenient to cut, and it does not crumble. For insulation of the loggia, a foamyplex is used with a thickness of 50 mm. The foam is glued to the base using special glue. It is applied by a comb. In order for the sheets of the foam to hold well on the basis, they make notches with a grater. Additionally, the foam is fixed with fungi. The second layer of insulation is glued to the first to block the seams and cold air did not fall from them.